
How to Create Assignments for a Course (with Rubric Criteria)
Creating an assignment is an opportunity for Instructors to evaluate the unique objectives for a course and course section. Instructors can create a wide range of assignments for students to complete and submit directly in AEFIS or outside of AEFIS.
Step-by-Step…
Step 1: Log into your AEFIS account
Step 2: Select the three white horizontal lines on the top left corner to open the AEFIS Main Menu
Step 3: Navigate to Courses > Courses
Step 4: Use the + Add filter option or the Search bar to locate a desired Course for which you will create an assignment.
Step 5: Select the Manage button to the right of the desired Course
Step 6: Select the Assignments tab from the panel on the left
Step 7: Select the blue EDIT button on the top right corner
Step 8: Select the + Create Assignment button on the top left corner
- Alternatively, you may select the +Add From Library button in order to select from a list of Assignment Templates that have already been added for your institution.

Step 9: A pop-up window will appear where you may fill out the following information:
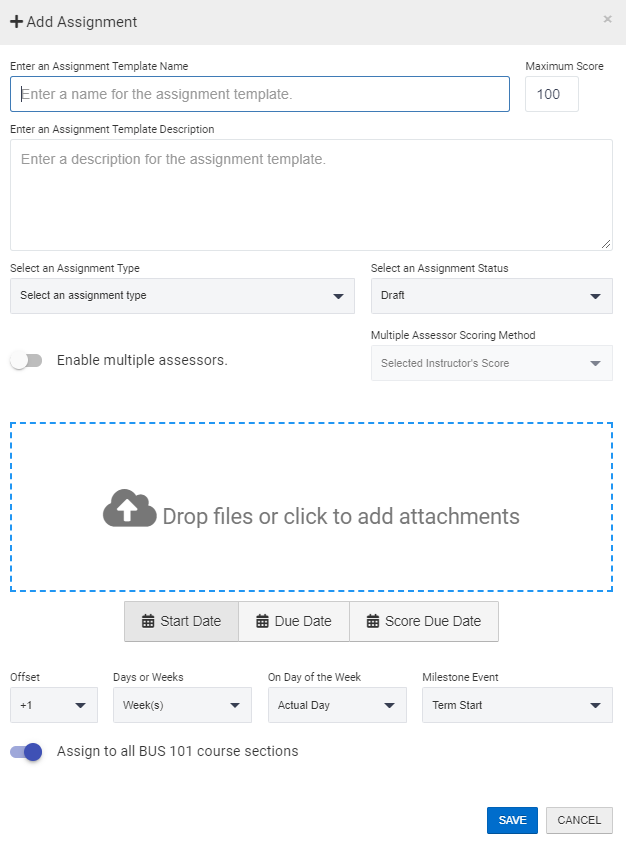
- Assignment Template Name: the name of the assignment
- Maximum Score: the highest score that students can achieve
- Assignment Template Description: the description of this specific assignment
- Assignment Type
- Student Submission in AEFIS
- This will allow the students enrolled in your course to submit files directly to AEFIS. They can submit Word, PDF, Excel, Audio and Video Files.
- No Submission in AEFIS
- This allows you as the instructor to manage the assignment in AEFIS and to input the assessment data through a CSV/Excel Template or through the AEFIS Gradebook. This option can also be used if you are viewing a student’s presentation or performance.
- Assignment not Managed in AEFIS
- This option means you will not have a Start Date, Due Date or Grading Due Date for the assignment and will only be importing the assessment data into AEFIS through the CSV/Excel Template.
- Student Submission in AEFIS
- Optional: Attach any relevant files or documents
- Files or documents can provide more information about the assignment or can include the assignment rubrics
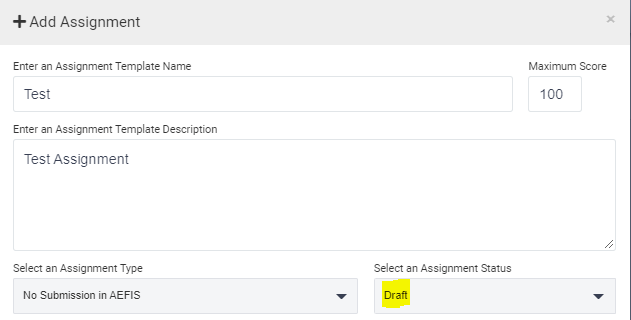
- Assignment Status
- You have the option to select from two statuses: Published or Draft
- Draft: Selecting Draft status is necessary if you would like to add Rubric Criteria to the assignment (more details to follow starting in Step 10).
- Published: If all assignment details are accurate and no Rubric Criteria is necessary, you may choose the Published status right away (prior to saving in Draft first).
- You have the option to select from two statuses: Published or Draft
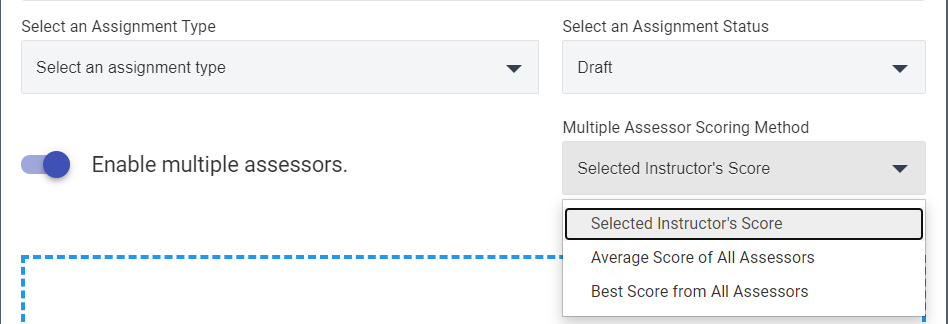
- Enable multiple assessors
- When toggling this setting on, you have the option to assign multiple assessors to this assignment. You may choose from 3 options to determine how the assignment will be scored:
- Why AEFIS Uses Milestone Events for Assignment Dates
- Since courses are not associated with a date or Term in AEFIS, you will need to use Milestone Events in order to set your assignment Start Date, Due Date and Score Due Date. When setting these dates, we suggest referencing your Term Timeline dates for the applicable term.
- Setting your Assignment Dates
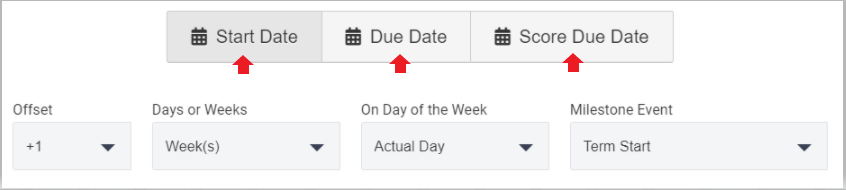
- You are able to select the assignment Start Date, Due Date and Score Due Date through setting offset dates based on Milestone Events.
- We suggest picking your Milestone Event first and then proceed with setting the Offset, Days or Weeks and Day of the Week.
- You are able to select the assignment Start Date, Due Date and Score Due Date through setting offset dates based on Milestone Events.
- Please note: the Start Date, Due Date and Score Due Date in this section are all buttons you can select, in order to set each corresponding date.
- Start Date: the day that assignments are available to students.
- Due Date: the date when students submits their assignment.
- If you select “No Submission in AEFIS” for the Assignment Type, we suggest setting the Due Date to be the day after the assignment Start Date. This will allow you to begin scoring sooner!
- Score Due Date: the day you are no longer able to enter data/scores for the assignment.
- Assign to all Course Sections
- When creating a Course level assignment, you have the option to toggle on a setting to assign this newly created assignment to all related course sections for that term. Course sections can be in either Faculty Pending or Published status.

Step 10: After adding all of the applicable assignment details and adjusting the assignment Status of Draft, select the blue SAVE button
Step 11: Once the Assignment has been saved in Draft status, hover over the blue icon with the 3 vertical dots to view more editing options:
Important Reminder: You can only add Rubric Criteria to assignments in Draft status.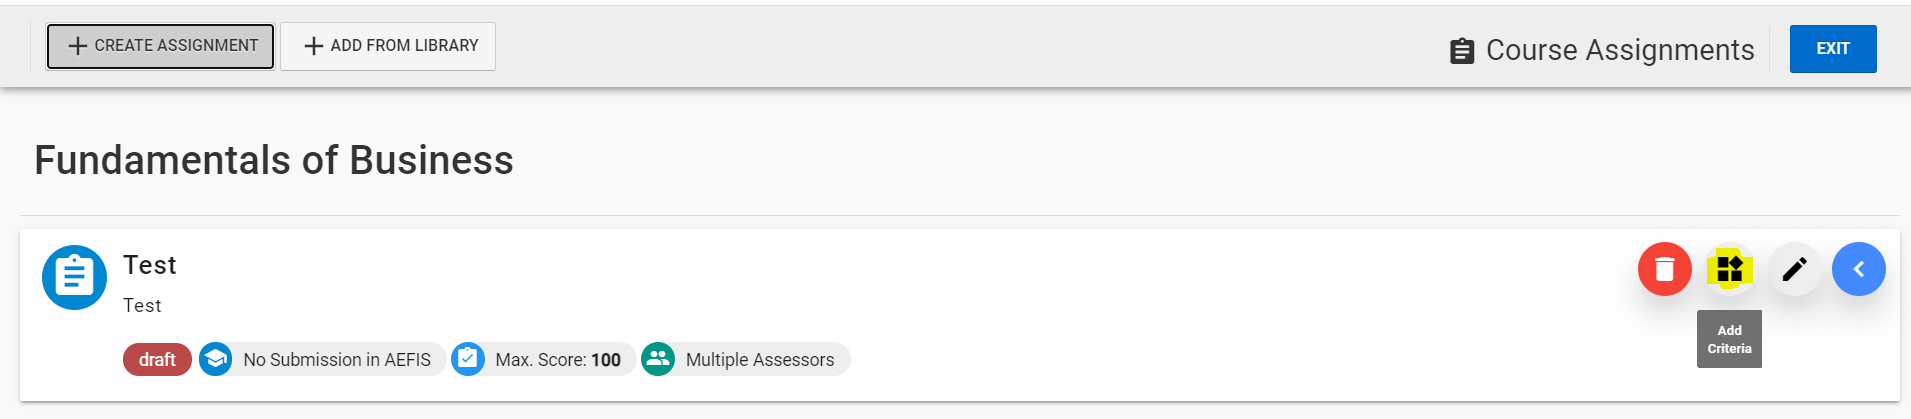
Step 12: Select the Add Criteria button
Step 13: A pop-up window will display to +Add Rubric Criteria
- You will have the option to populate a completely new Rubric Criteria or choose from the Rubric Library (select the + Add From Library button and type in a key word in the Search bar).
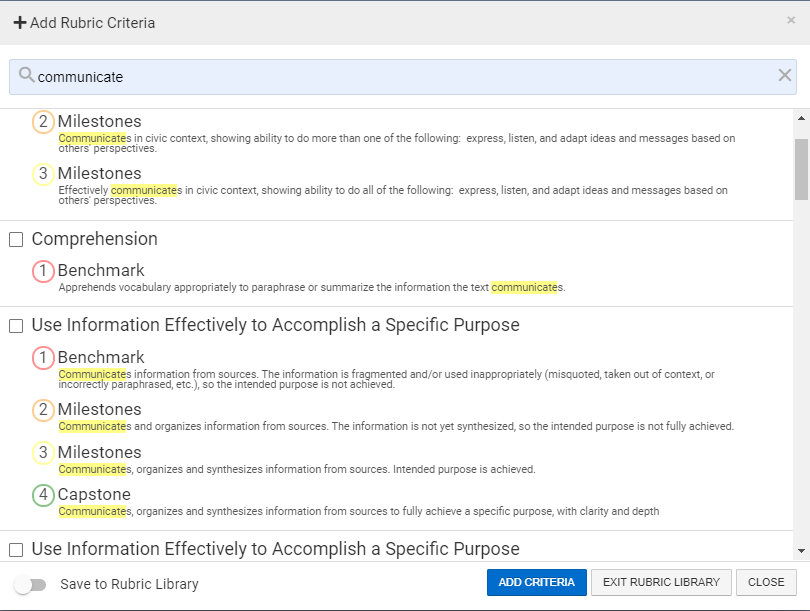
- If you are creating a new Rubric Criteria, you will have the option to save this new criteria to the Rubric Library through toggling on the setting at the bottom of the window. This will allow you to locate this Rubric Criteria from the Rubric Library for future use.

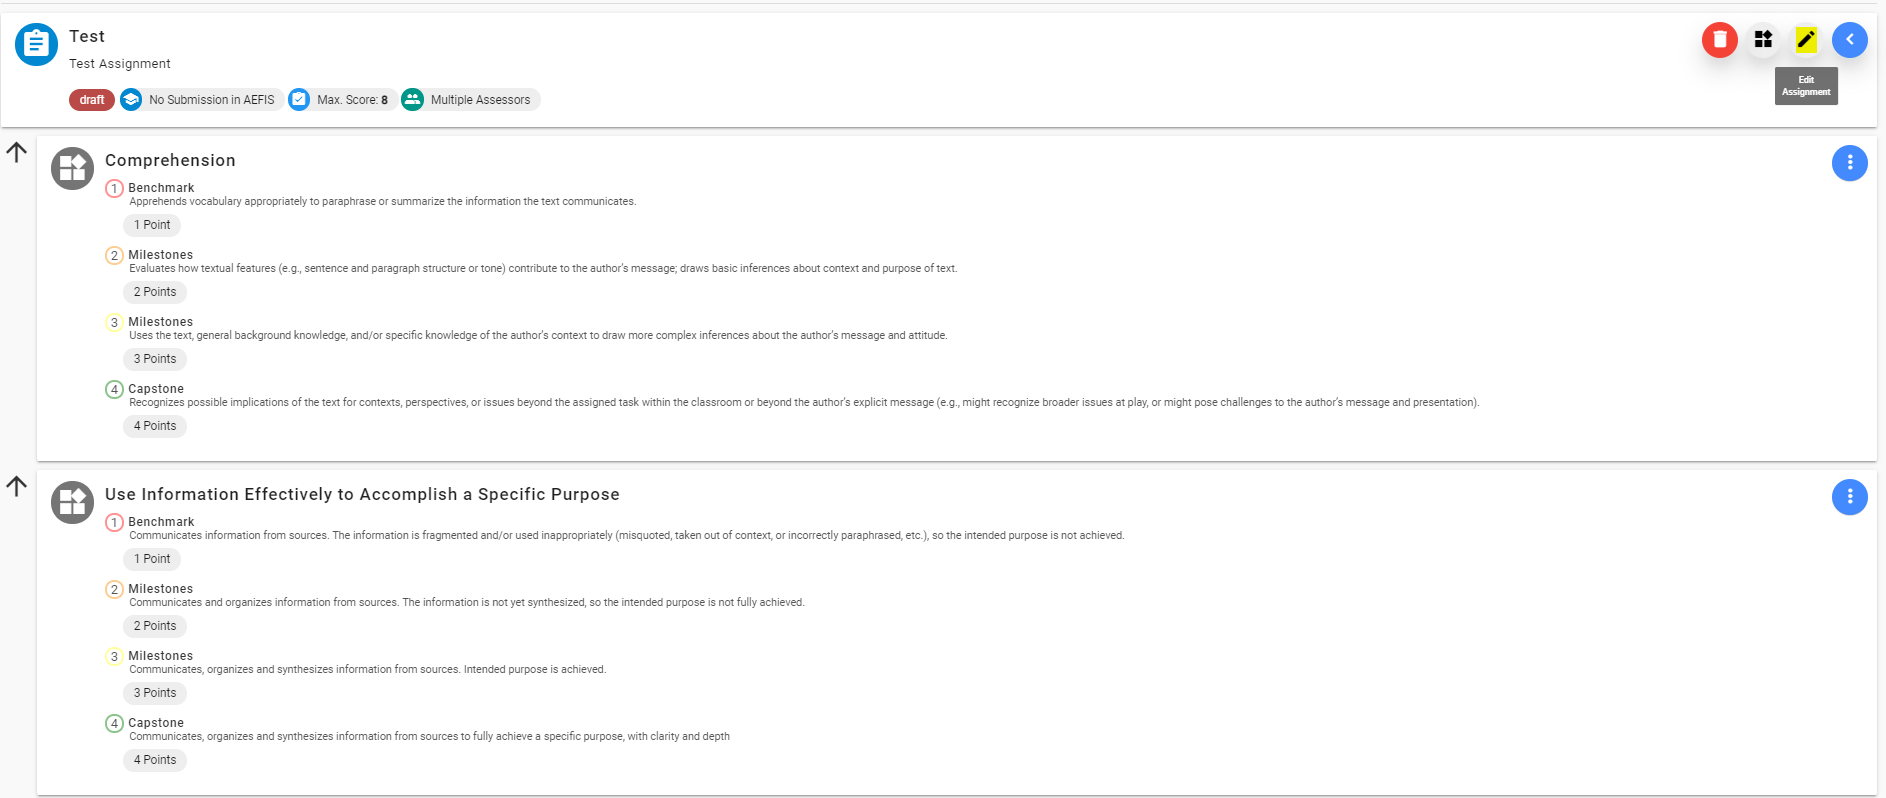
Step 14: After the applicable Rubric Criteria has been added, select the blue SAVE button
Step 15: Select the blue icon with 3 vertical dots to display more editing options. Then, select the pencil icon:
Step 16: Adjust the Assignment Status from Draft to Published status
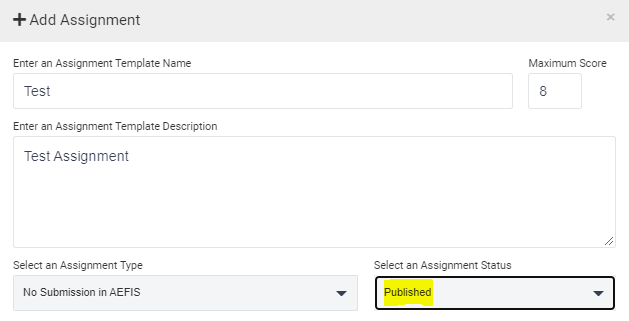
Step 17: Select the blue SAVE button
Step 18: Your assignment will now be in Published status.
- If you selected the option to push this assignment to all related course sections, you will be able to see this newly added assignment in the Assignments tab of the course section(s).
- You will see the assignment listed with dashed lines around it:
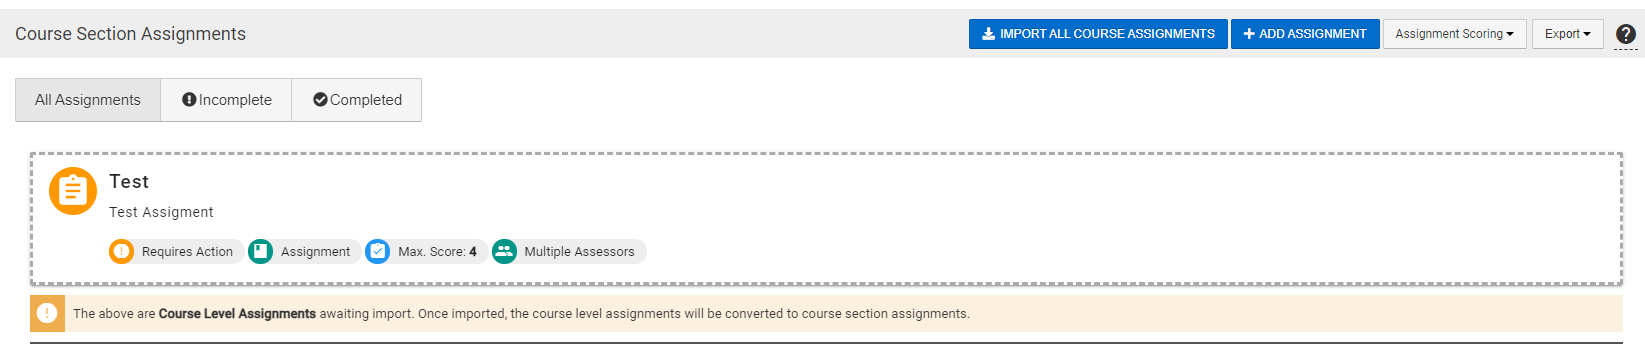
- Prior to importing the course level assignment into your course section (through selecting the blue Import all Course Assignments button), make sure you create any necessary Assignment Linkings at the course level first.
- Following this order will allow the Assignment Linkings from the course level to be pushed into the course section level.
- Once you have created any applicable course level Assignment Linkings, you may then select the Import all Course Assignments button in the course section Assignments page
- The Rubric Criteria that was added at the course level will also be displayed at the course section level for the specific assignment.
Helpful Tips
If the status of the course section is either “Published” or “Faculty Pending,” you are able to create assignments for this course section.
