
How to Manage A Self Study
Description: Once your Self Study is schedule, you may use this guide to learn about the roles and management of the Self Study process.
Self-Study Role Definition + Permissions
- Self-Study Chair
- Owner of the Self Study
- Role has access to all Settings, Details, and Content Sections of the Self Study
- Role can assign and un-assign other Self Study roles, like Self Study Editor and Self Study Approver
- Role will finalize all content and rubric scores for the entire Self Study Template
- Self-Study Liaison
- Role serves as the second-in command of the Self Study
- Role has access to all Settings, Details, and Content Sections of the Self
- Role can assign and un-assign other Self Study roles, like Self Study Editor and Self Study Approver
- Role will evaluate and review the content of each section and adjust the initial rubric score if necessary
- Self-Study Editor
- Assigned to a section or sections to add Self Study content
- Role sets the initial rubric score for their assigned sections
- Role does not have access to sections outside of the ones that they are assigned
- Self-Study Approver
- Role approves or disapproves sections and provides feedback back to the Editor
Part One: Accessing your Self Study
Applicable to: Institution Admin, Self Study Chair
1. Click on the AEFIS Main Menu
2. Navigate to the Self Study menu category and select Self Study ![]()
3. Click Manage next to the Self Study you would like to Manage and you will be redirected to the Self Study homepage
Part Two: Self Study Details
Applicable to: Institution Admin, Self Study Chair
1. Under the Self Study Details page, you may change the title of your Self Study while it is in DRAFT status. The other Details can not be changed once the Self Study is scheduled.
2. Adding Self Study Coordinators (Self Study Chair(s)/Liaisons
- Next to the Self Study Coordinators section name, you will see a blue circle with a plus

- Click the blue circle with the plus
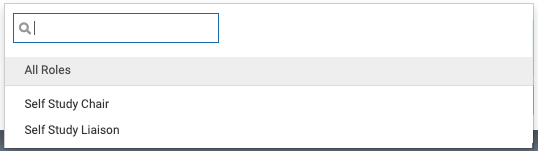
- Use the pop up to search for a user by last name or email:
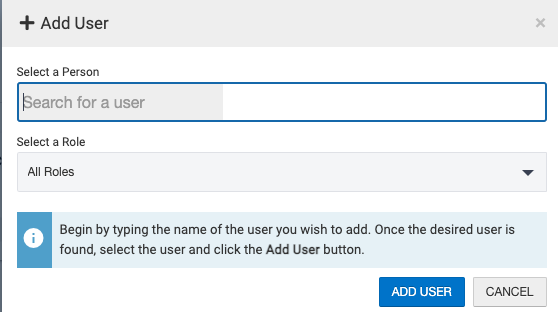
- Then select the role you would like to assign:
- Then click the blue Add User button
- If you want to remove a user added on this screen, just click the grey trash can next to their name

Part Three: Self Study Settings
Applicable to: Institution Admin, Self Study Chair, Self Study Liaison
1. Select the Settings tab in the panel on the left, fill out the Self Study Section Rubric Settings
Important Note: Self Study Section Rubrics cannot be edited after the Self Study is published/started. Therefore, please make sure the rubrics are accurate while your Self Study is still in Draft status.
- Use the Rubric Level Slider to increase or decrease the number of rubric levels
- Edit the following Rubric Level Names
- Change the color for each Rubric Level
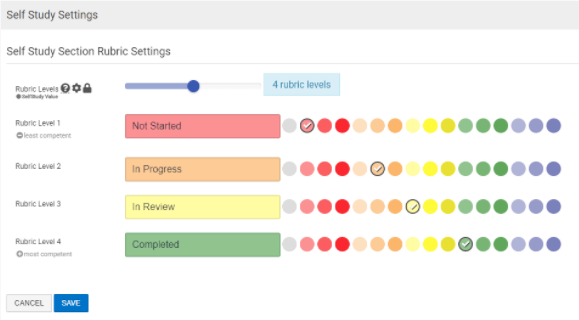
2. Select the blue Save button
3. Set Notification Variables
- The Self-Study Section Notifications refer to the notifications that will be sent out based on the progression of each section through the workflow.
- The Self-Study Notifications refer to notifications to be sent out based on the status of the self study
Please Note: you are able to click on the following buttons below (with a checkmark), in order to set the corresponding notifications.

4. For each Notification, you are able to:
- Edit the Notification Content by selecting on the blue icon with the white pencil

- Disable the Notification from being sent by toggling the following setting

- Set the Task Deadline
- Set the Deadline Reminder Frequency (how often notifications will be sent out)
- Edit the Deadline Reminder Content by selecting on the blue icon with the white pencil
Part Four: Self Study Section Management
1. Select the Sections tab in the panel on the left
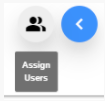
2. You have the option to add a Self Study Editor/Approver to each section.
- Hover over the blue Action Button to the right of any section and select the Assign Users icon
- A new pop-up window will appear, select the the blue icon with the white plus sign.
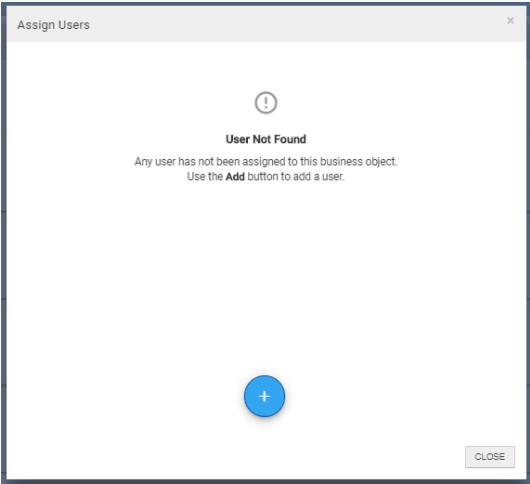
- Type in the name of the user you wish to add
- Select the desired role (Self Study Editor or Self Study Approver)
- Select the blue ADD USER button
Please Note: You are also able to assign users to a section after the Self Study has started.
Part Five: Related Documentation
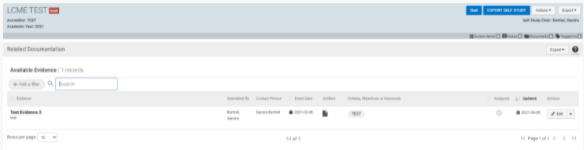
You may review the Related Documentation tab from the panel on the left, to see all currently available Evidence for the Self Study (if any).
- You will see any Evidence that was tagged with specific criteria or objectives that match the Self Study Accreditor, College or Department.
- If Evidence is added after the Self Study is In Progress, the Evidence will still populate the Related Documentation section of the Self Study (based on the tagged criteria/objectives).
For more information about adding evidence, please see our Evidence Bank Guide.
Part Six: Starting your Self Study and Adding Content to Sections
1. After all settings, rubrics, and roles have been established, select the blue Start button in the top right corner. The Self Study will shift from Draft to In Progress.
2. Once the Self Study is In Progress, the Self Study Chair is now able to add any preliminary content into the Self Study sections. Select the Edit Content icon in the corresponding row of the section. 
3. The content section of the Self Study has a number of effective and Google-Doc like features:
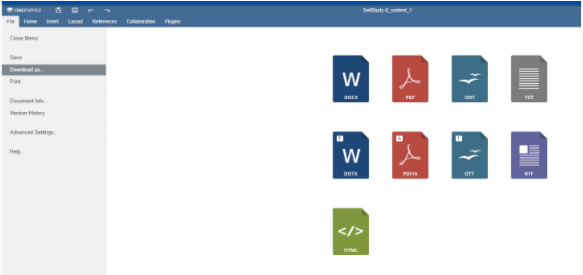
- Export individual content sections
- In the far left panel, Select the File icon. You are able to export the content sections in the following formats: PDF, TXT, DOCX, ODT, and HTML
- In the far left panel, Select the File icon. You are able to export the content sections in the following formats: PDF, TXT, DOCX, ODT, and HTML
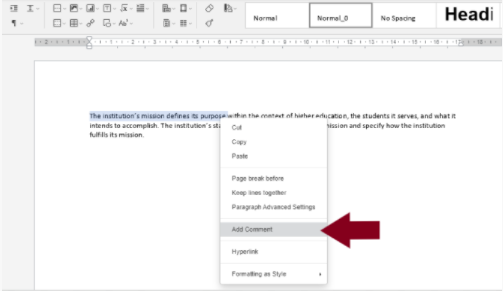
- Add Comments to Document
- In the far left panel, select the Message icon
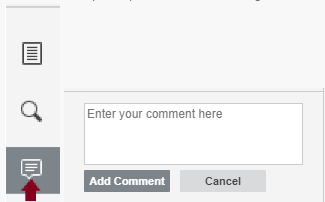
- Highlight over a word or a phrase in the content section to add direct feedback or comments
- In the far left panel, select the Message icon
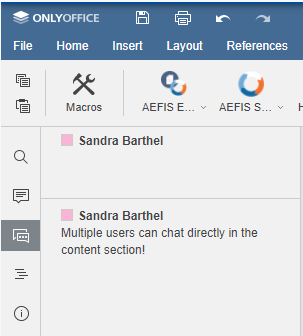
- Chat Feature
- If editing or approving the Self Study section is a collaborative effort, then multiple users can chat directly in the content section
- If editing or approving the Self Study section is a collaborative effort, then multiple users can chat directly in the content section
- Plugin Options
- Use this toolbox to add AEFIS data directly into your content section/document. The data will appear in your completed Self Study document.
- Use this toolbox to add AEFIS data directly into your content section/document. The data will appear in your completed Self Study document.
- Adding Evidence to a Self Study Section:
- Navigate into a Self Study section through selecting the Edit Content (pencil) icon to the right of any section
- Highlight the applicable word(s) that should be hyperlinked with the Evidence (ex. below)
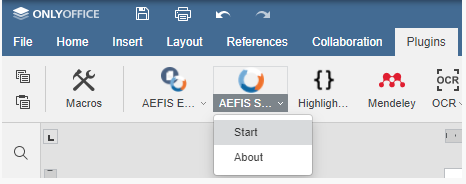
- Select the Plugins button in the menu and choose AEFIS Smart Content > Start
- Once you have selected the Smart Content, a pop-up window will appear and following instructions:
- Smart Content
- Select Insert Evidence
- Select Next
- You will see the available Evidence for this Self Study (based on the criteria and tags associated with the Evidence in the Evidence Bank). Select the applicable Evidence to insert.
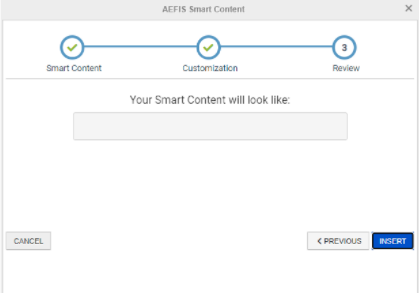
- Select Next
- Select the blue Insert button (Smart Content preview is currently in development)
- The hyperlinked Evidence will now look like this in the editor:

- However, after changes are saved, you may Exit out of the section editor view and select the blue Document Preview button in order to see the hyperlinked text:

- NOTE: If you have not yet added evidence to the Evidence bank the smart content feature will not be available to you
- Smart Content
Part Seven: Self Study Workflow
- Self-Study is Started (In Progress) and Self Study Section Editors & Approvers are Assigned by the Self Study Chair(s).
- Self Study Section Editors submit each section for approval by Self Study Section Approvers.
- Self Study Section Approvers review and approve/reject their sections. If rejected, the section goes back to the Self-Study Editor.
- Once all Self Study Sections are approved, the status of the entire self study changes to “In Review.”
- Self-Study Liaison(s) begin their review of all the sections of the Self-Study.
- Once Approved by the Self Study Liaison, the Self Study Chair takes over and begins their review process.
- The entire Self Study can then be approved or rejected. If rejected, it is sent back to the Self Study Liaison.
- If approved, the Self-Study moves to “Final Review” Status.
- Self Study Chair is in charge of the “Final Review,” and once approved, the Self Study Chair will “Publish” the Self Study.
Helpful Tips:
As always, the AEFIS team will initially upload the self study template on the partner’s behalf.
To edit any self study settings and details, the self study has to be in Draft
If the information of the Self Study Chair is not already in AEFIS, please see the AEFIS Academy Guide on How to Add User Accounts and Edit User Roles into AEFIS.
After roles have been added to each section, start the self study. From here, the assigned roles will be immediately notified, and they will able to add the required information into their own individual section(s)
If an Approver is not assigned to a section, the approval process will automatically move that section to the next stage in the self study work-flow.
Please make sure that all rubrics, settings, details, and roles are finalized before starting the self study. Once the self study is in progress and in any case that user would like to revert the status – please notify the AEFIS Client Support Team.


How to Manage A Self Study Discussion