
How to Schedule a Survey: Comprehensive Guide
Each Survey created in AEFIS requires a Survey Schedule. Creating a Survey Schedule links the Survey to its assigned course sections. This guide will assist you in exploring the Survey Schedule features within AEFIS.
Applicable To: Institutional Admin, College Admin, Department Admin
1. Creating Your Survey Schedule
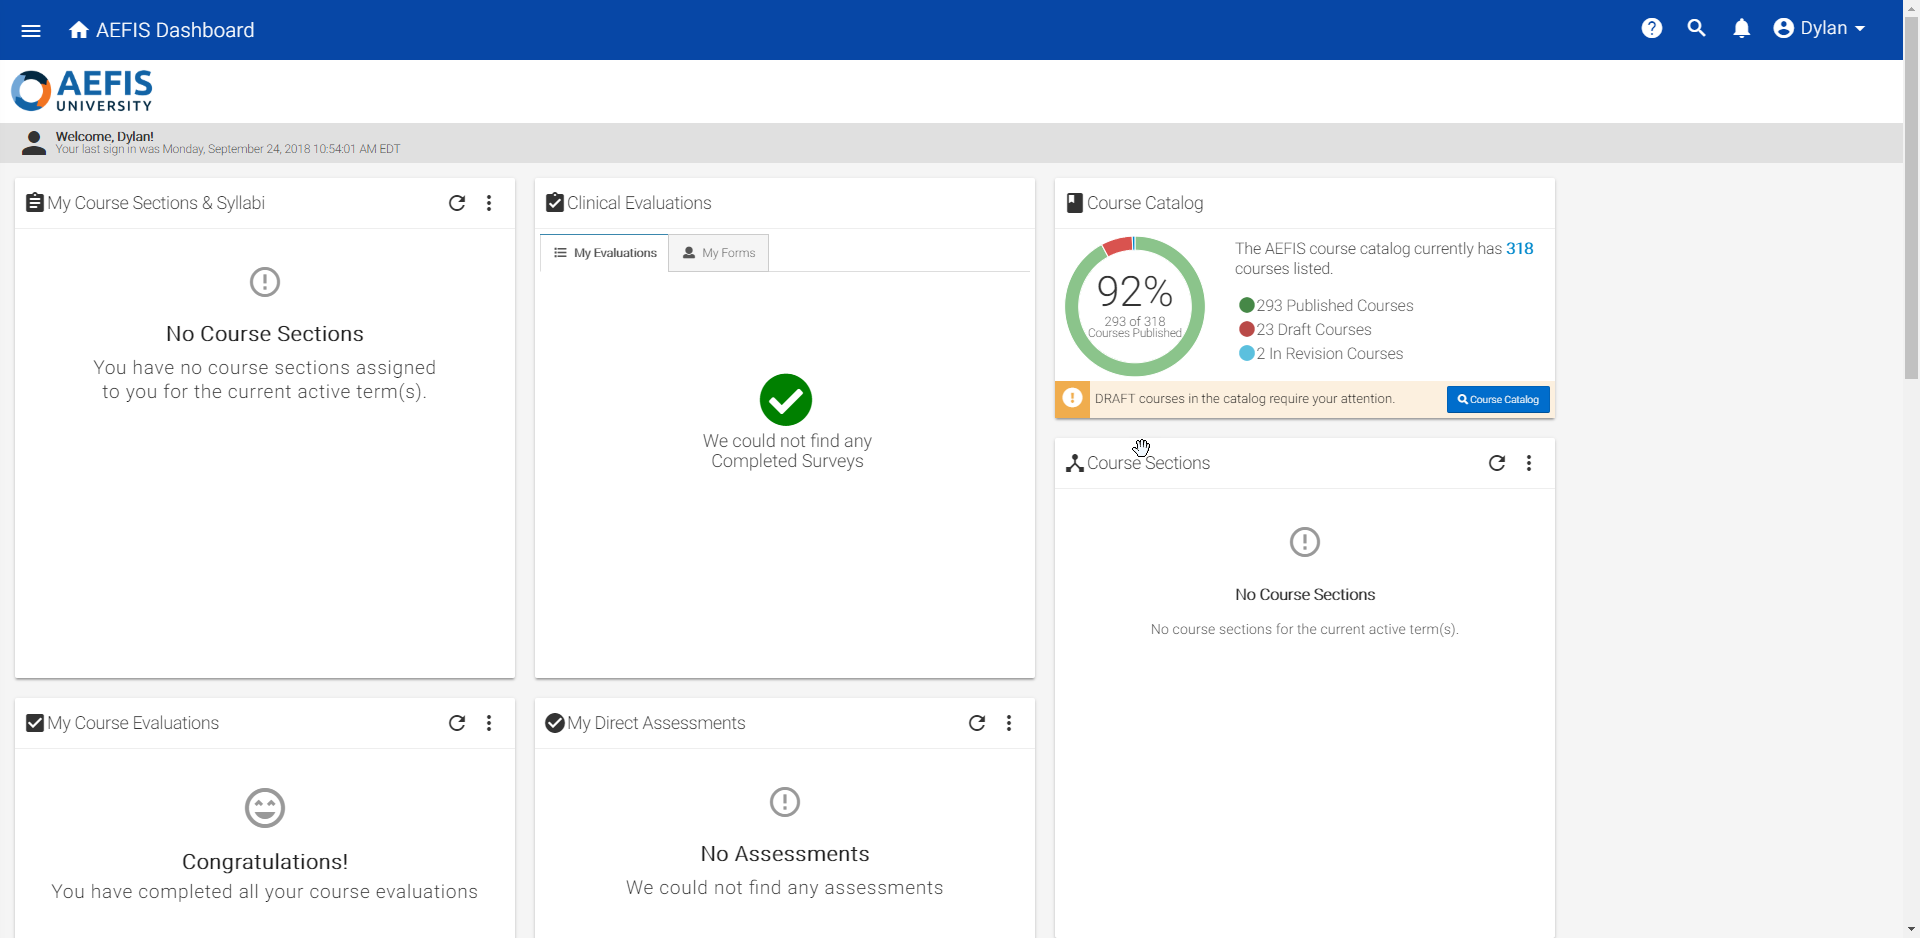
Once you have logged into your AEFIS account, you should see the following screen:
Select the hamburger icon in the top left corner of your screen. From here, scroll down to Surveys and select the “Survey Schedule” section.
A new panel should appear displaying any available Survey Schedules:
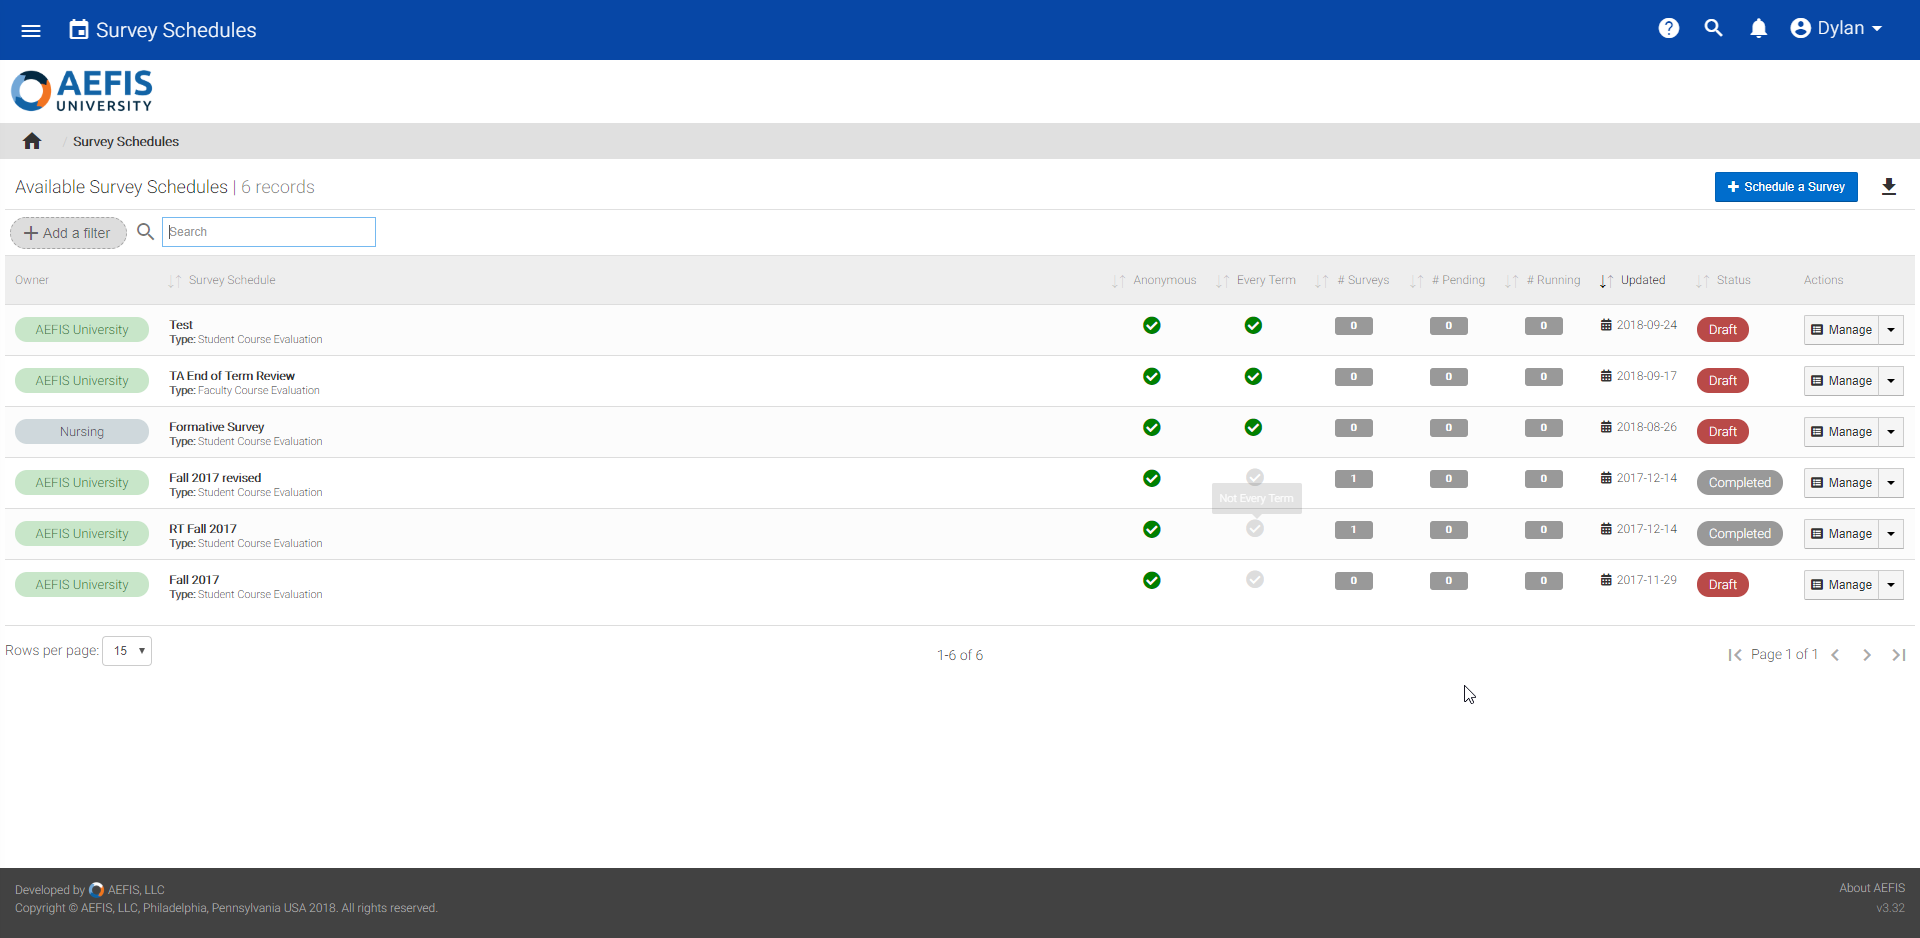
To schedule a new Survey, locate the blue +Schedule a Survey button in the top right corner of this panel.
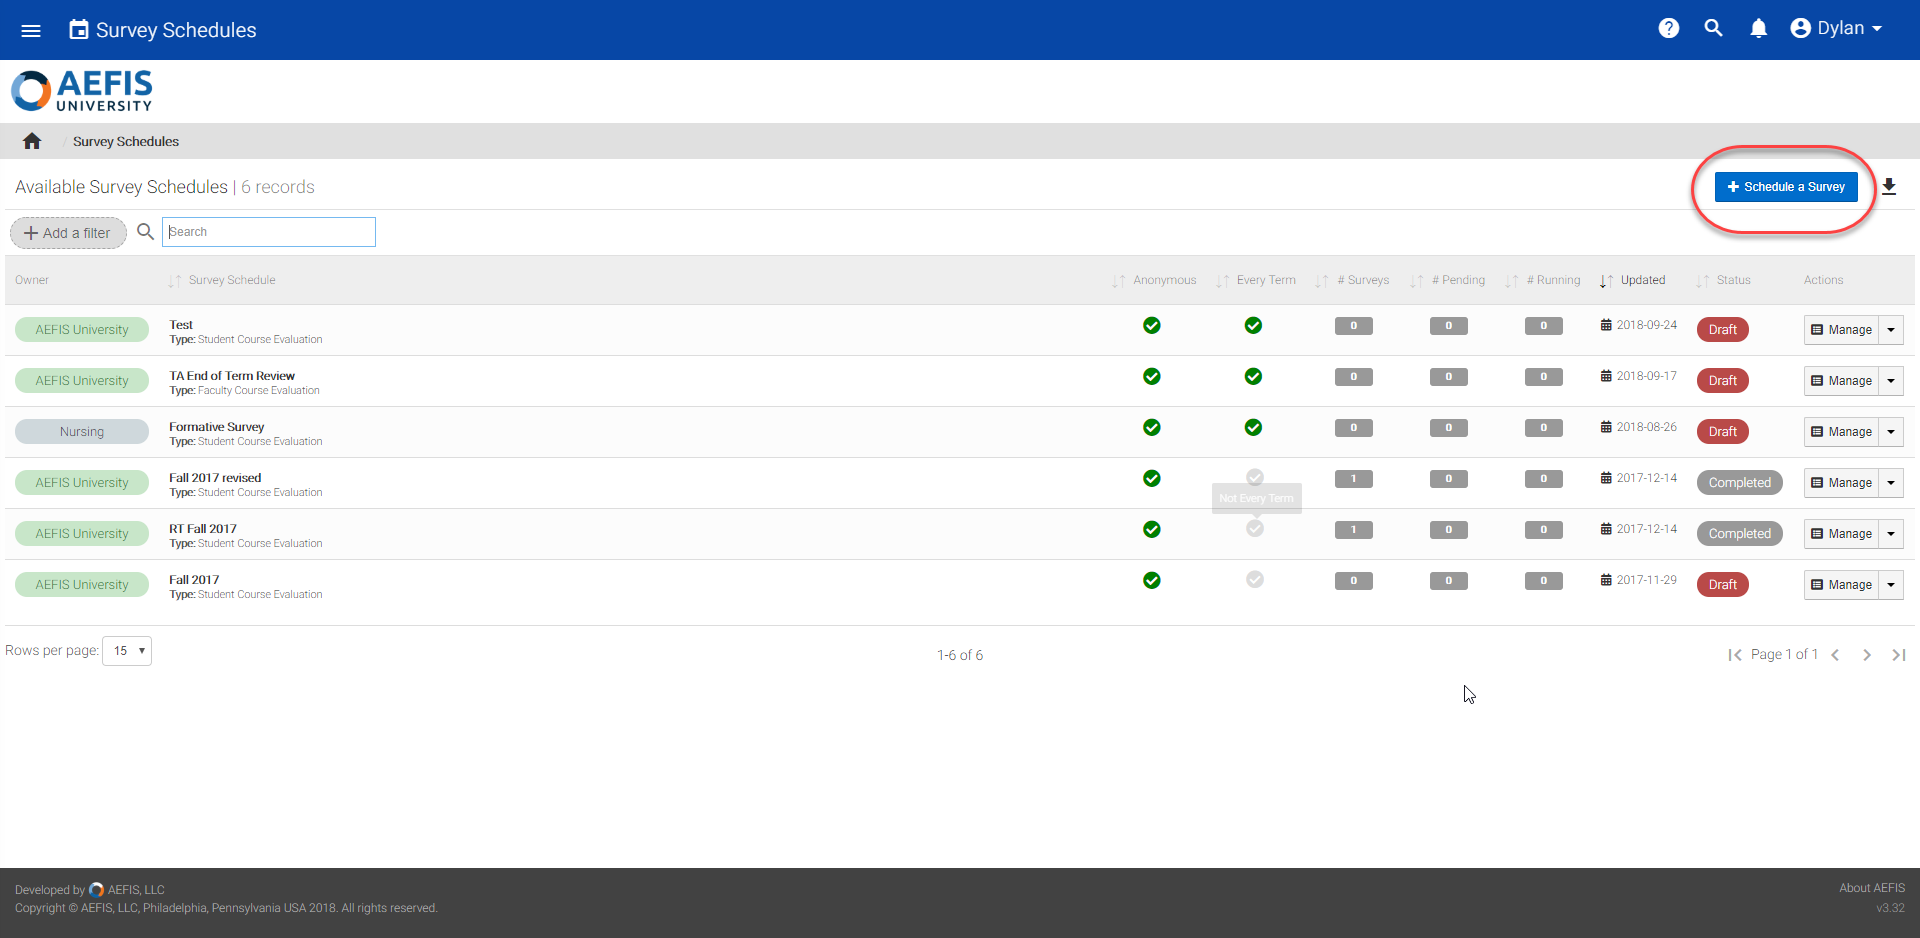
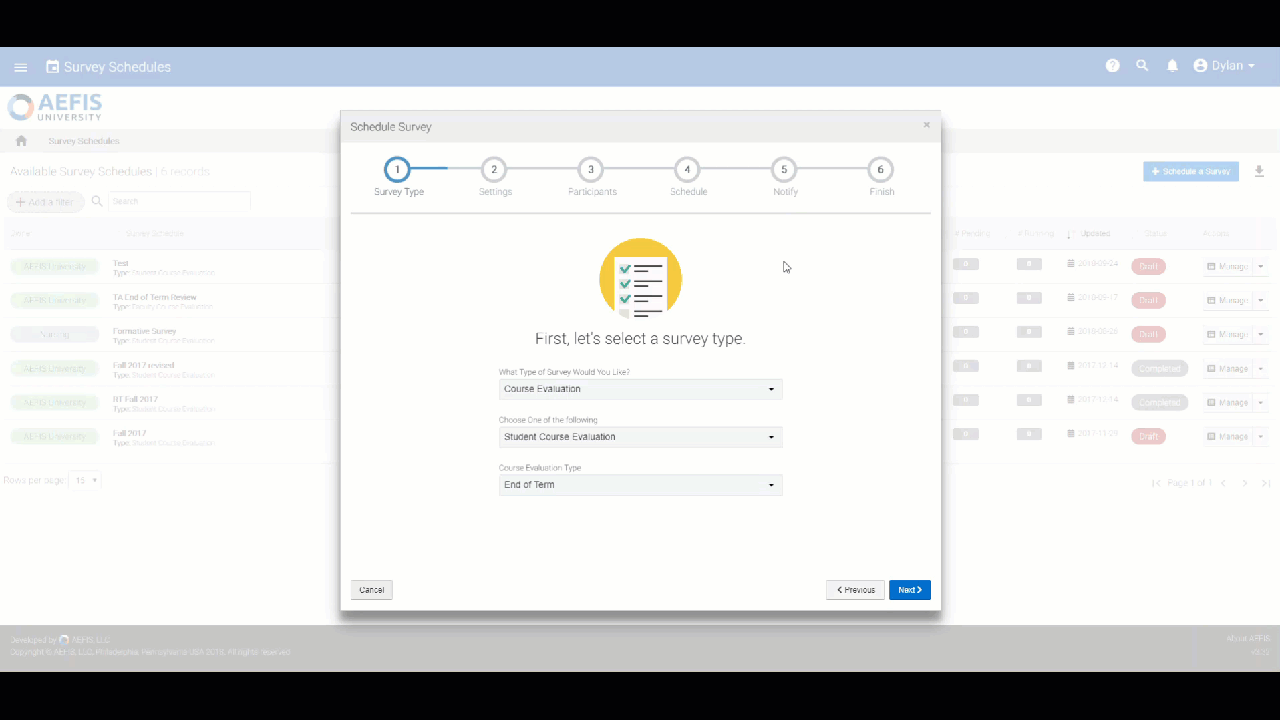
Once selected, this should open up a new pop-up window:
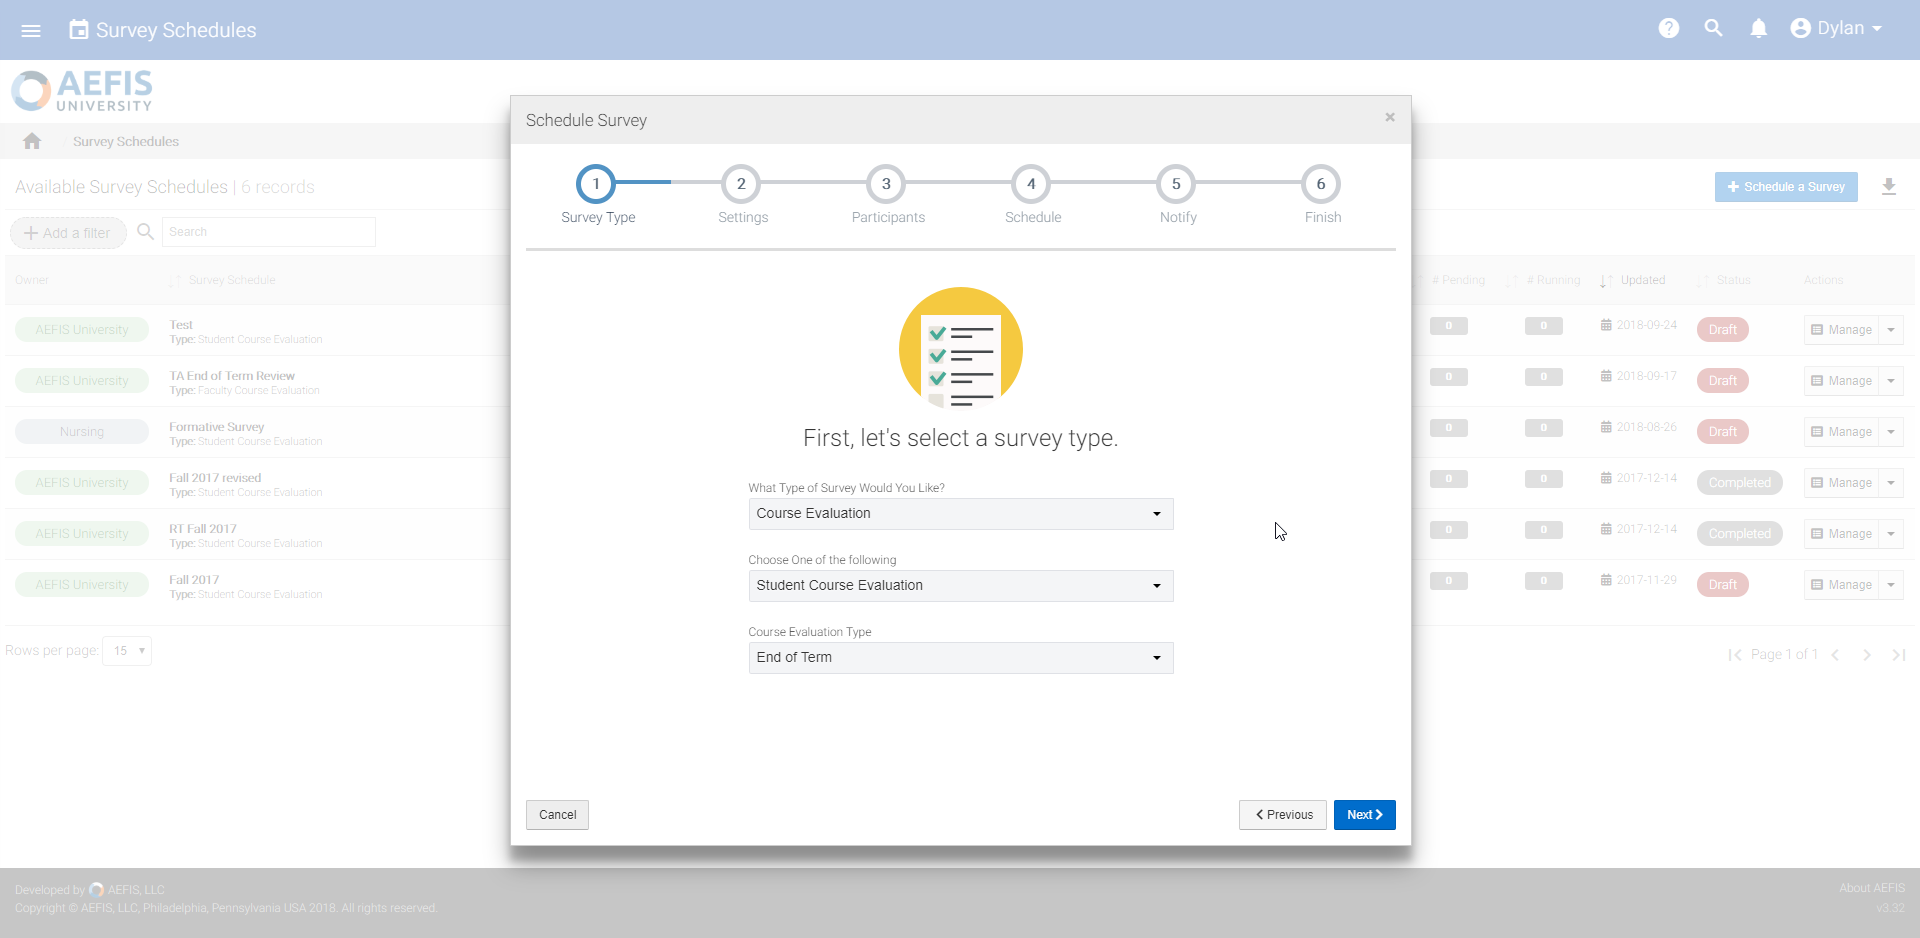
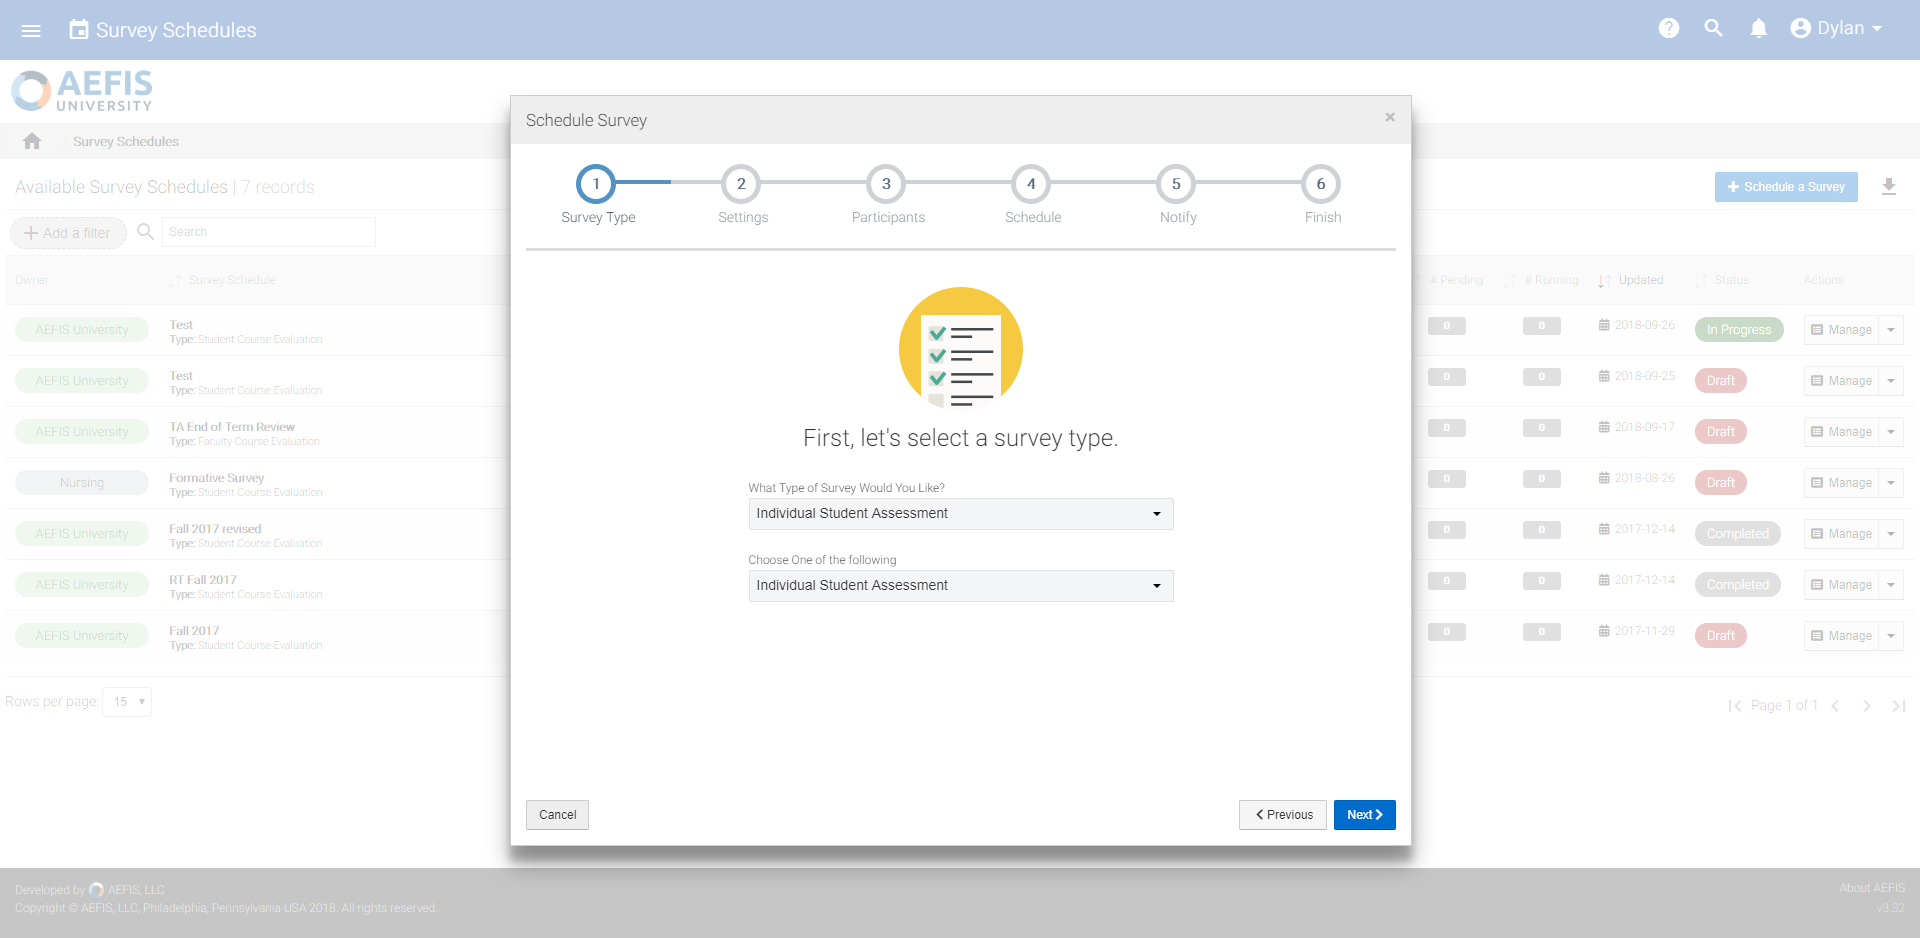
2. Survey Schedule Details
In the first panel of the pop-up, you will enter information about the Survey Type. In this panel, you will find drop down menus for the following options
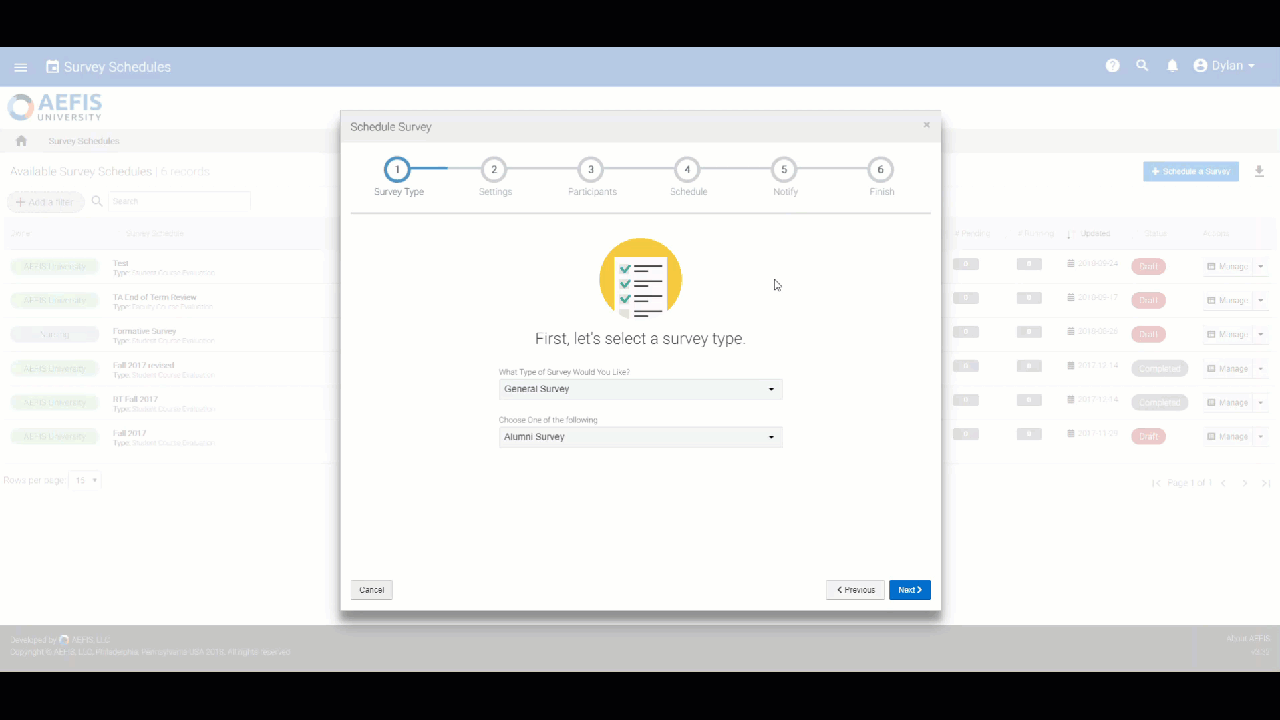
What Type of Survey Would You Like:
Course Evaluation
General Survey
Individual Student Assessment
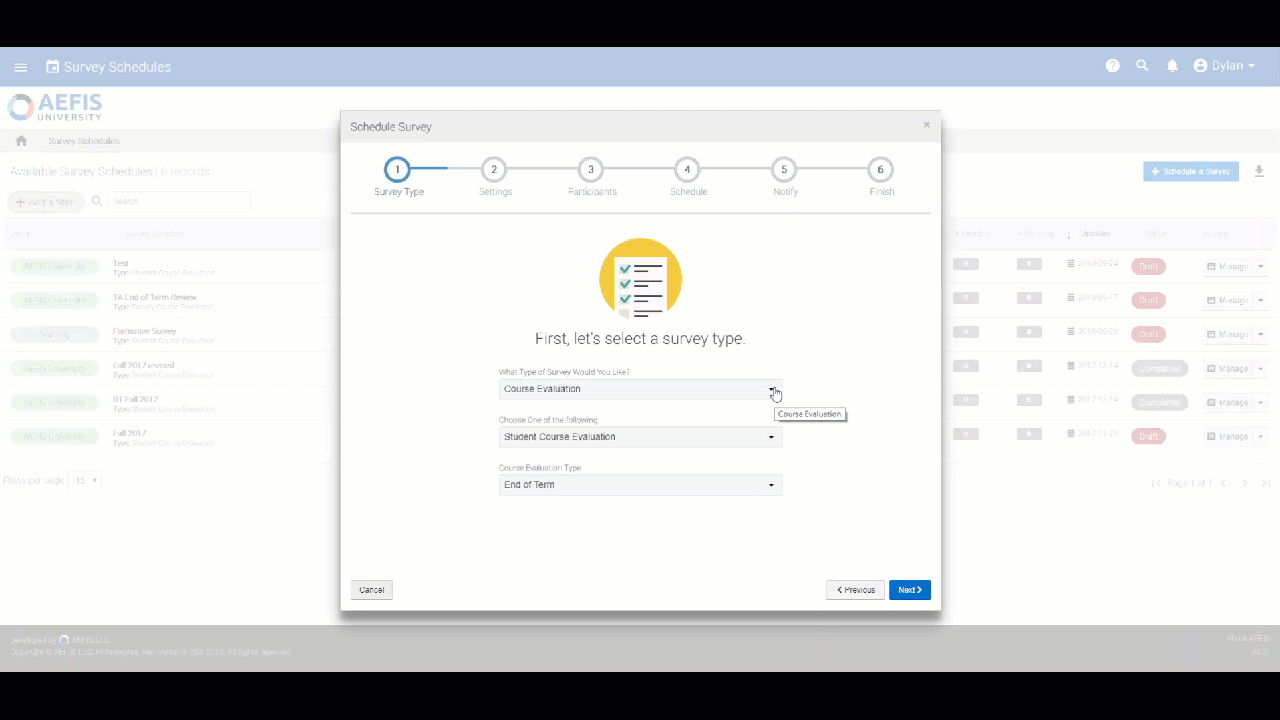
*Note: Your choice under the “What Type of Survey” section will determine what content you will need to fill out for the rest of the panel.
If you select the Course Evaluation, in the following options, you will need to choose whether the evaluation is a Student Course Evaluation, Faculty Course Evaluation or a General Course Evaluation. You will also need to choose when the Evaluation will run at the beginning, middle or end of the term.
If you choose the General Survey option, you will have the option to choose between an Alumni Survey and an External Group Survey.

If you choose the Individual Student Assessment option, you do not have to fill out any other content.
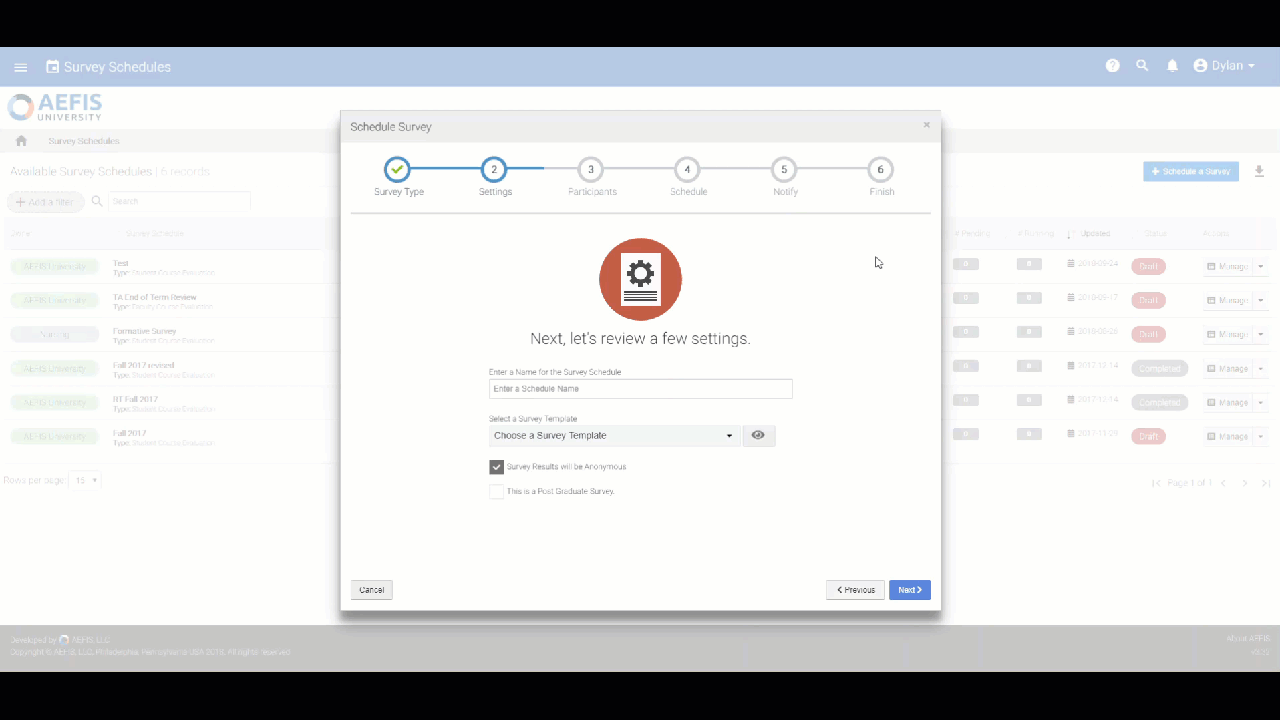
2. Survey Settings
Now, you should move onto the Settings panel of the Survey Schedule
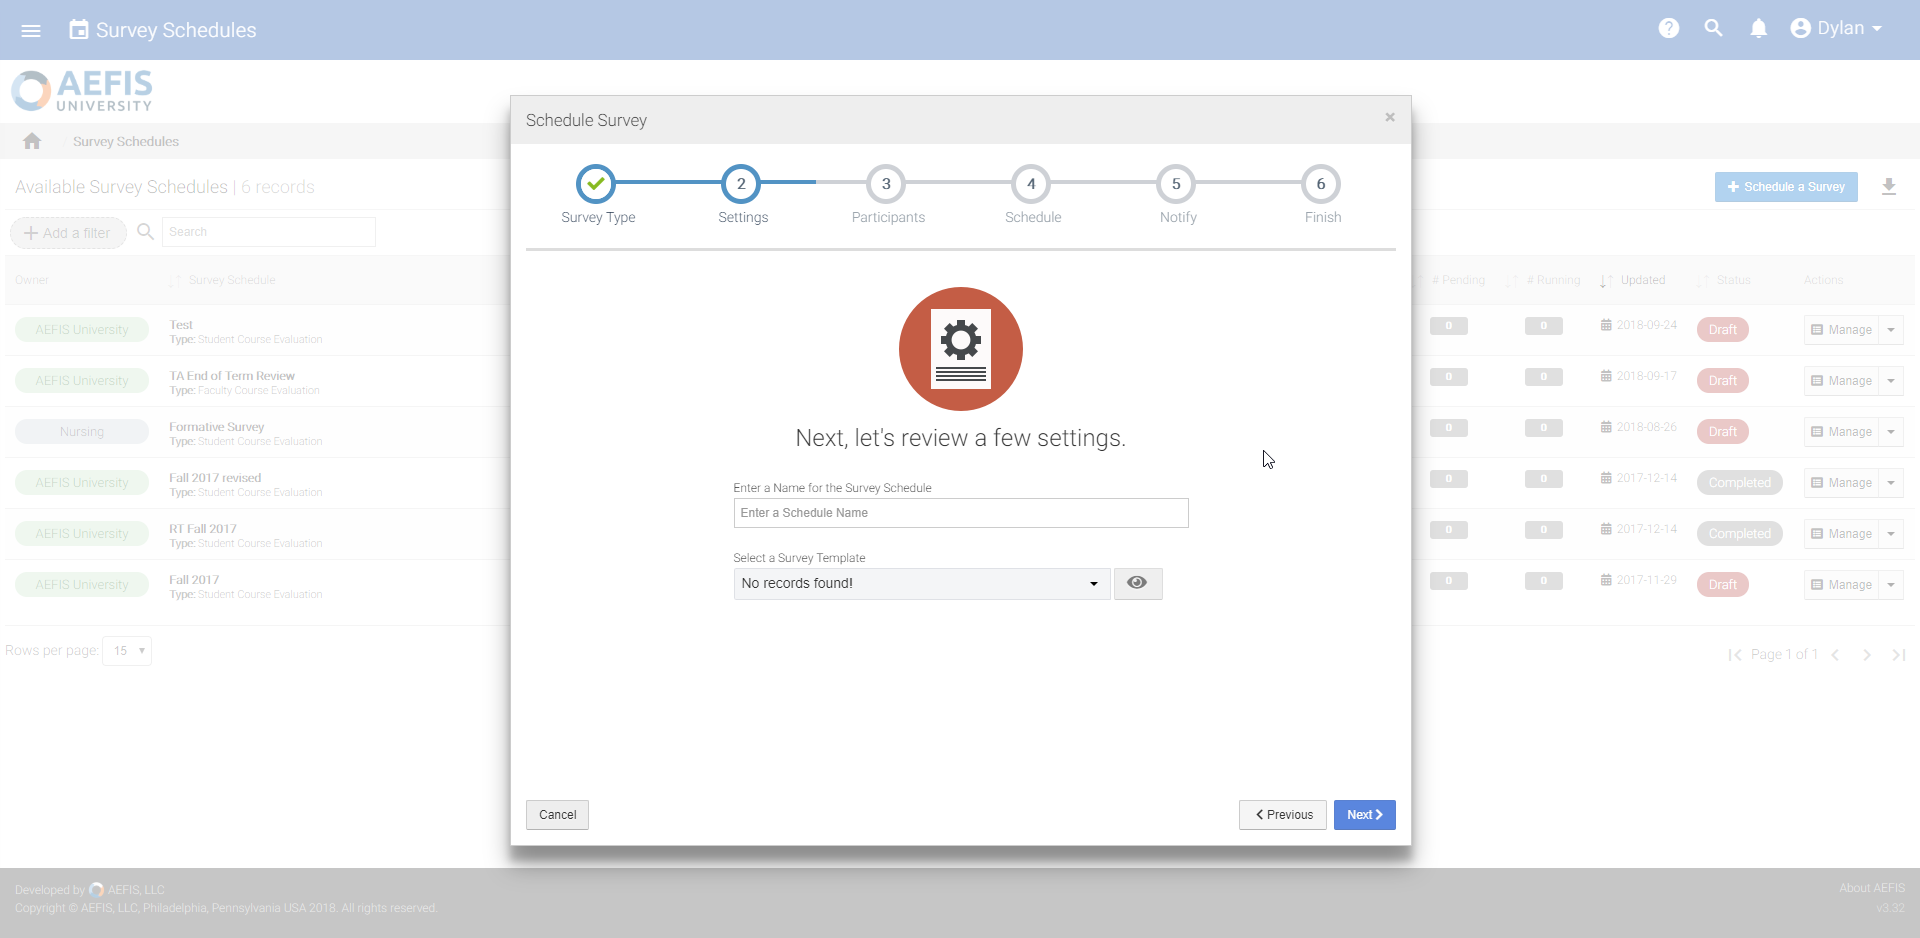
First, enter a name for your Survey Schedule.
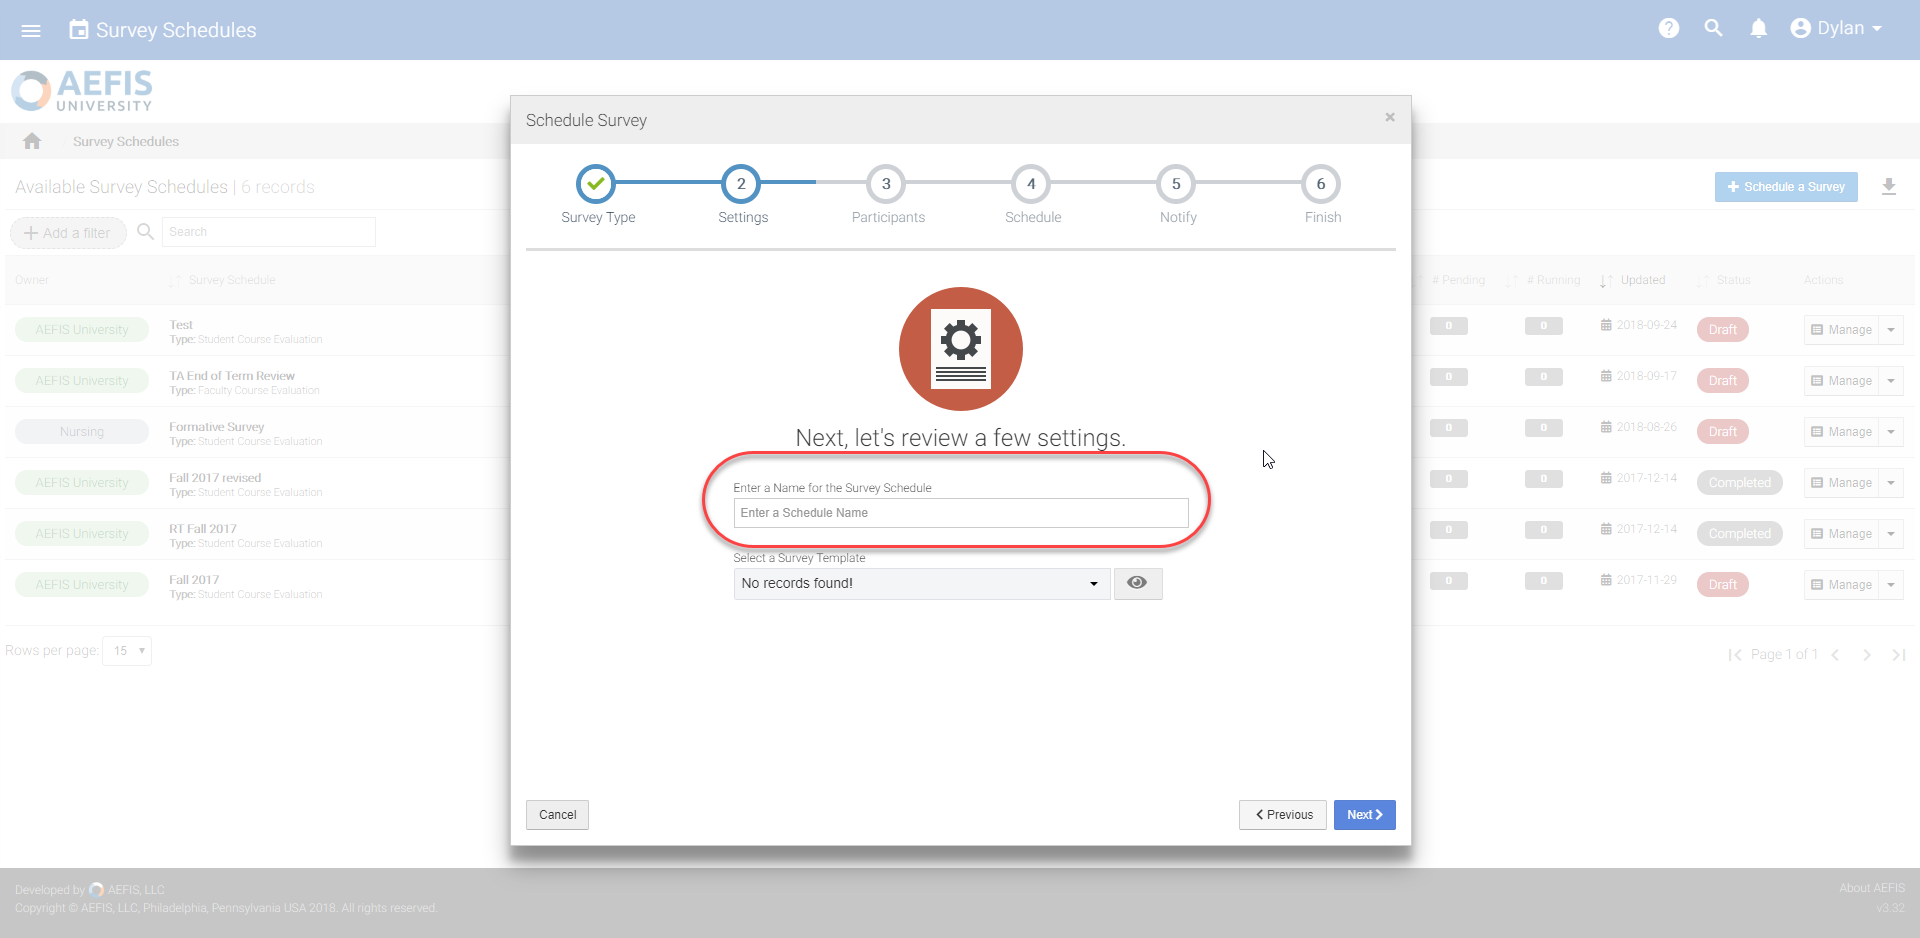
Secondly, select a Survey Template from the drop-down list.
To the right of the Select a Survey Template you should see an icon to preview the Survey Template:
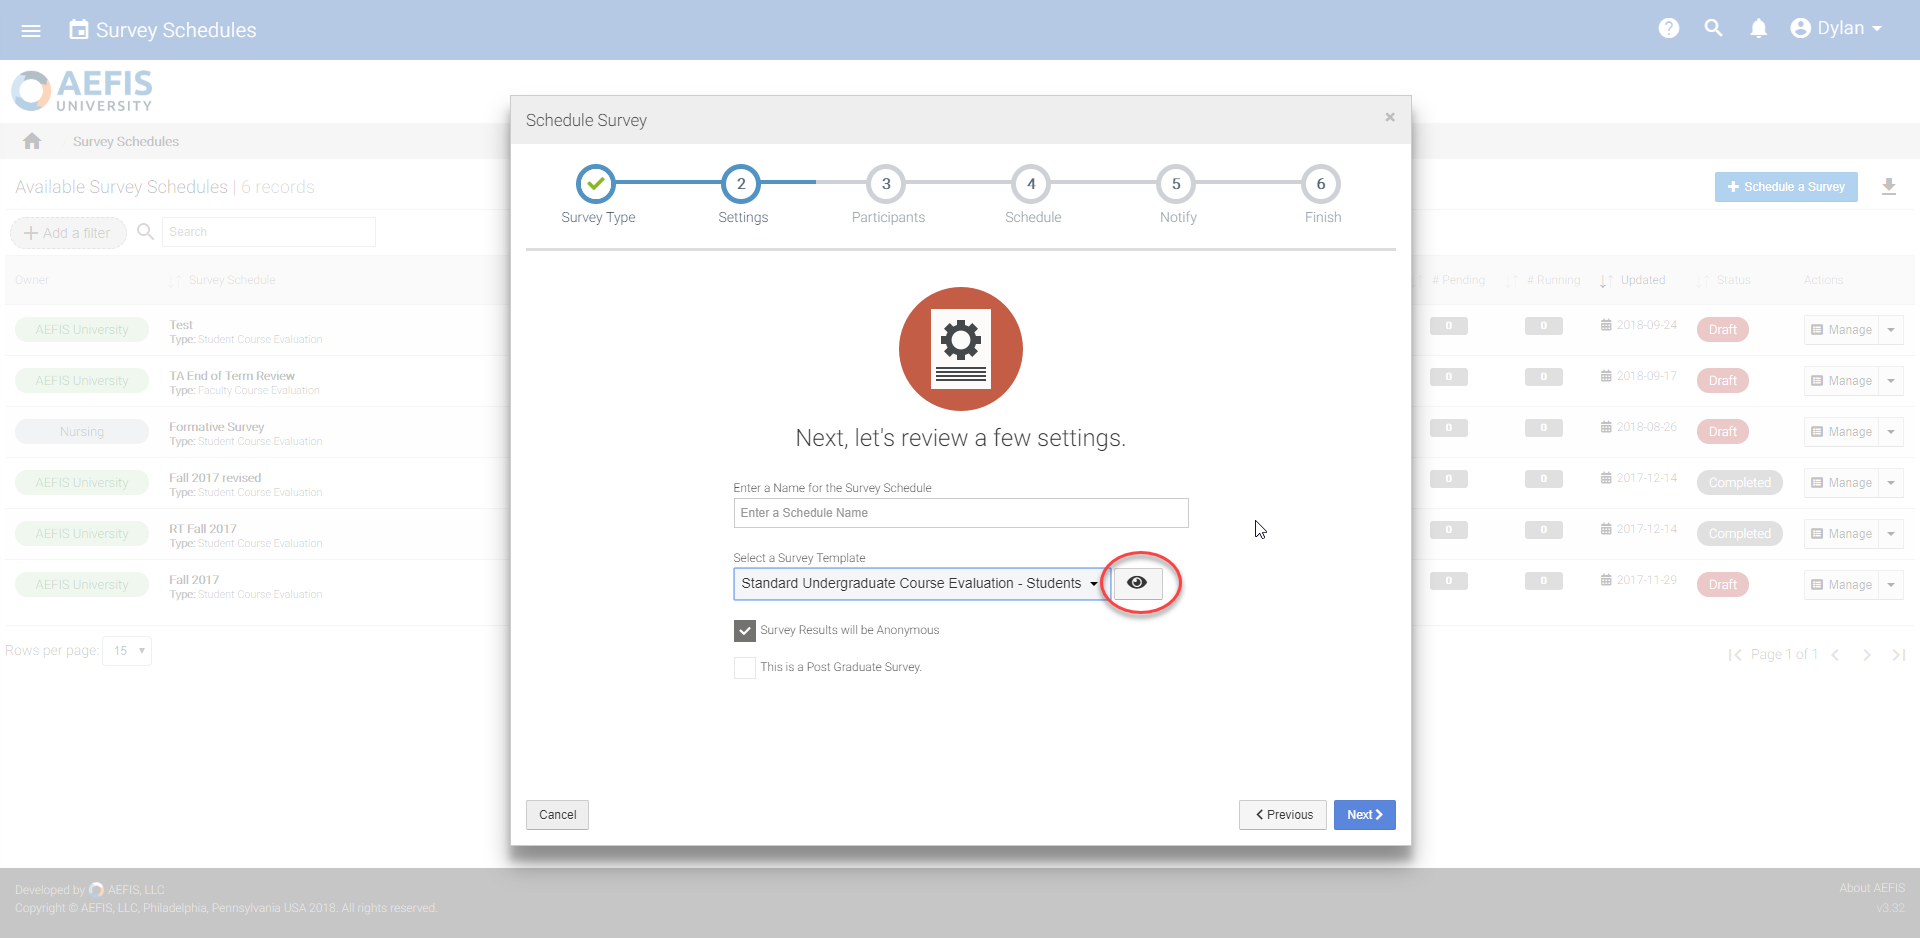
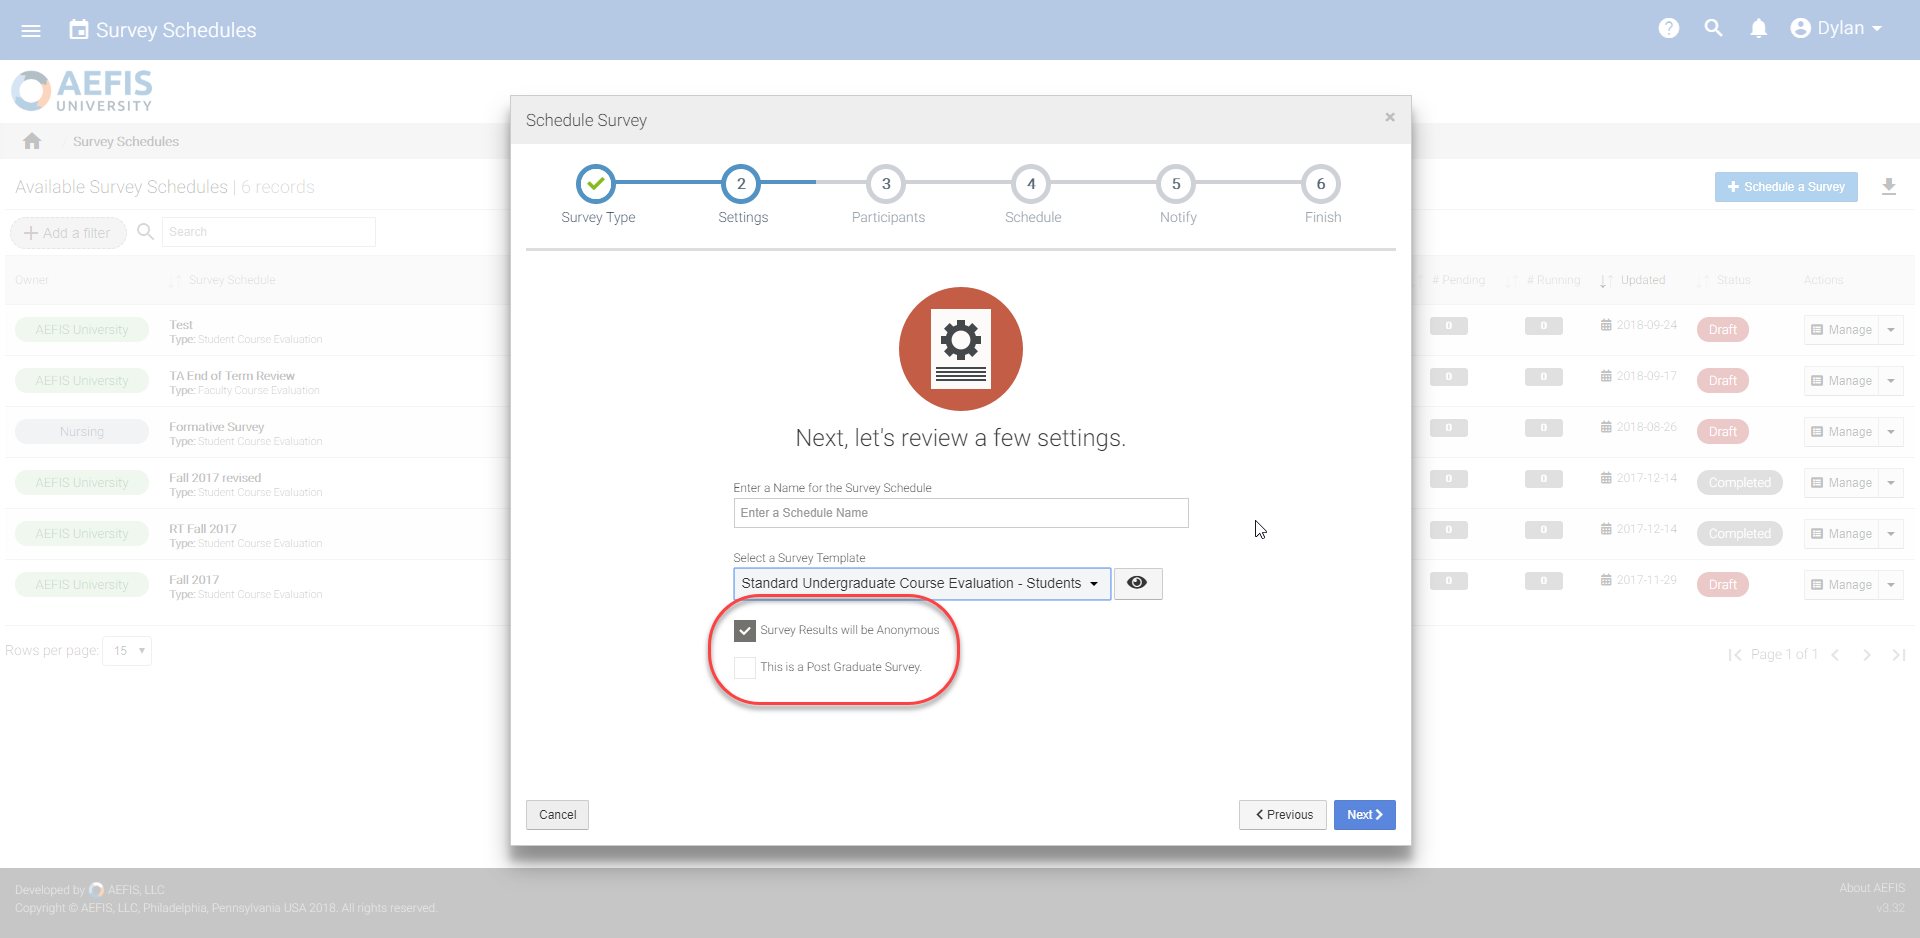
You can then choose if you want Survey Results to remain anonymous and if you would like this to be a Post Graduate Survey via the checkboxes below the drop-down menu.
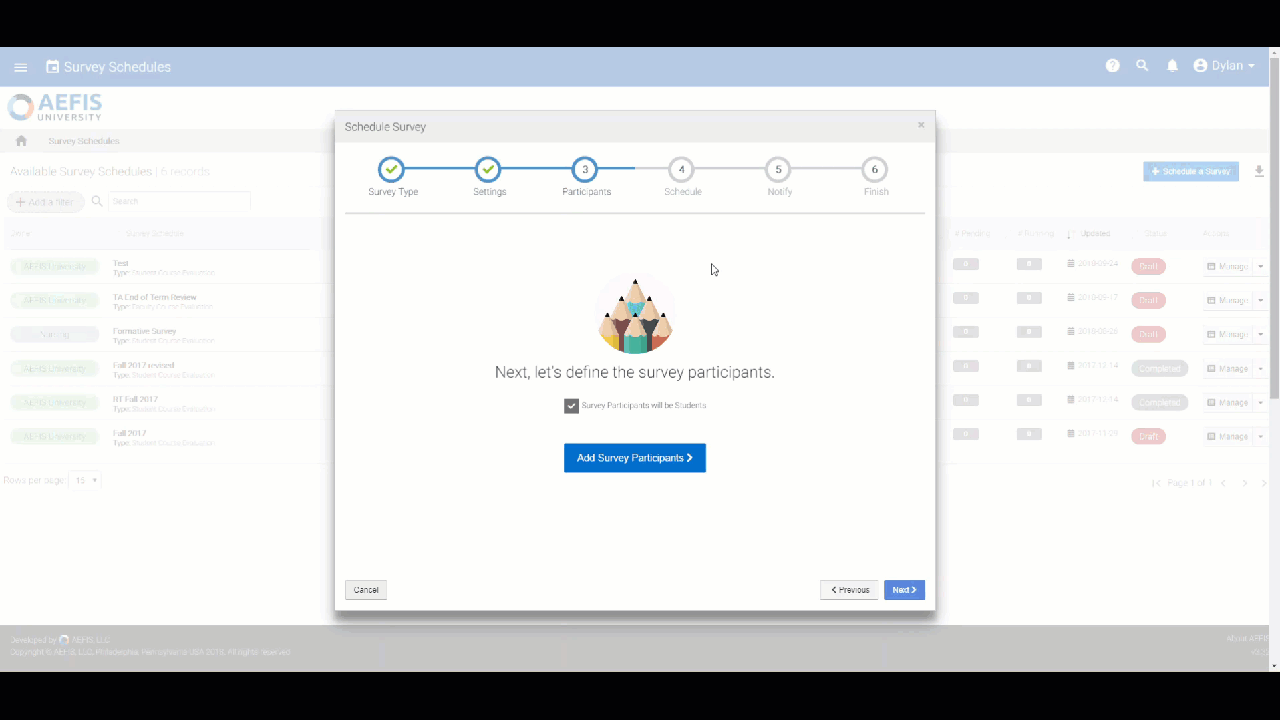
4. Adding Participants
In this section, you will be asked to add participants to your Survey Schedule. The Participants are the courses that will be linked to the Survey Schedule in question.
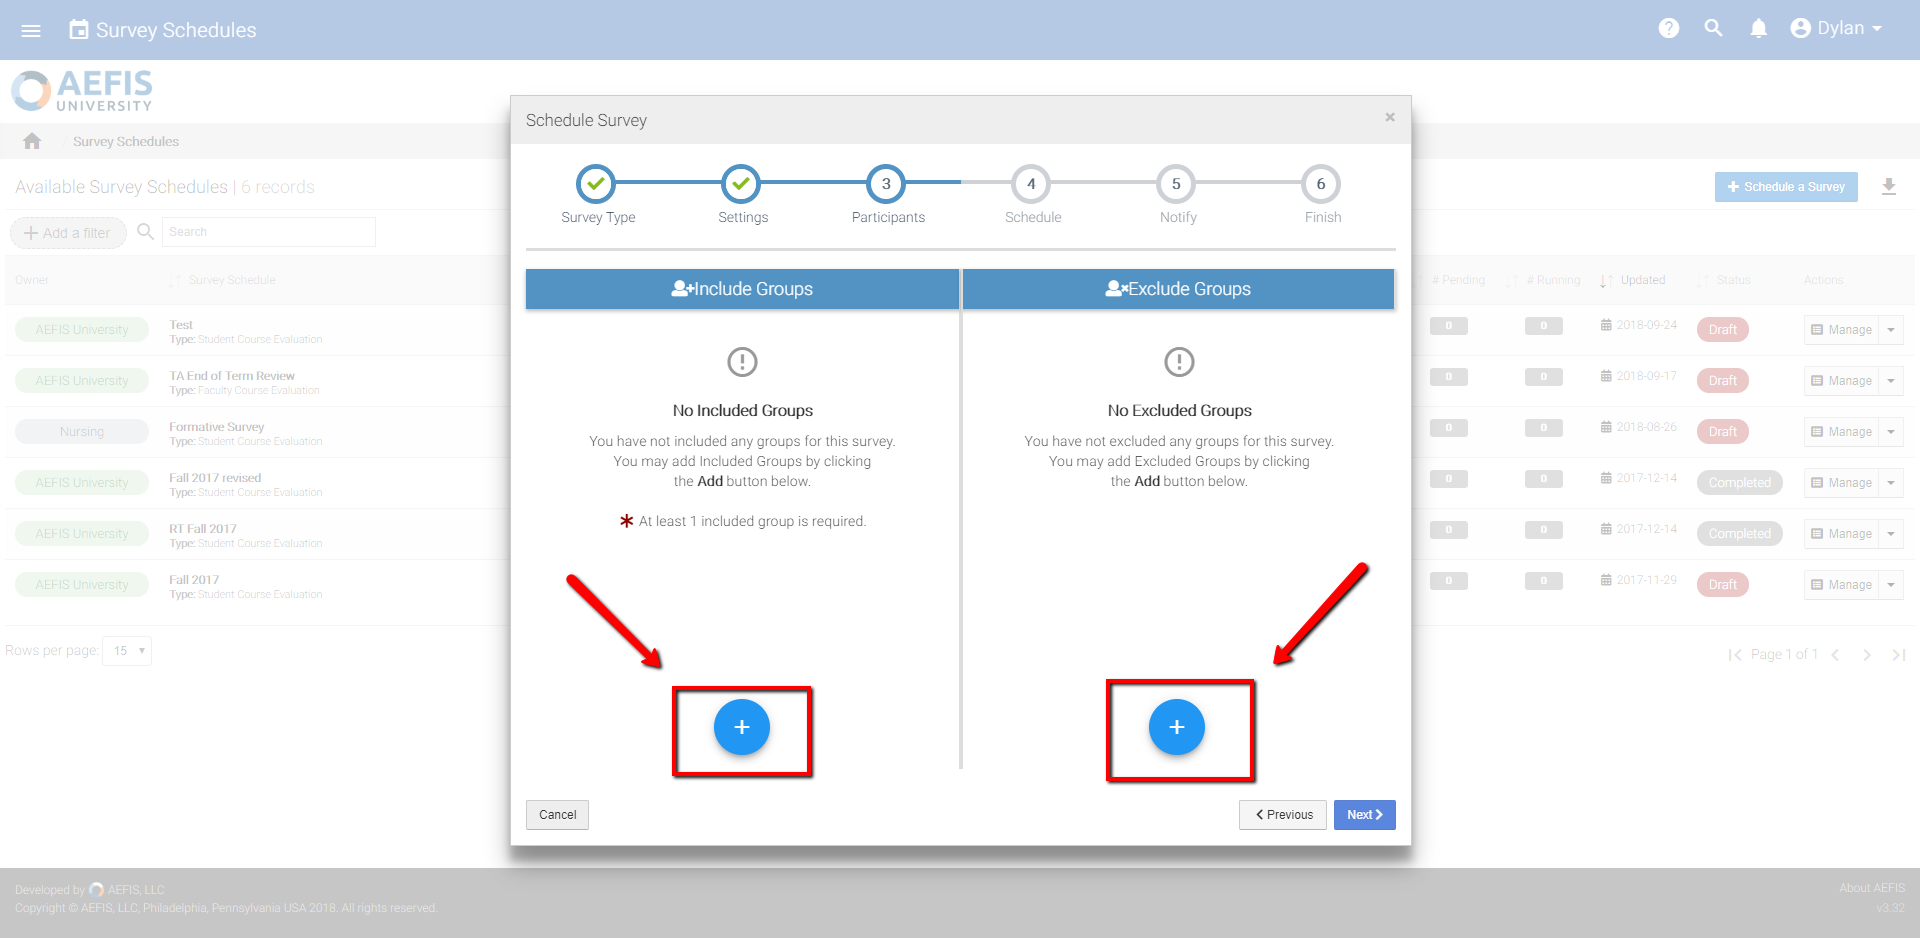
You have two options to add Participants to your Survey Schedule, No Included Groups and No Excluded Groups.
Included Groups:
Excluded Groups:
To add a group under these sections, click on the blue + icon near the bottom of each section.
Click the + icon, a new pop up window should appear:
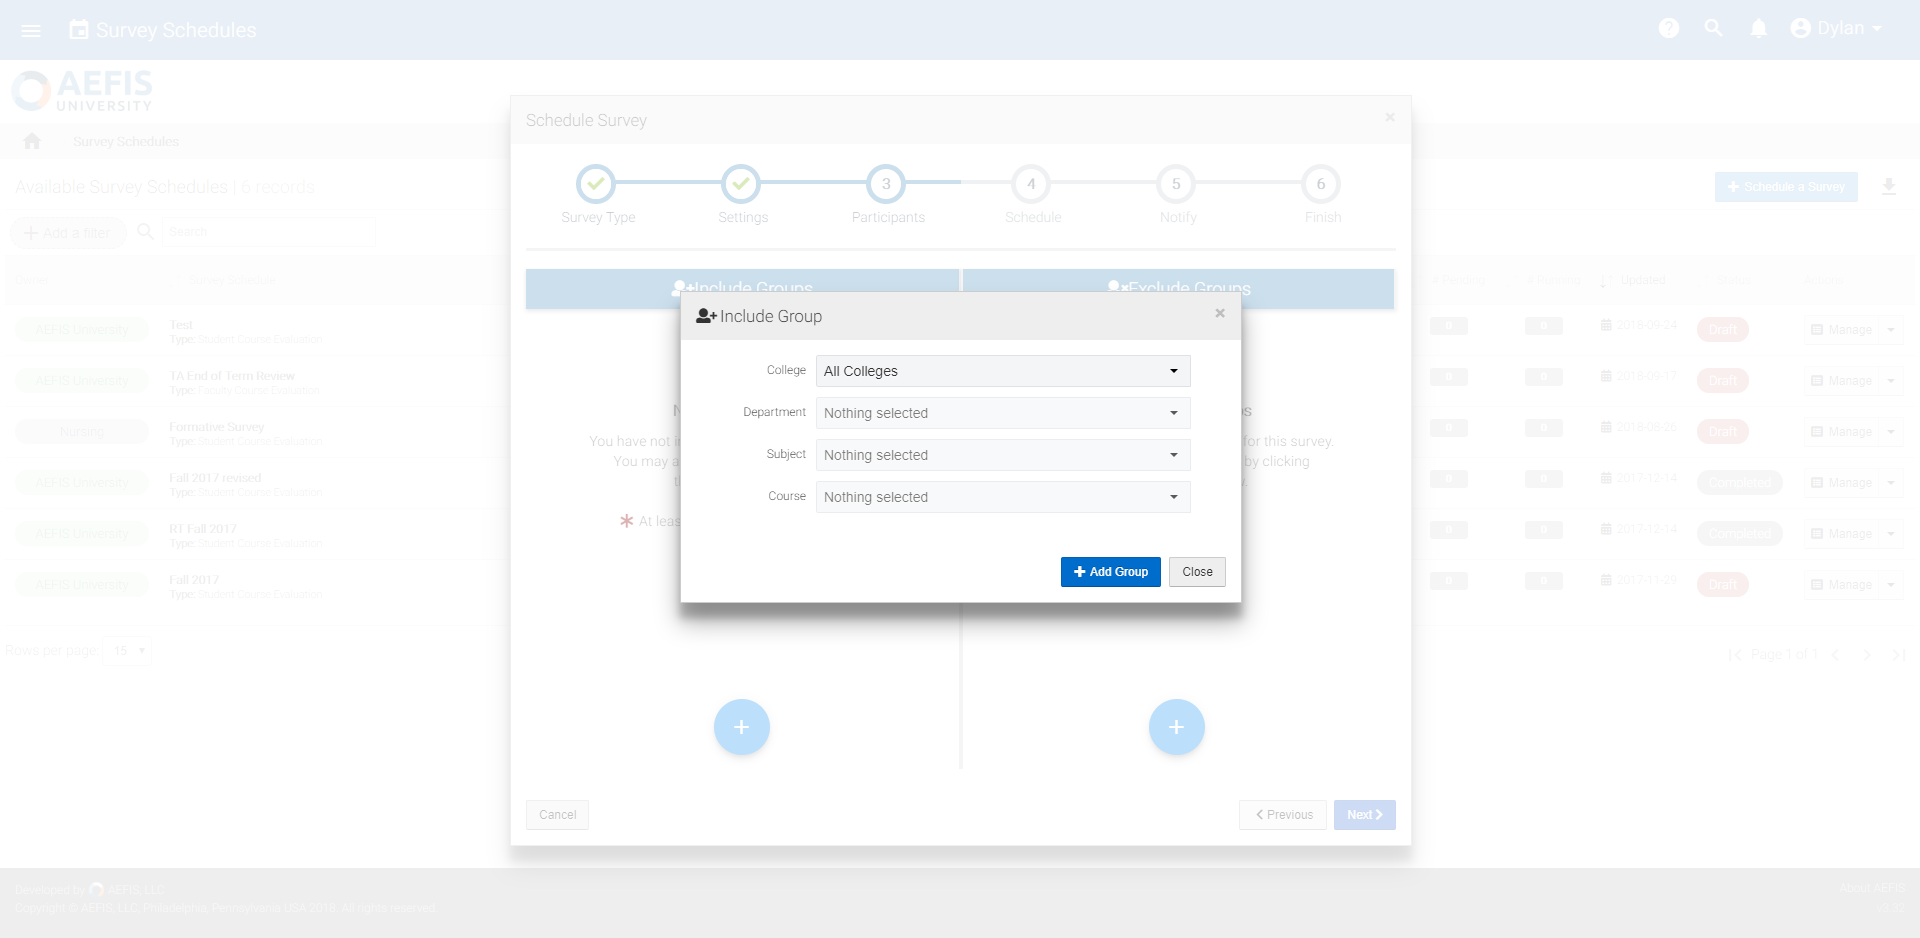
From this pop-up, you will need to enter the following information:
College
Department
Subject
Course
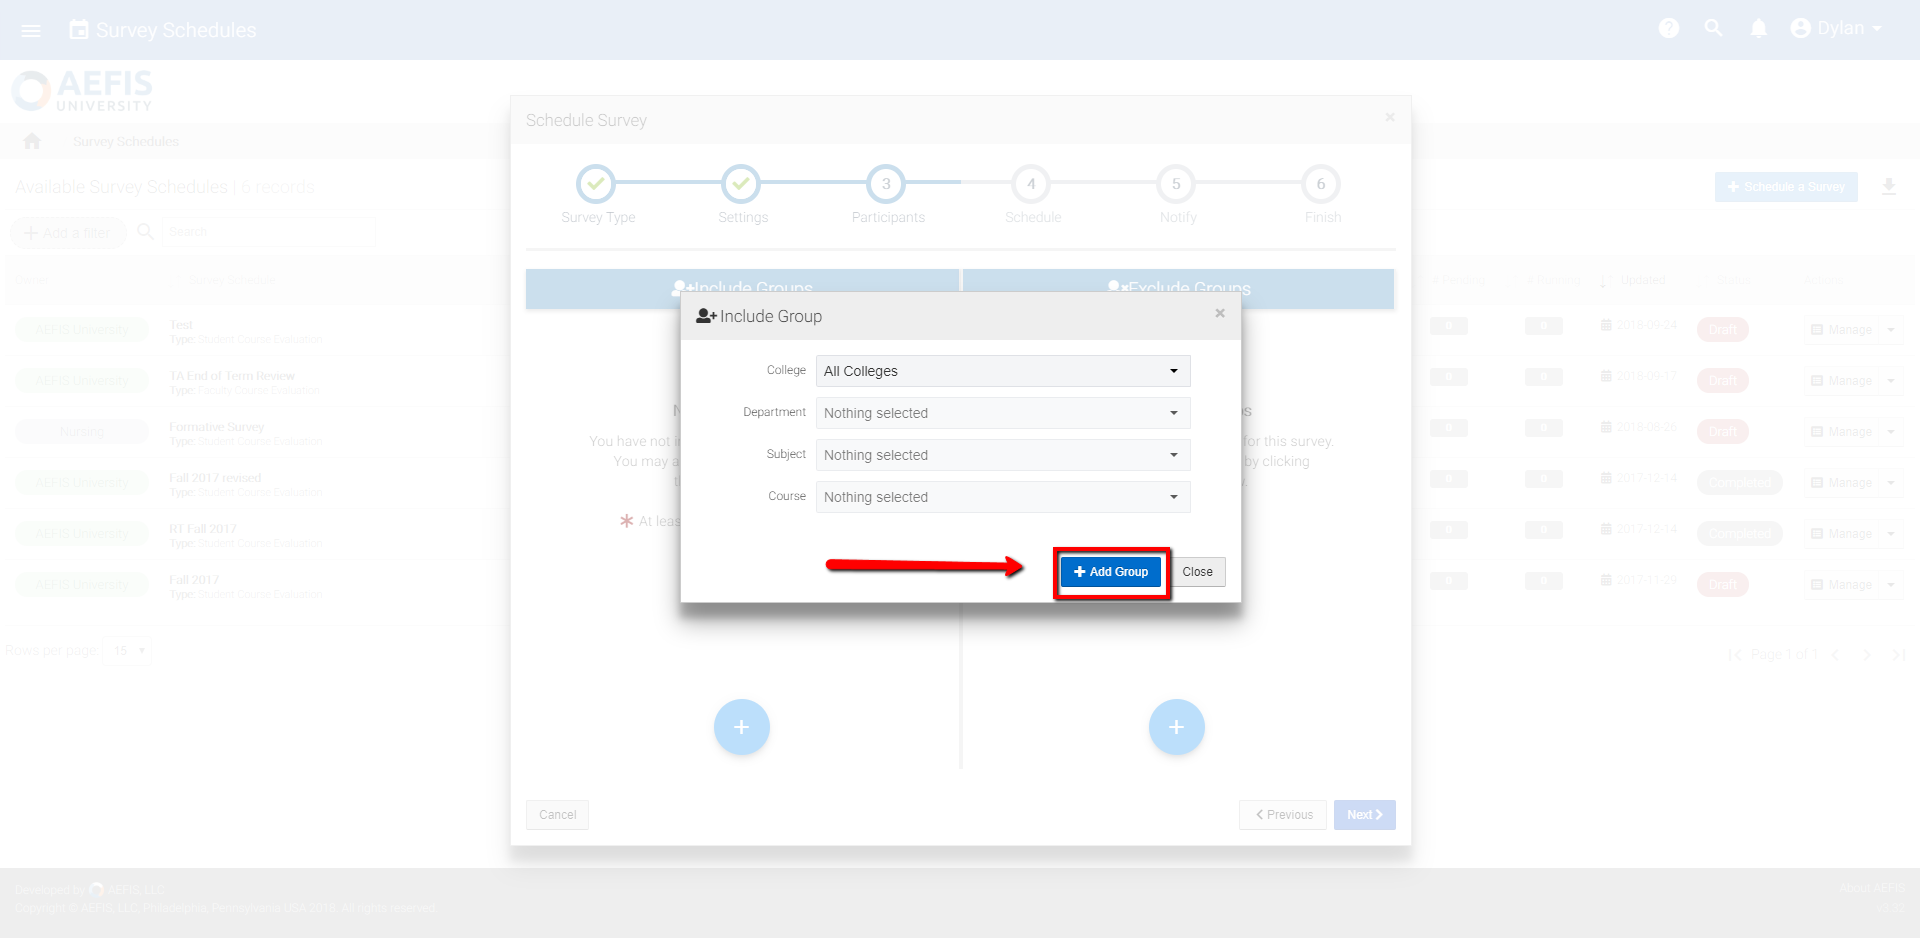
Once you have finished adding this information, select the +Add Group button near the bottom of the pop up to save your information.
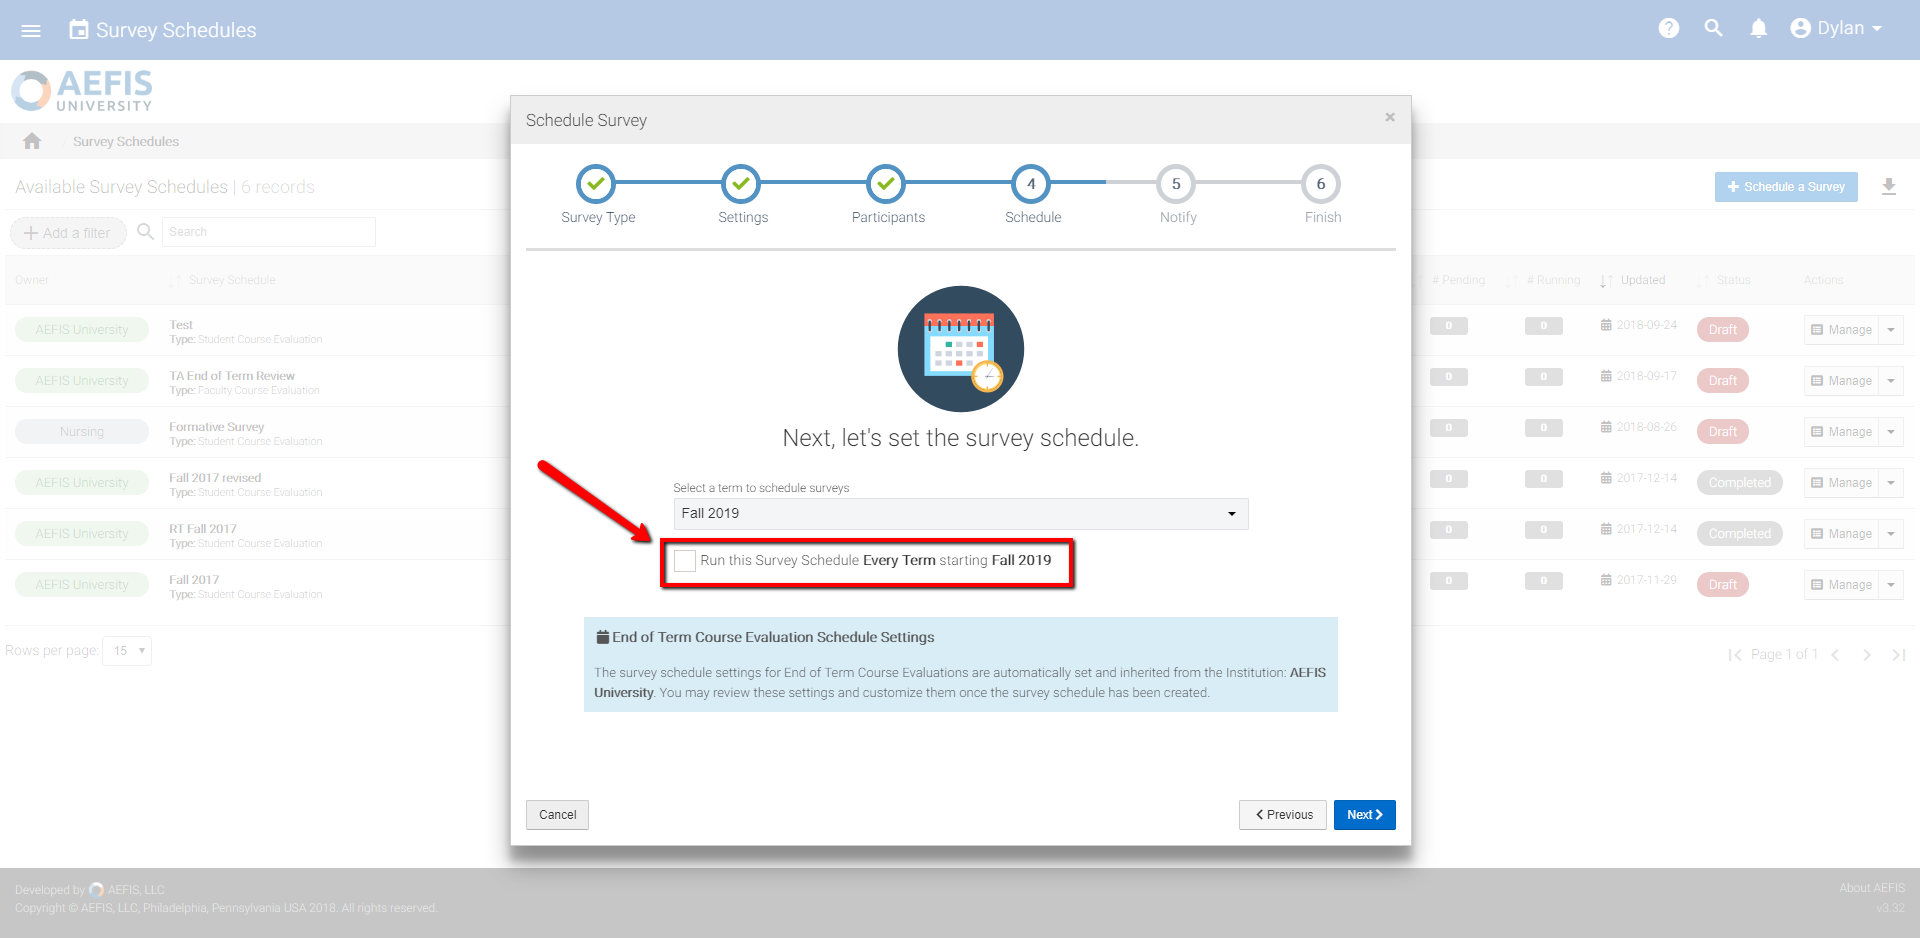
5. Creating a Schedule for Your Survey
Now we will move on to set the time frame for your survey. First, you will need to select the term that you would like to schedule your survey.
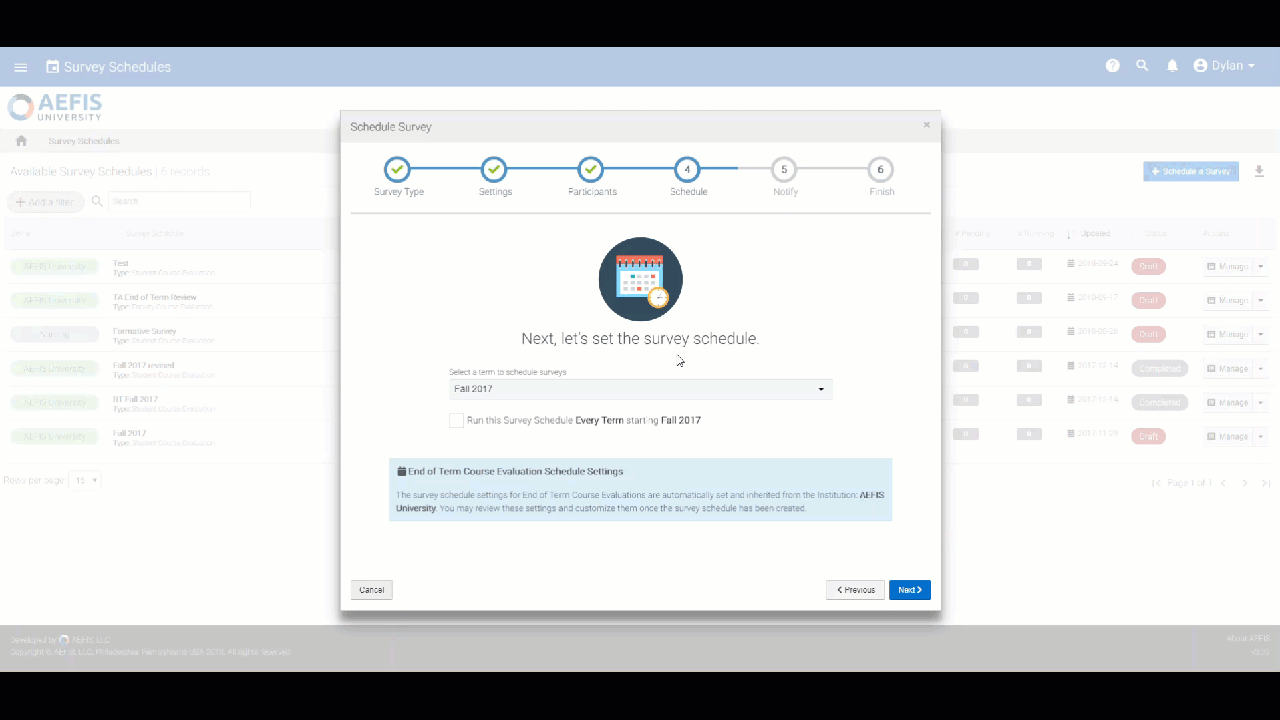
You have the option of running the same survey schedule for every term moving forward.
Once you have filled out this information, select the Next button option in the bottom right corner of the pop-up box.

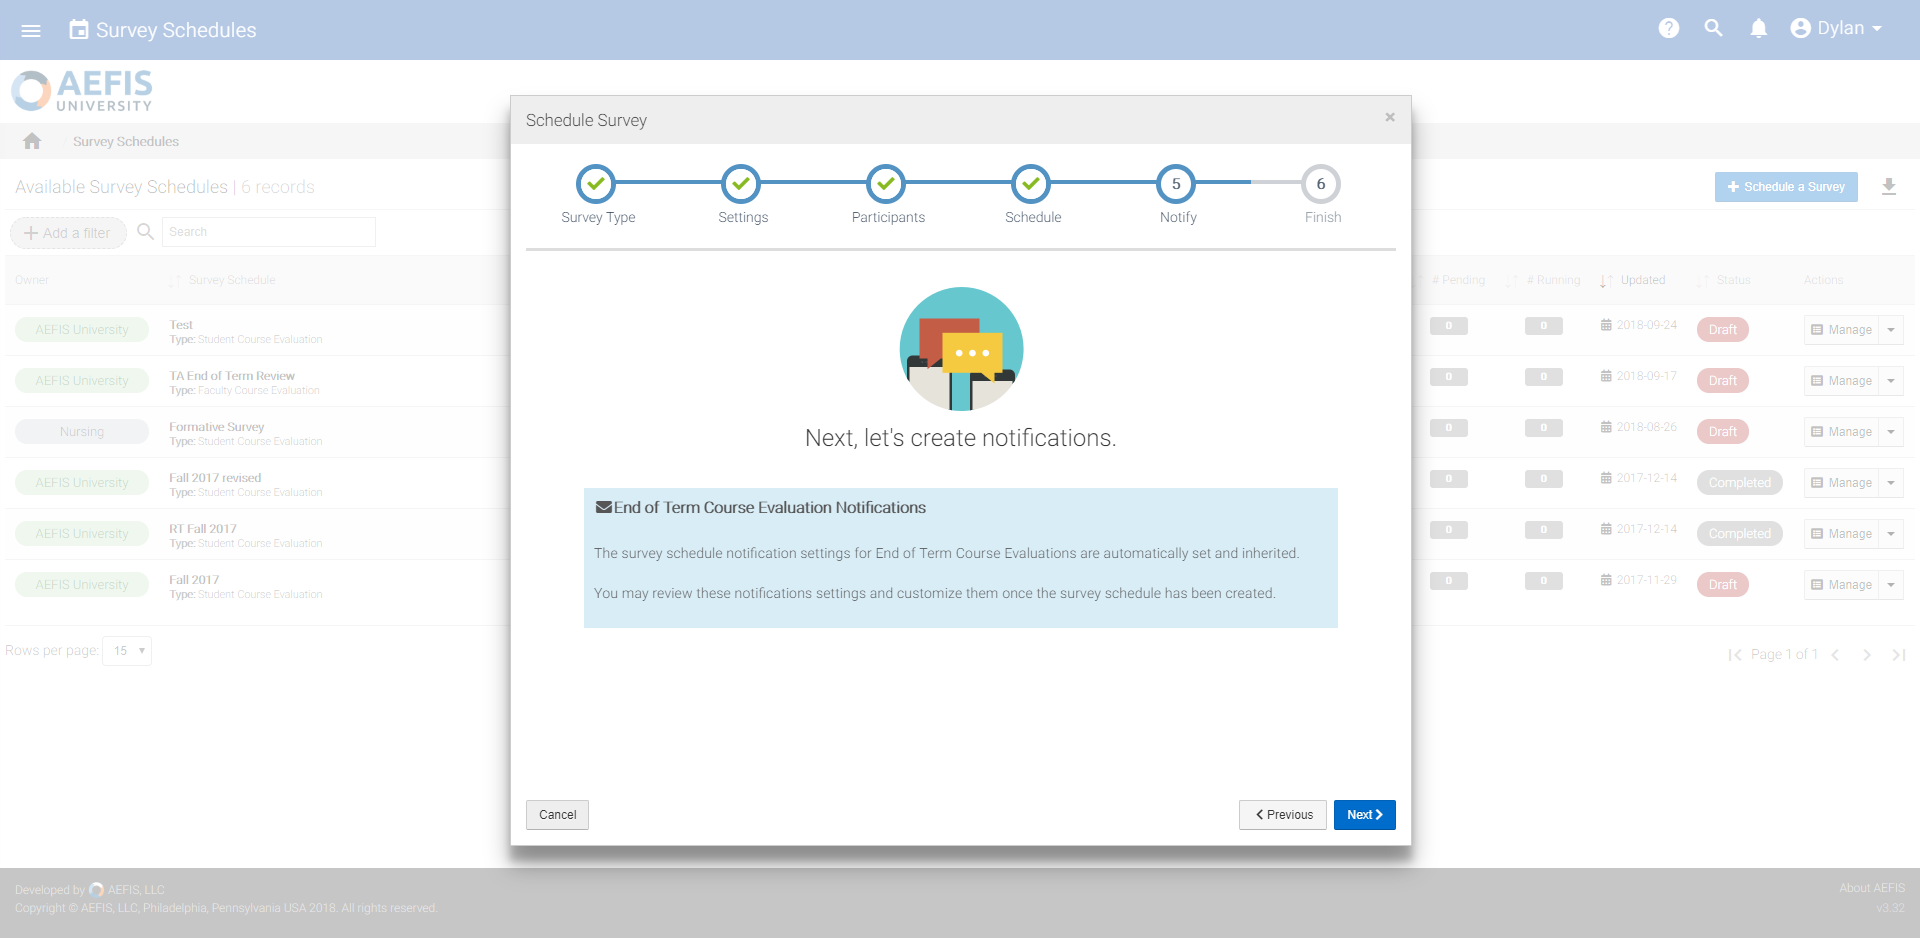
6. Adding Notifications
Notifications will be determined by the term schedule set by your survey. You can review and edit the notification settings once the schedule has been created and completed.
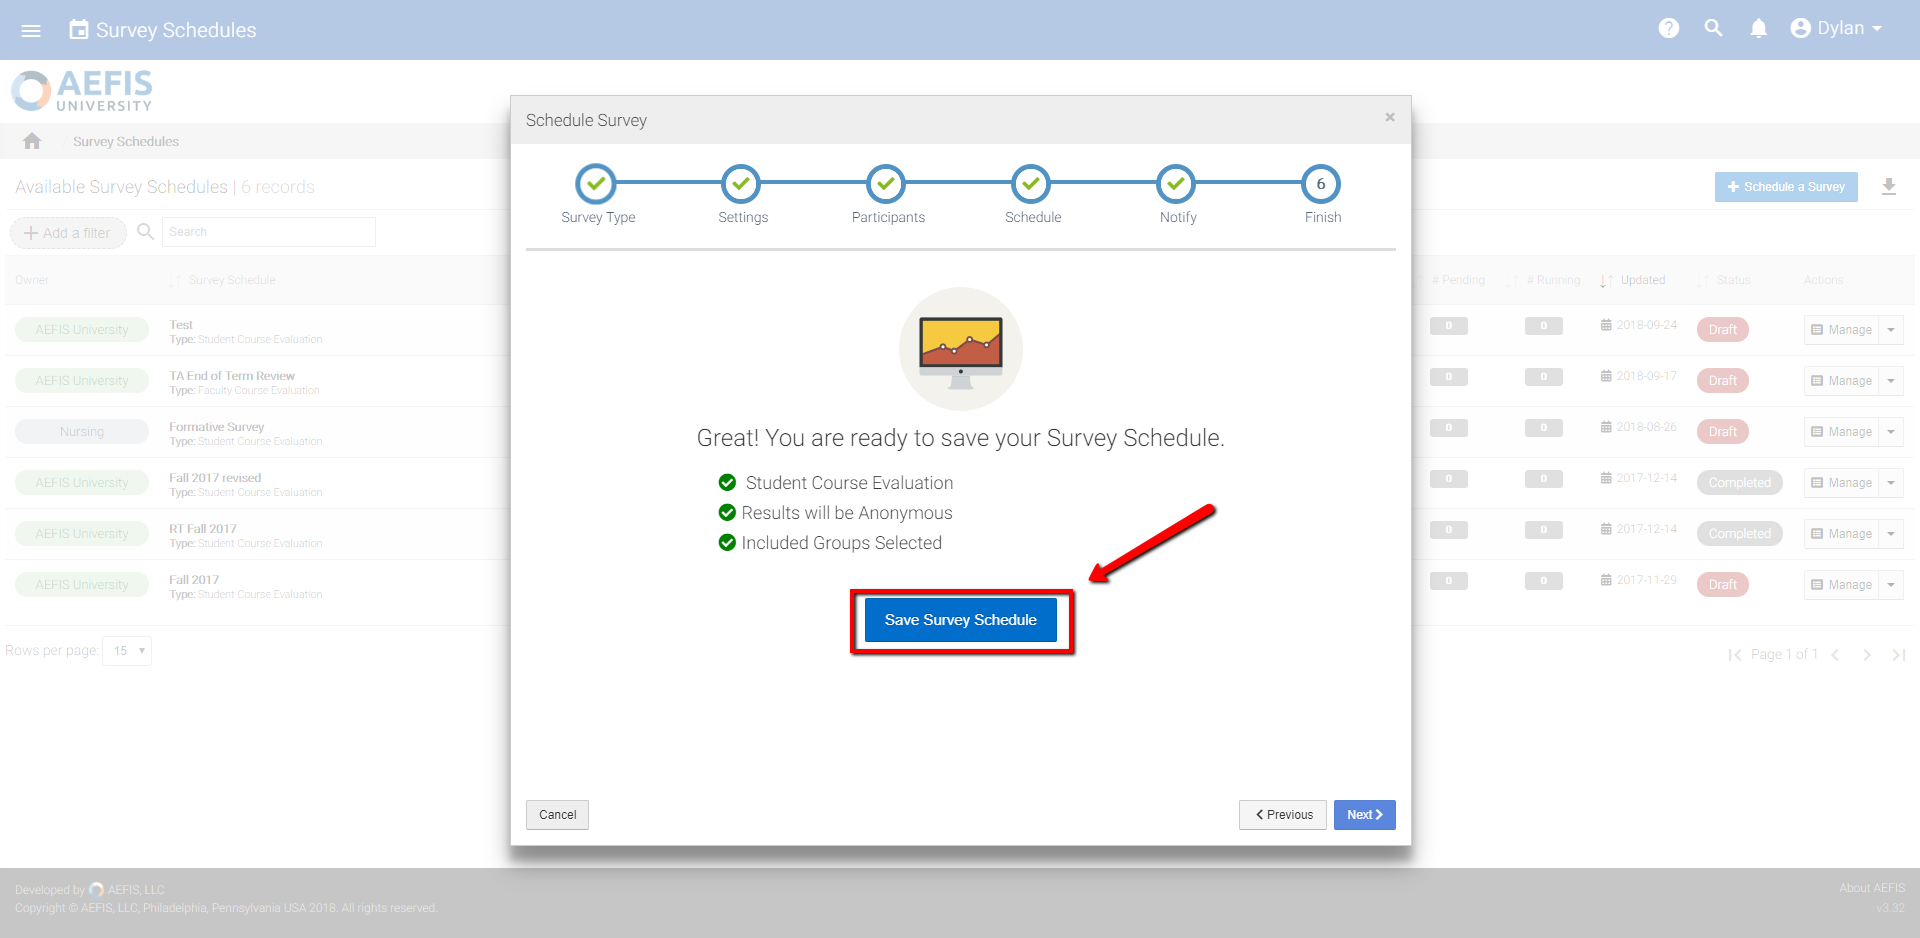
7. Finishing Your Survey Schedule
To finish your schedule survey, click the save Survey Schedule button near the bottom of the Finish panel.
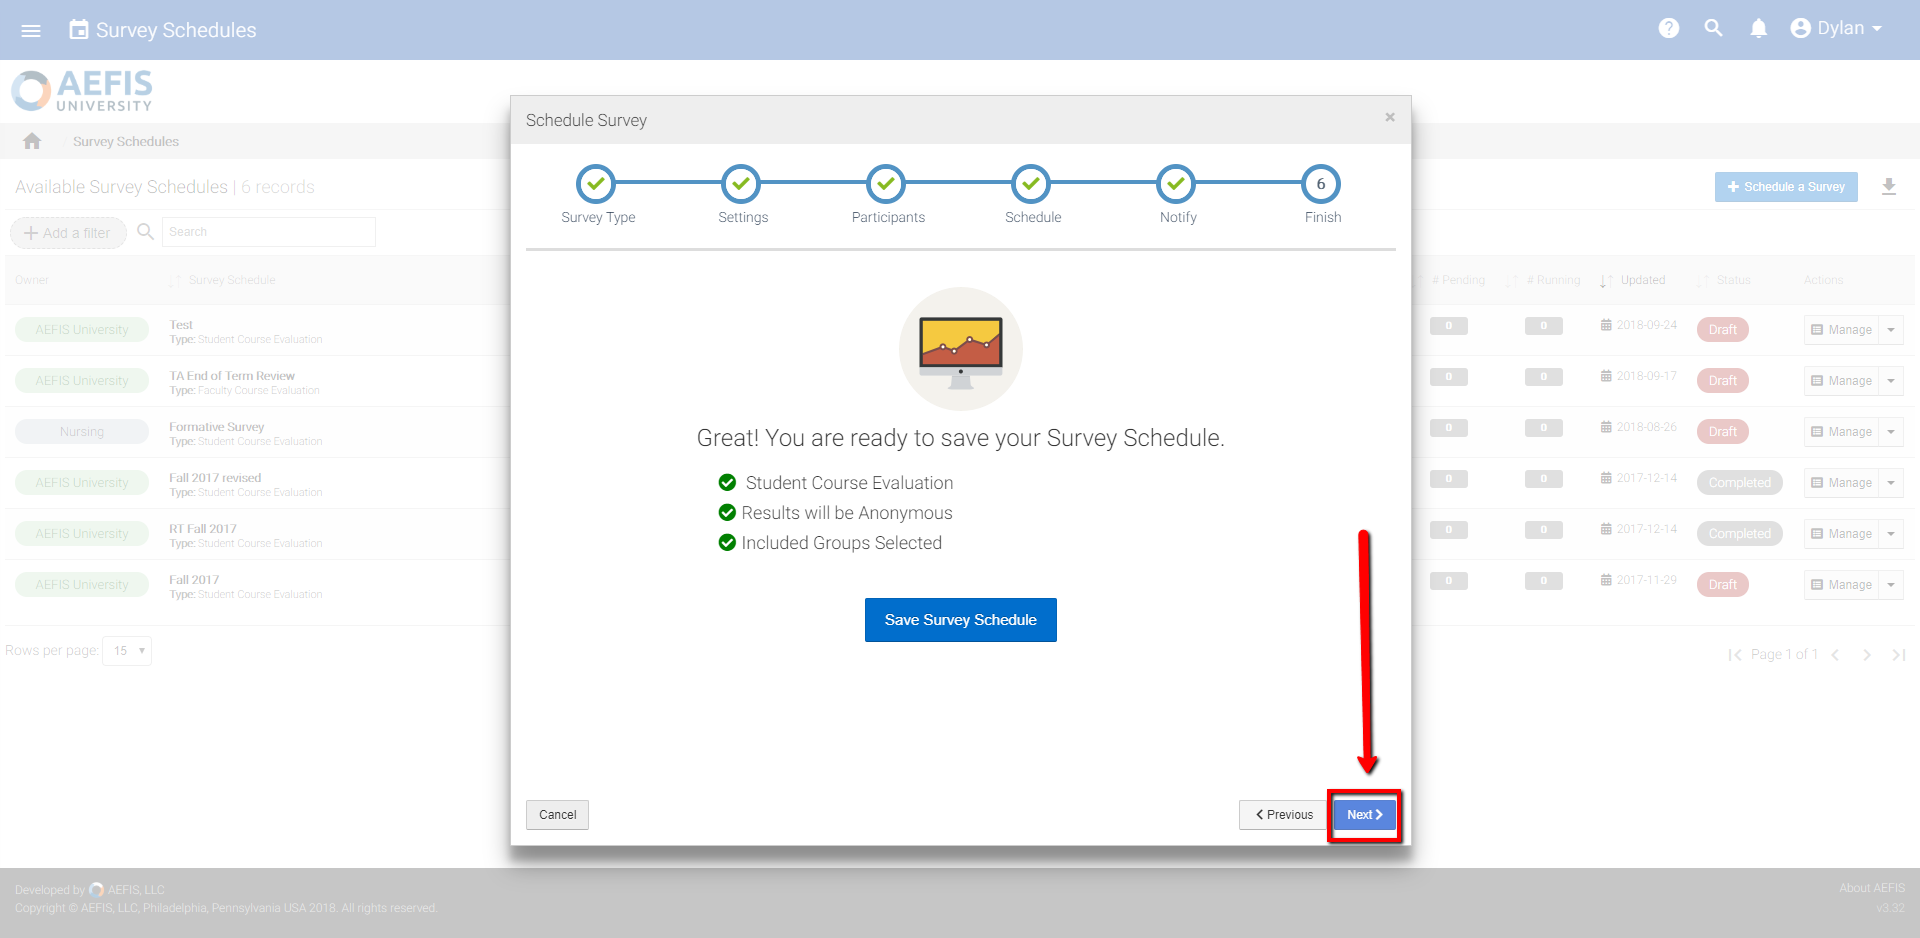
To finish the process, click the next button in the bottom right corner of the Finish panel.
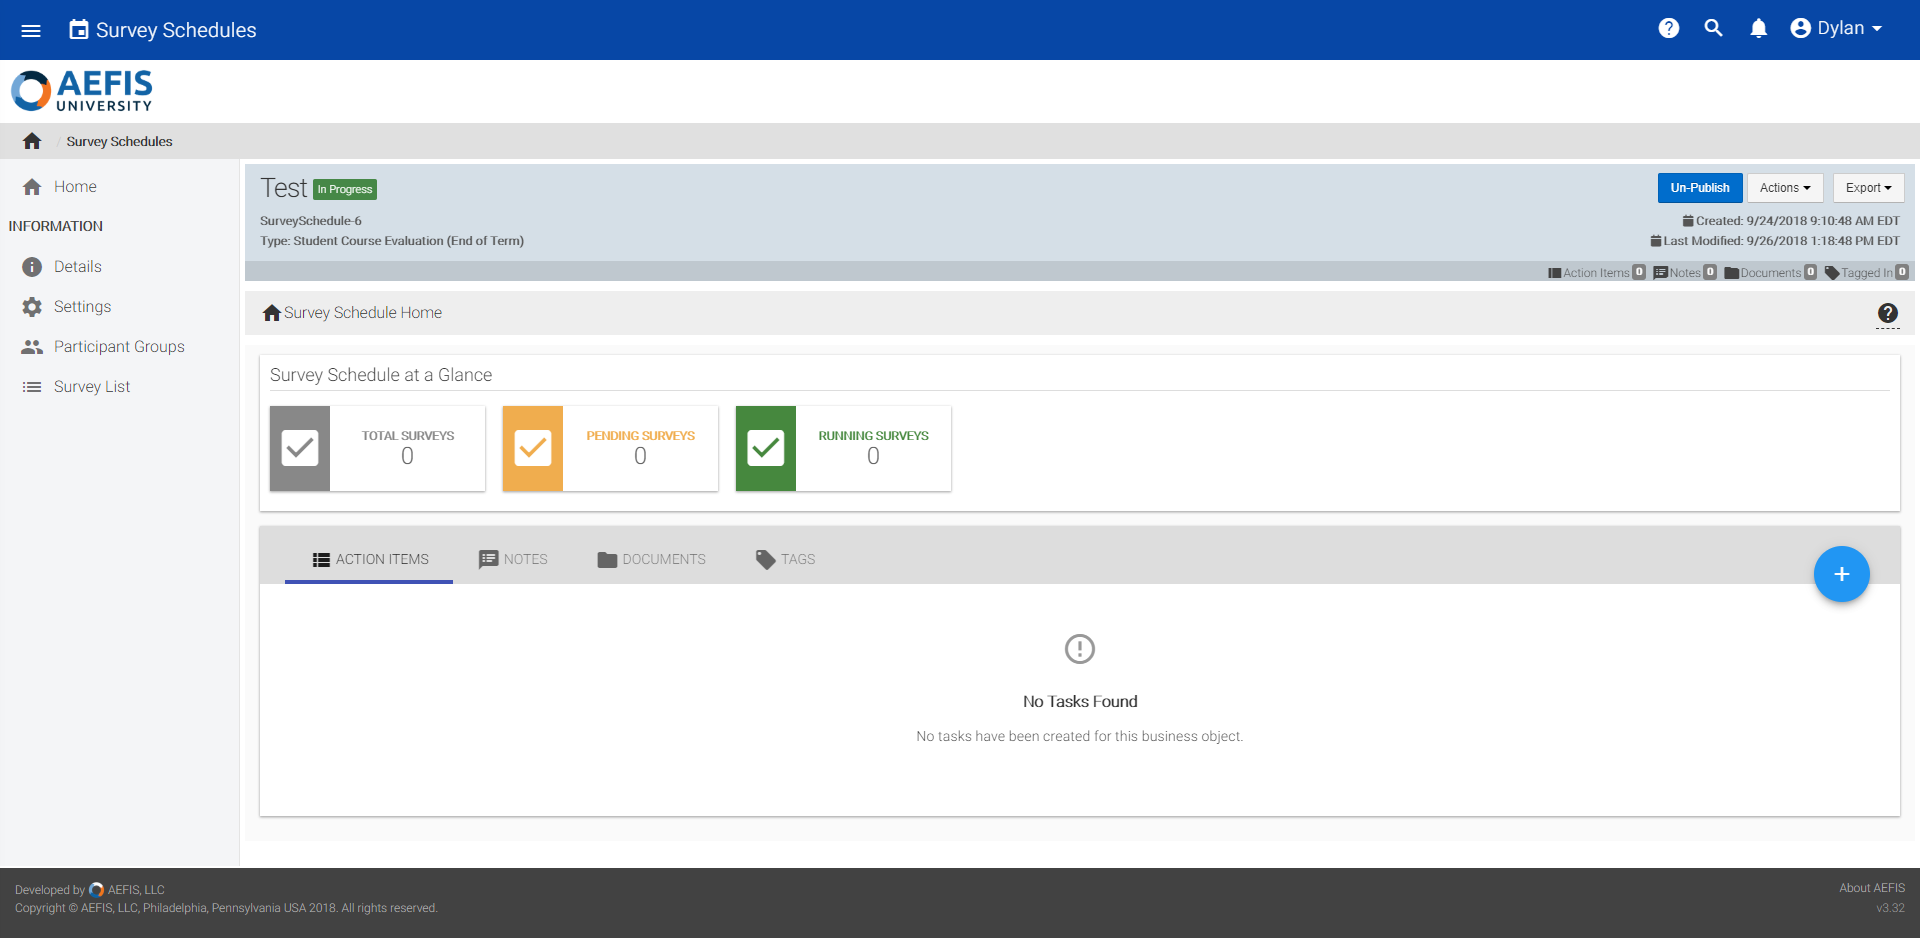
Once you have finished saving your Survey Schedule settings, you should be directed to a new Survey Schedules panel. It should look something like this:
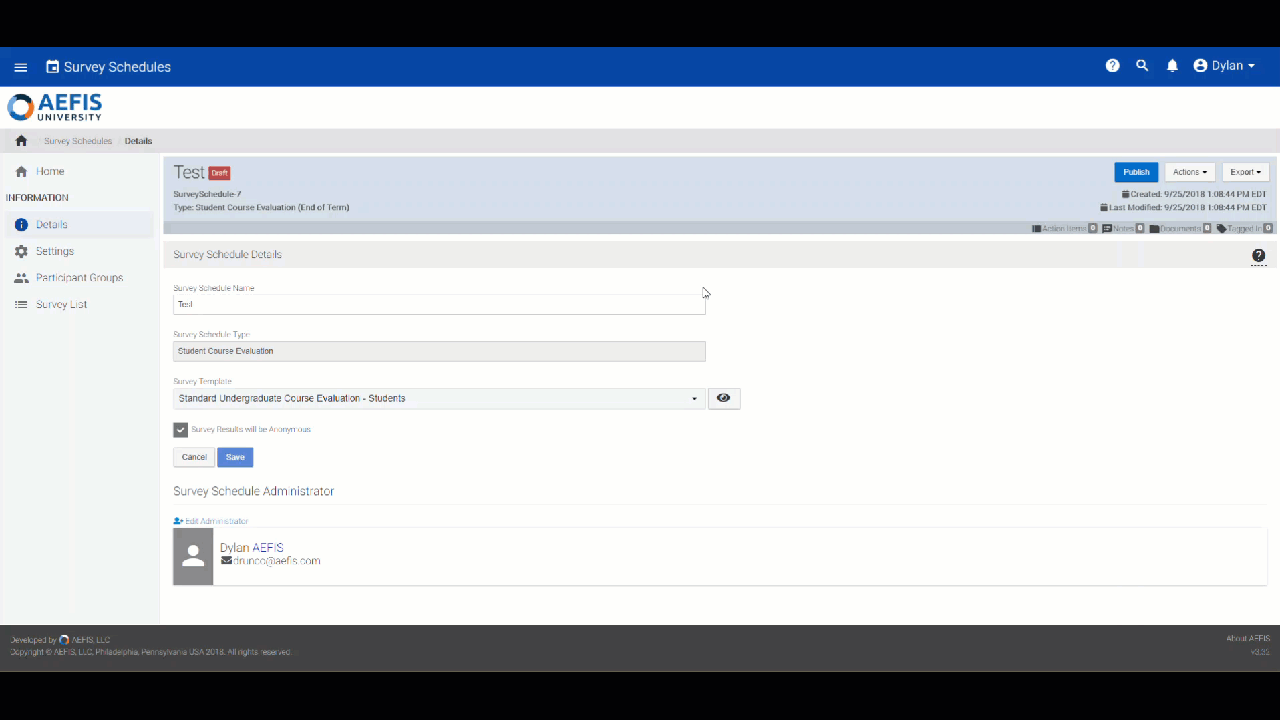
8. The Details Panel
You should see a left-aligned navigation panel called Information:
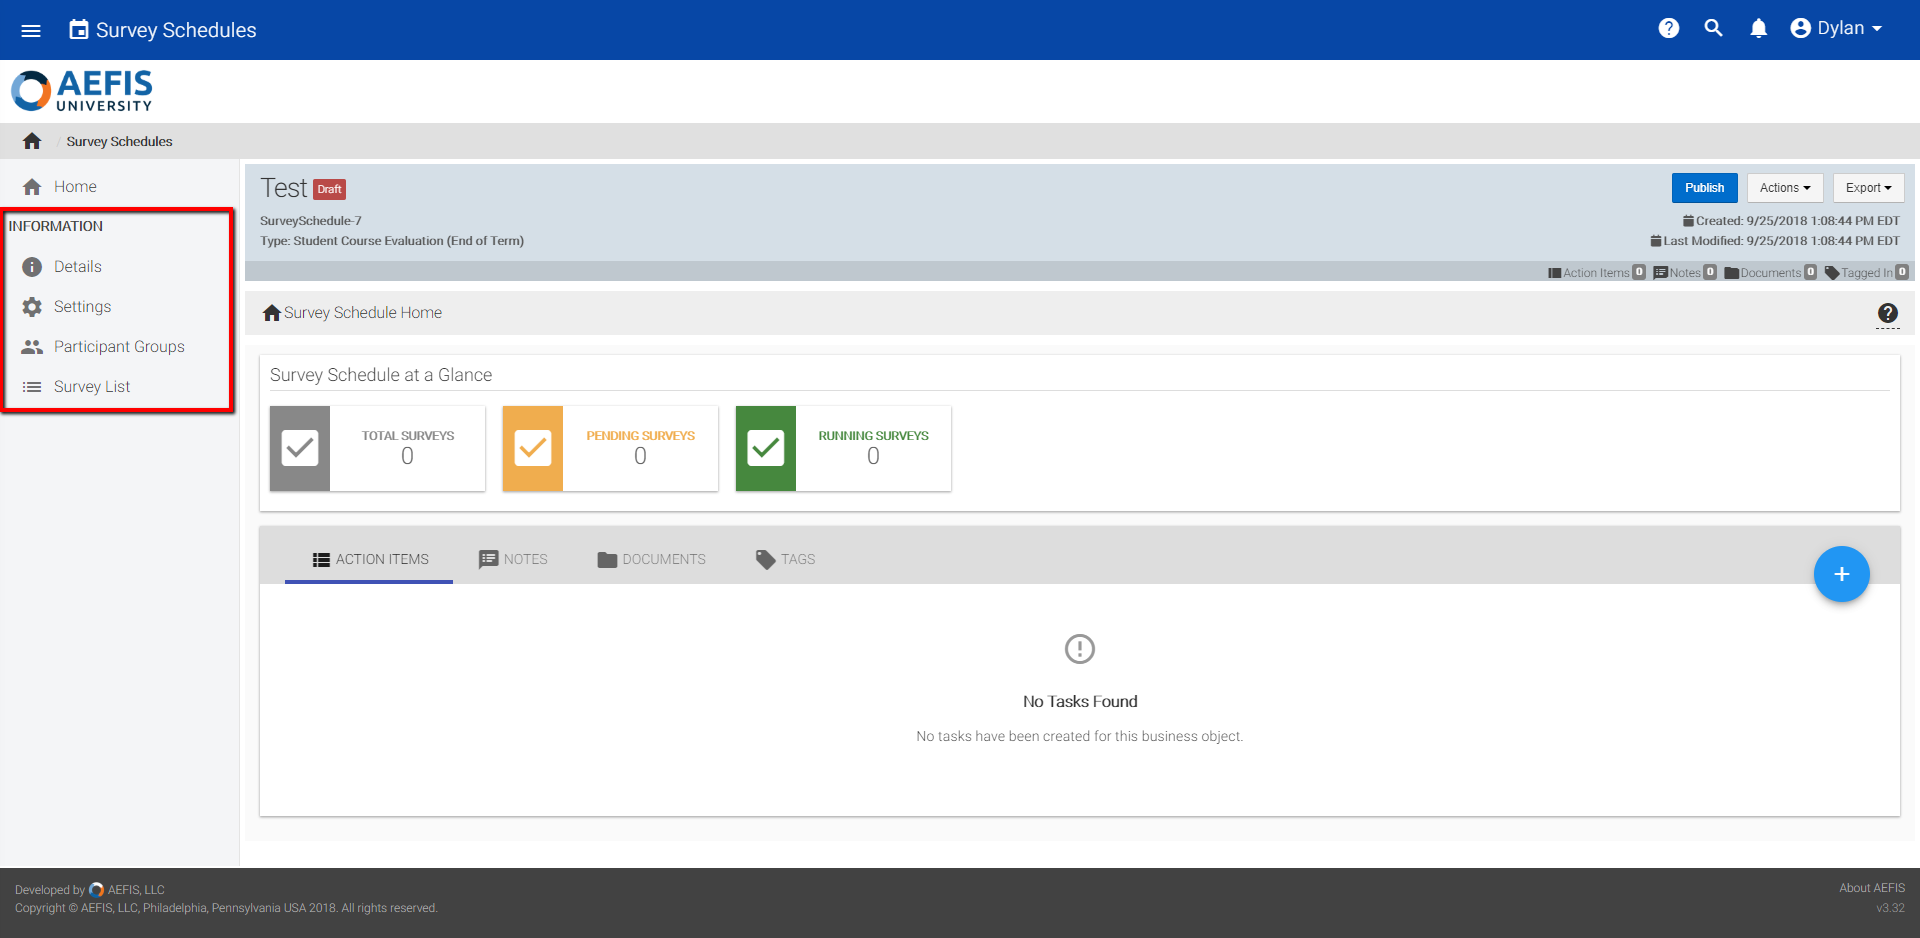
From this navigation, locate the Details section under the Information header.
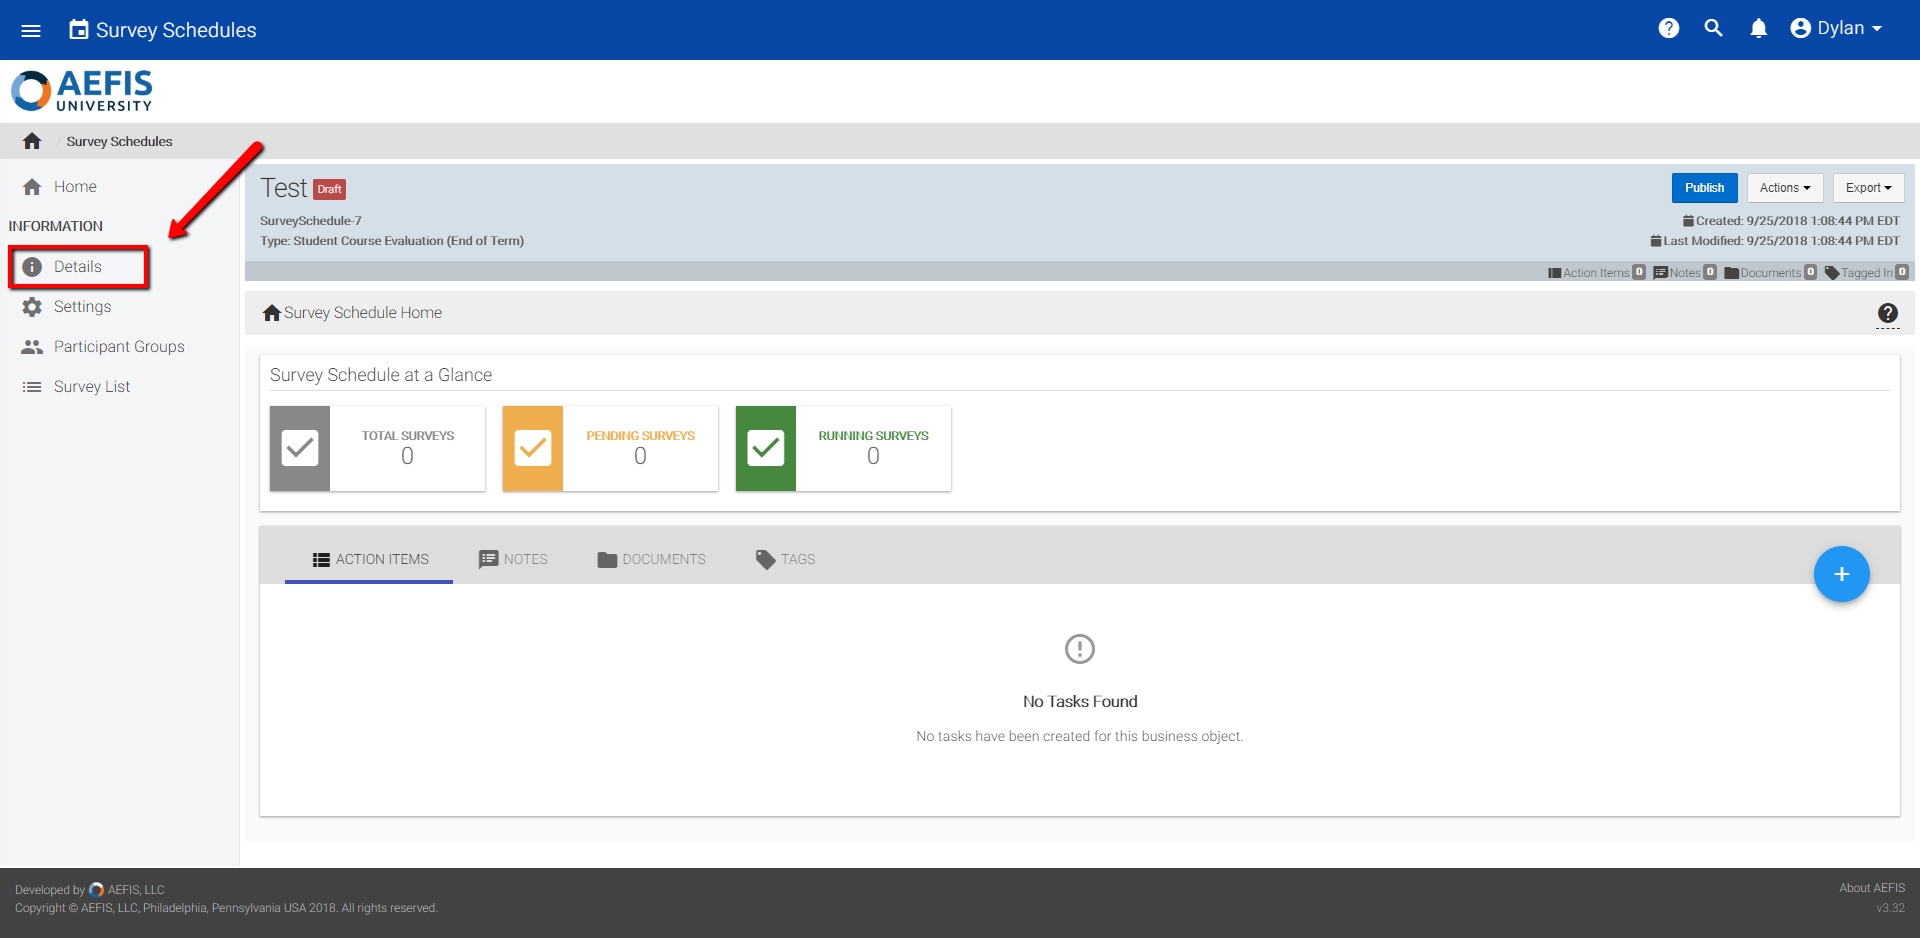
Once you select this option, you should be brought to a new panel:
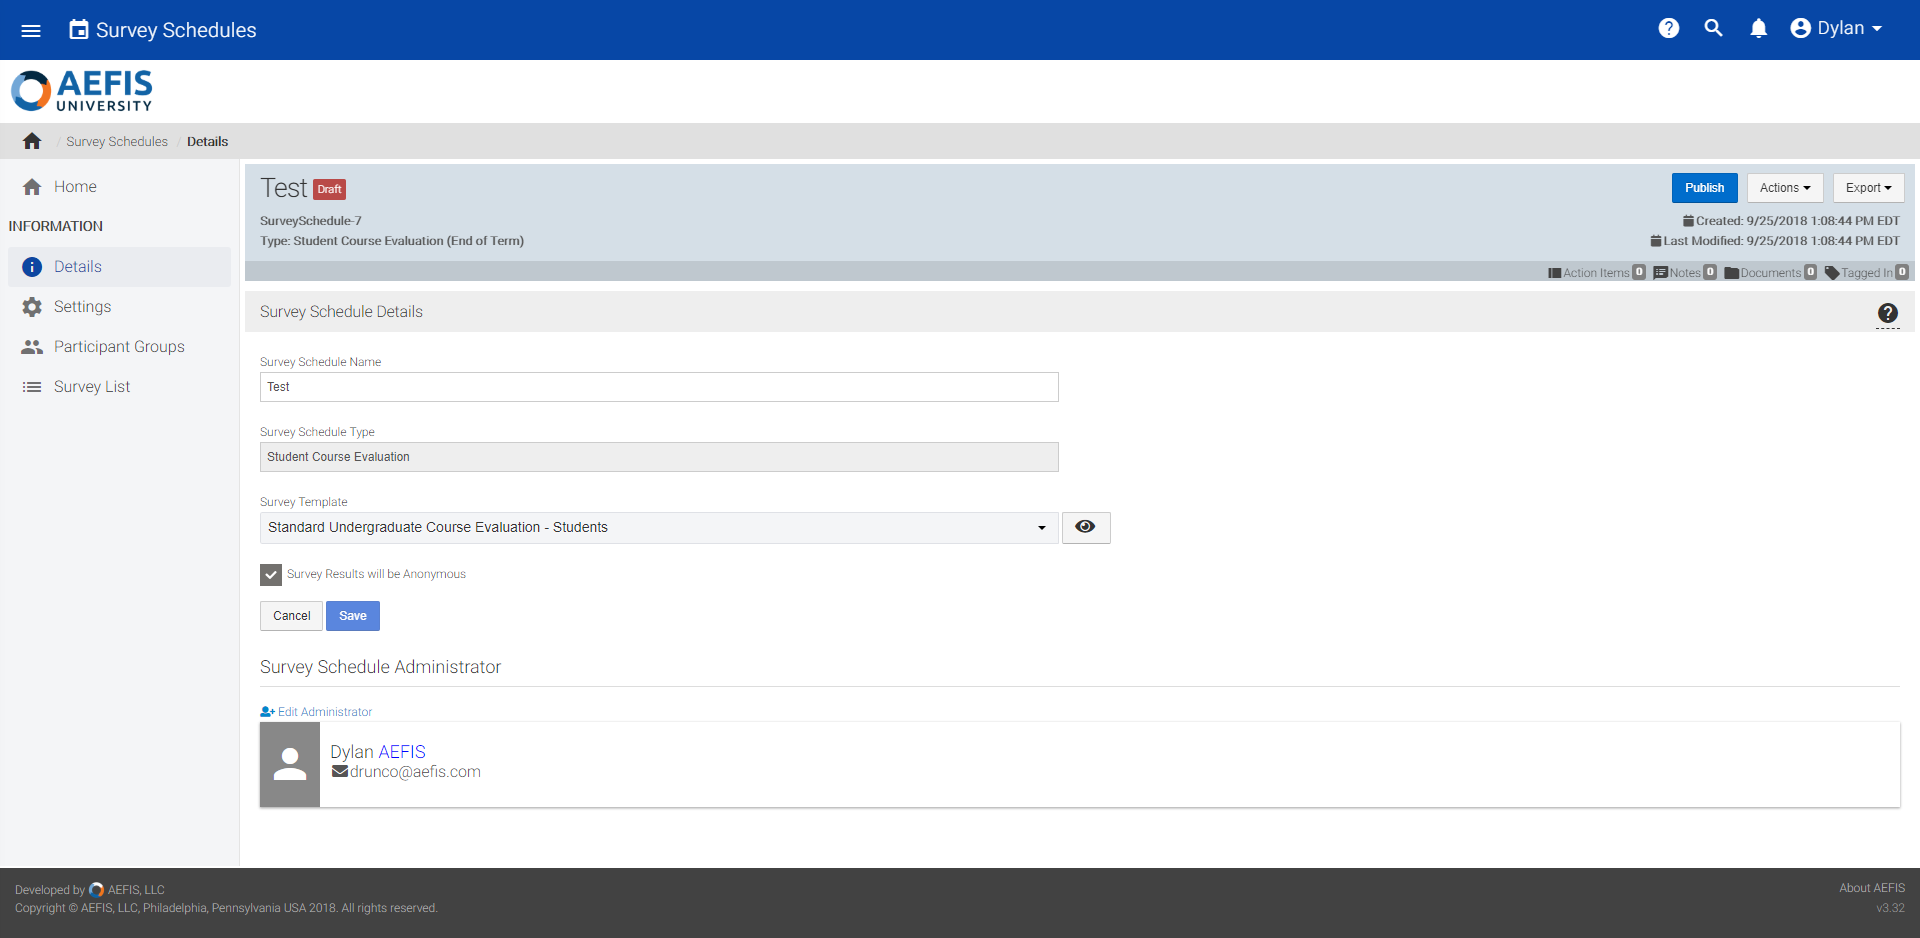
Under the Details panel, you will have the options to edit information associated with your Survey Schedule. At the top of the Details panel, you should see the option to edit the name of the Survey Schedule:

*Note: The Survey Schedule Type option cannot be edited from this panel.
Under the Survey Template section, you can click the drop-down menu, and search for a new Survey Template to link to your Survey Schedule.

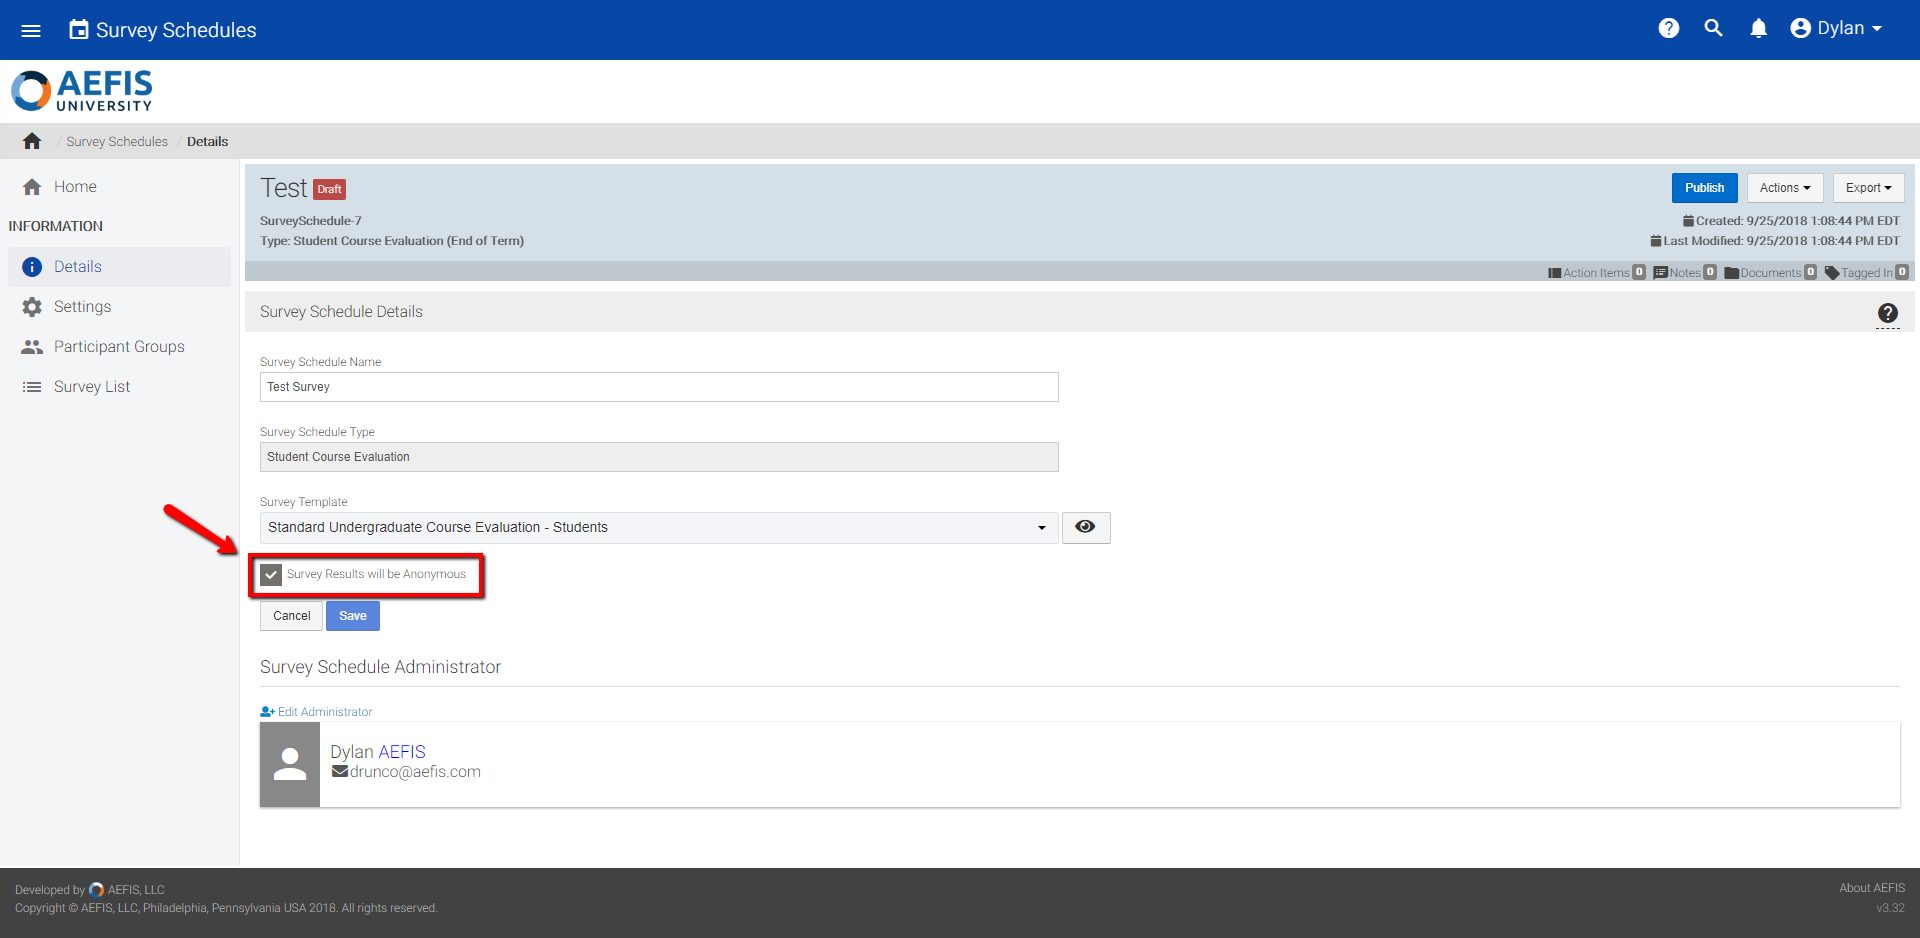
You can also edit the option for the Survey Results to be Anonymous from this panel. You will see a checkbox option near the bottom of this section to change this option:
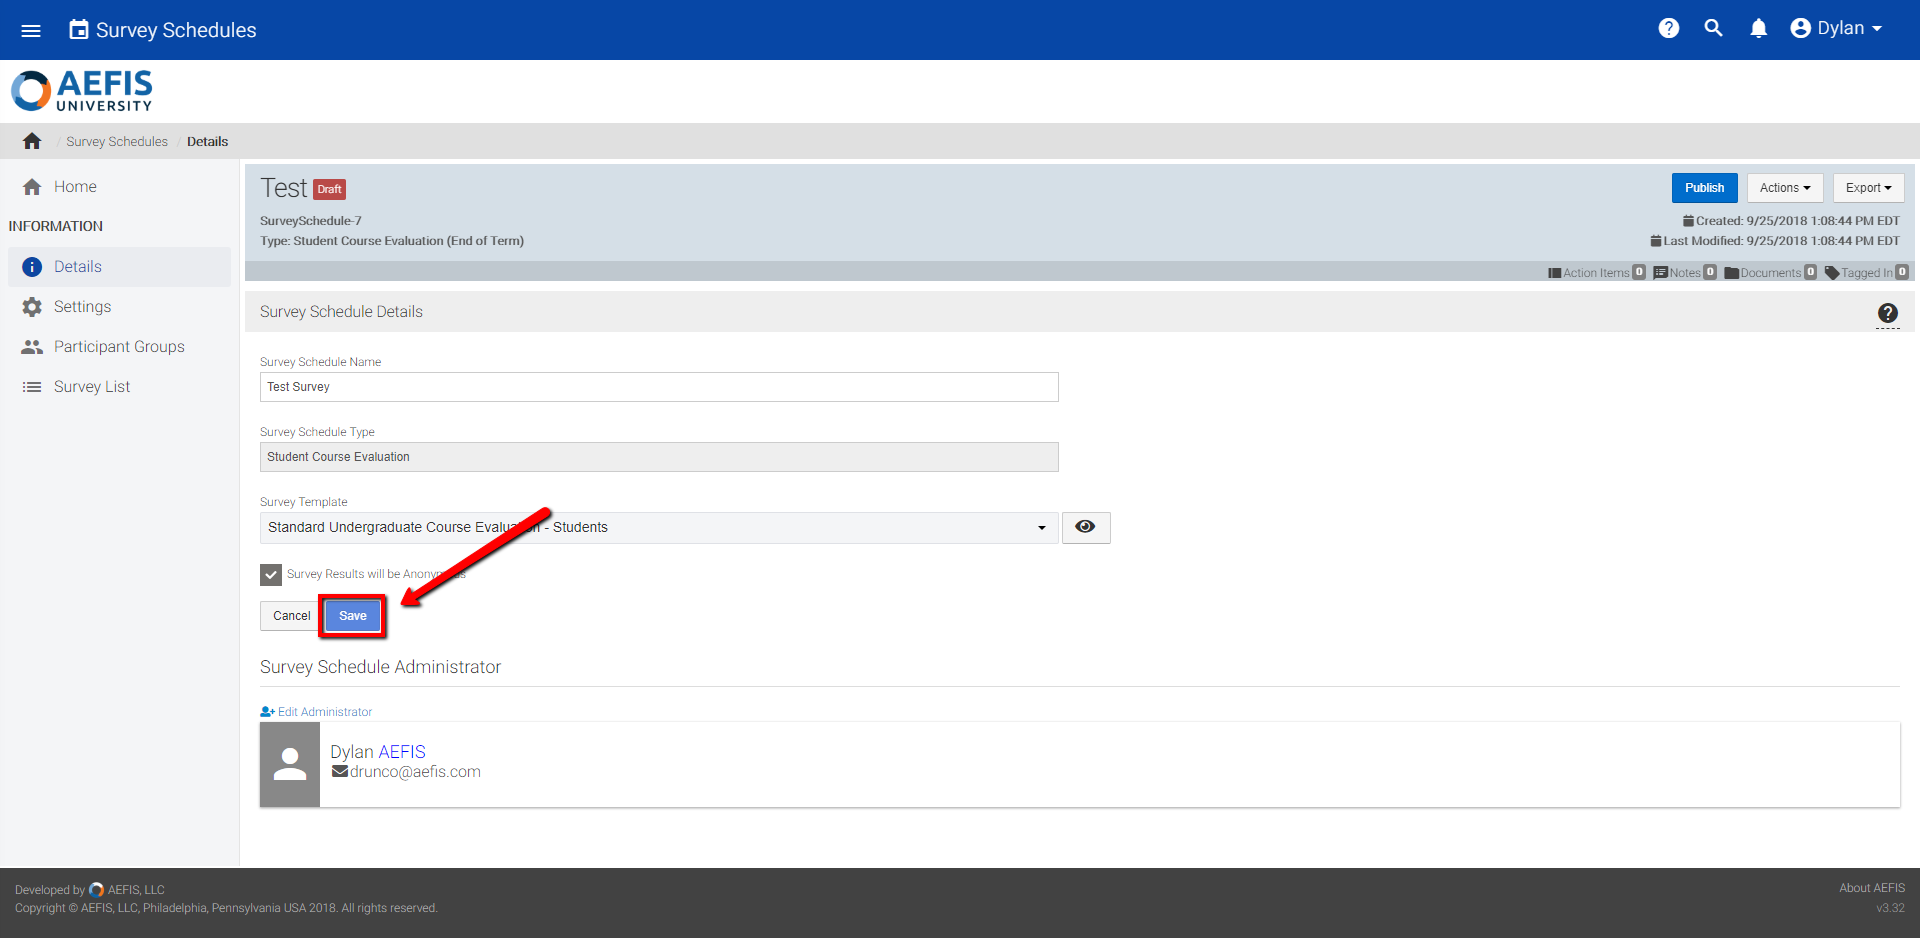
Once you have finished editing this information, select the Save option to publish these changes:
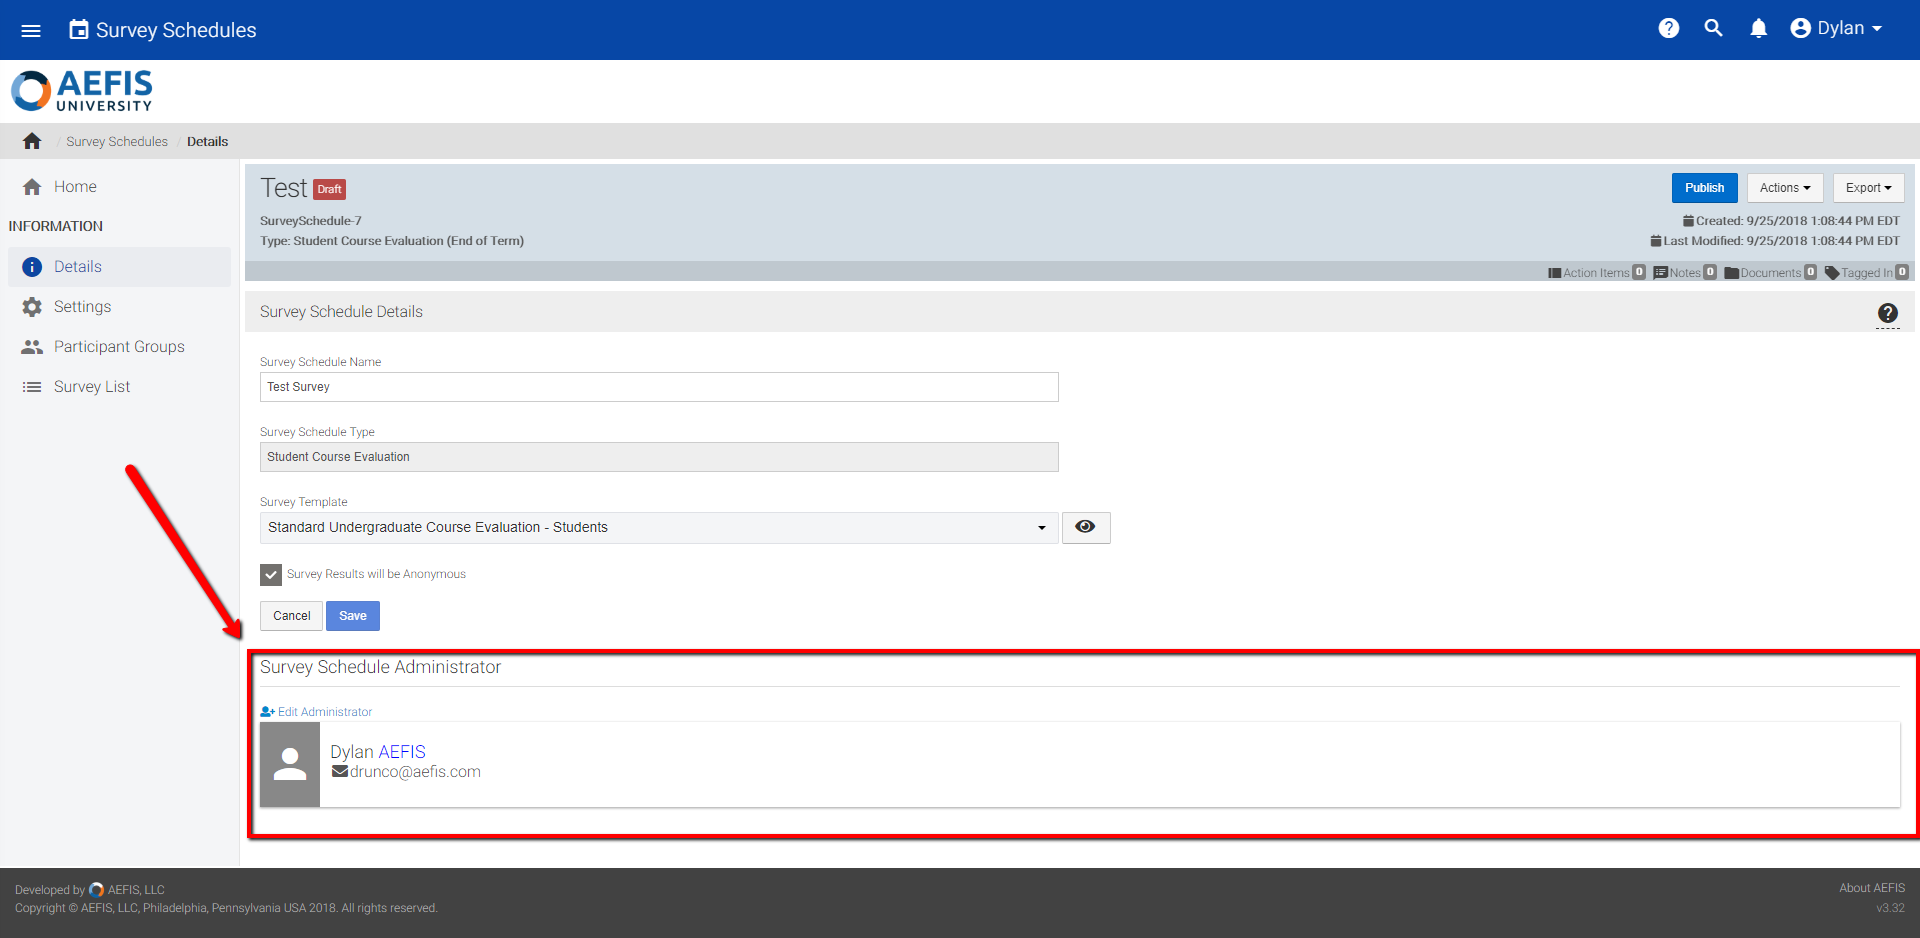
The last section of the Details panel is dedicated to the Survey Schedule Administrator option. From this section, you can edit the Administrator associated with this particular Survey Schedule. To edit the Administrator associated with this Survey Schedule, click the blue Edit Administrator text.
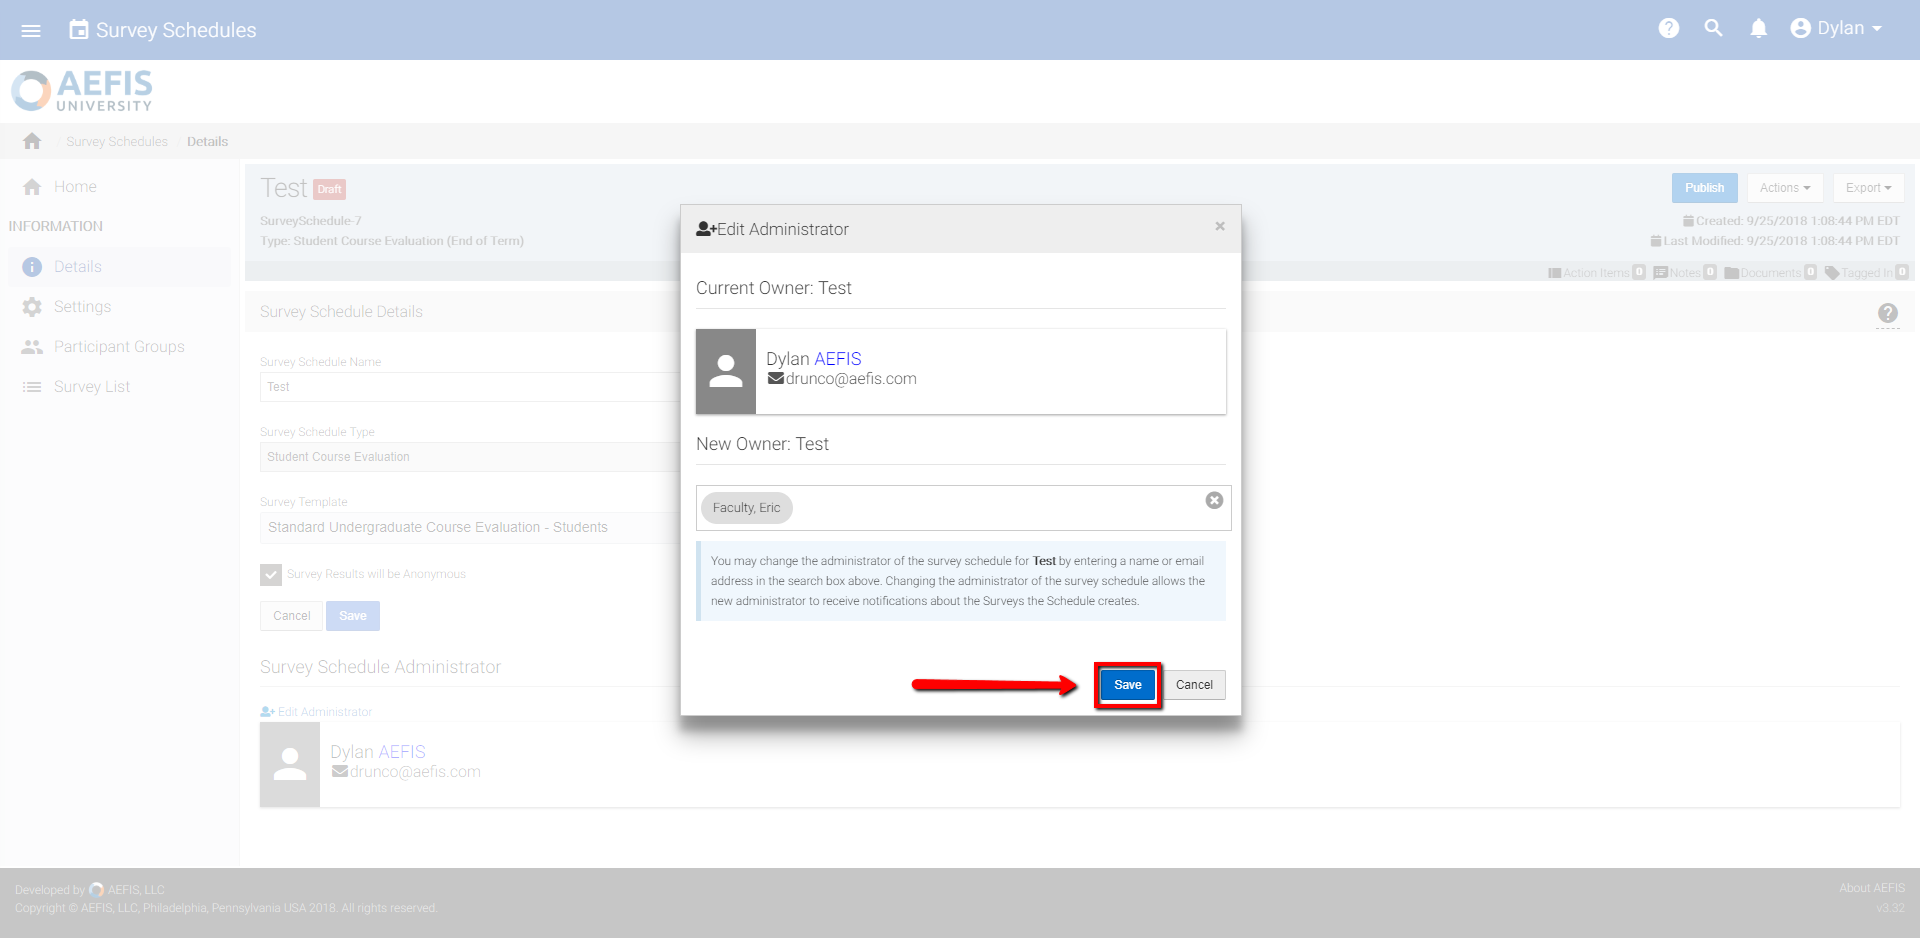
Once you select this option, a new window should pop-up. Under the Current Owner section, you will see the name of the Admin that is currently associated with this Survey Schedule. Near the bottom of this pop-up window you will see a box where you can search for a new user:

Once you have found the new user to add as the Survey Schedule’s admin, click the save option in the bottom right corner of the Edit Administrator window.
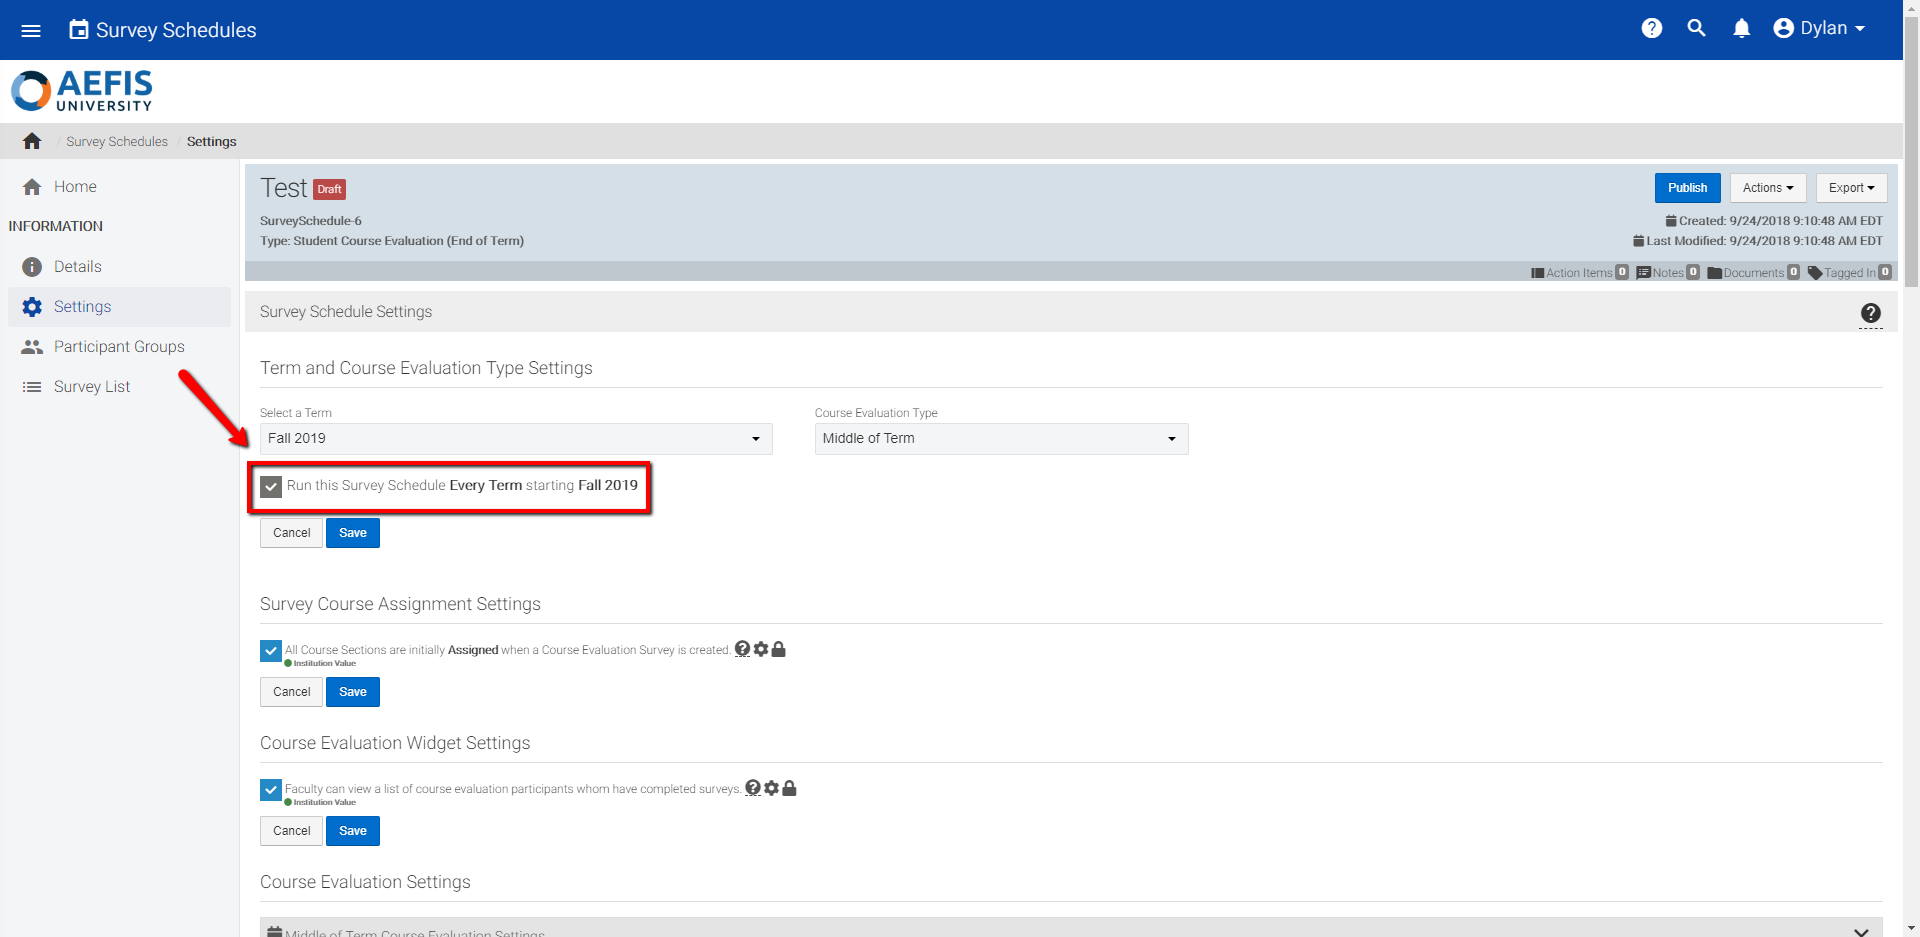
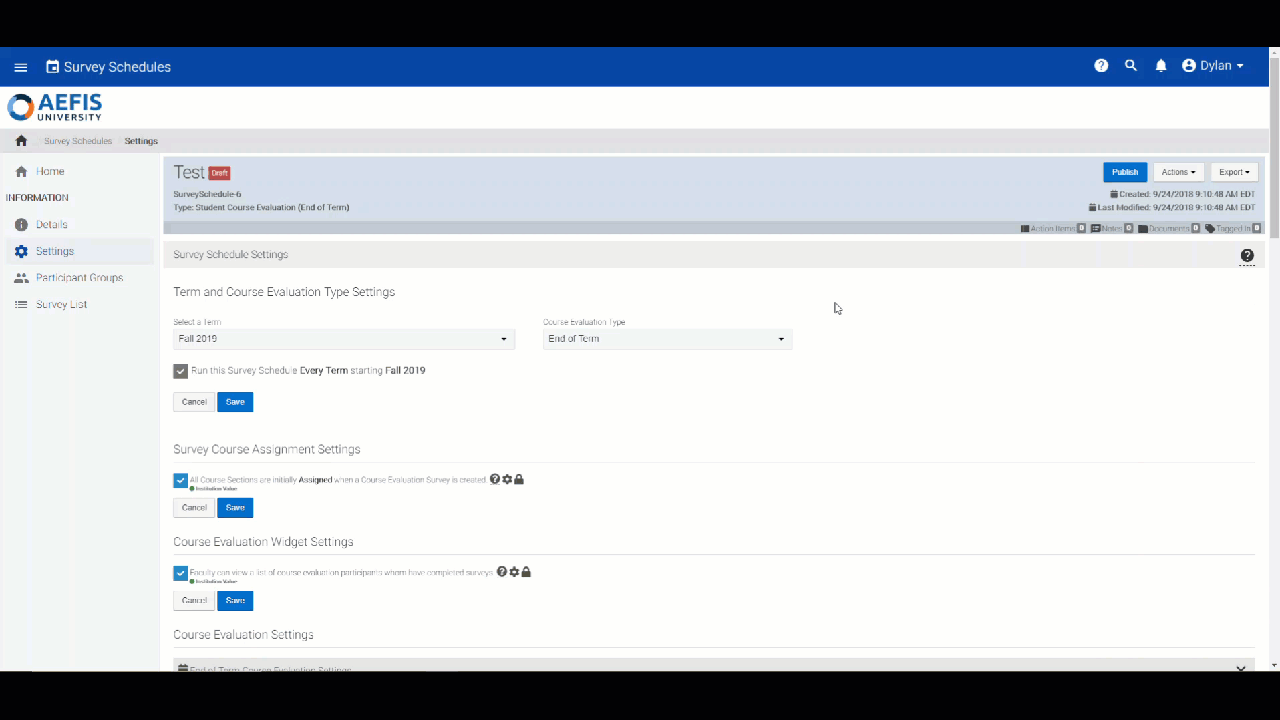
9. The Settings Panel
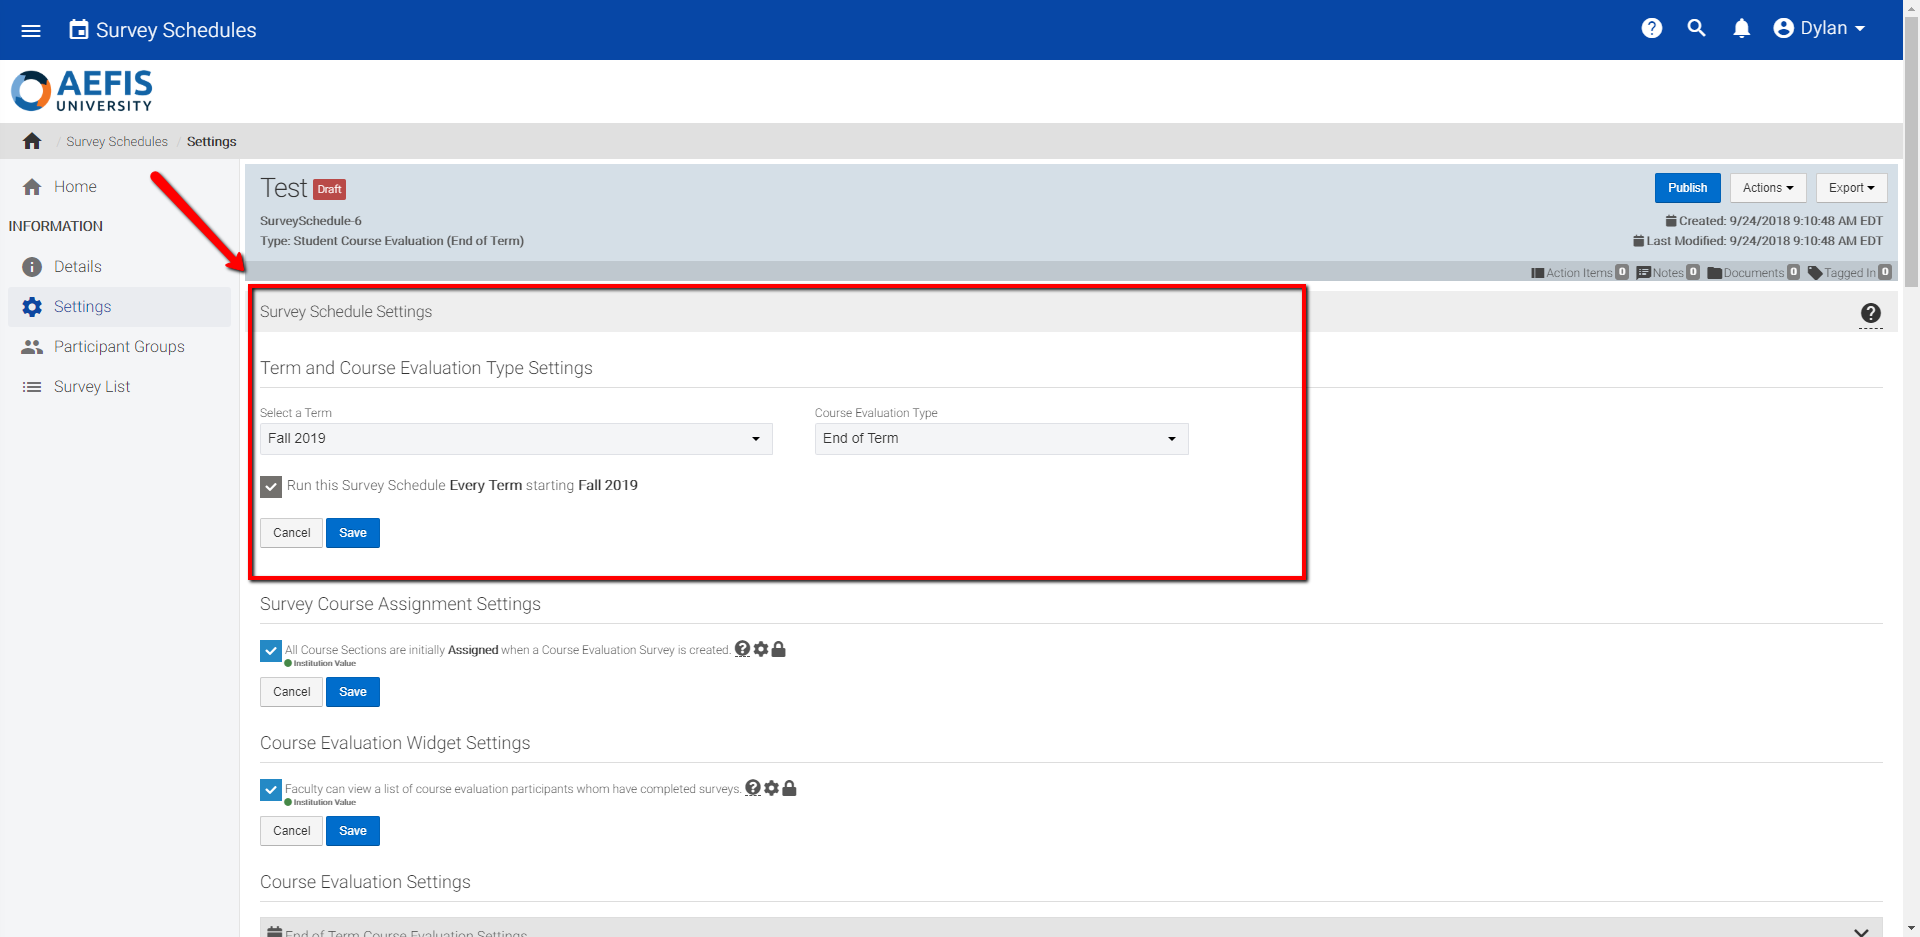
Under the Survey Schedule Settings, you will first see a section to edit the Term and Course Evaluation Type Settings associated with the Survey Schedule.
You can search for a new Term from the “Select a Term” drop-down.
Under this section, you will also see the option to edit the Course Evaluation Type from the associated drop down near the top right of the Settings panel.
Finally, the last option under this section is to edit whether or not the Survey Schedule runs every term. You should see the checkbox option at the bottom of this section.
In the following section of Settings Panel, you will see the Survey Course Assignment Settings section. From here, you can choose whether all of the Course Sections are initially Assigned when a Course Evaluation Survey is created.
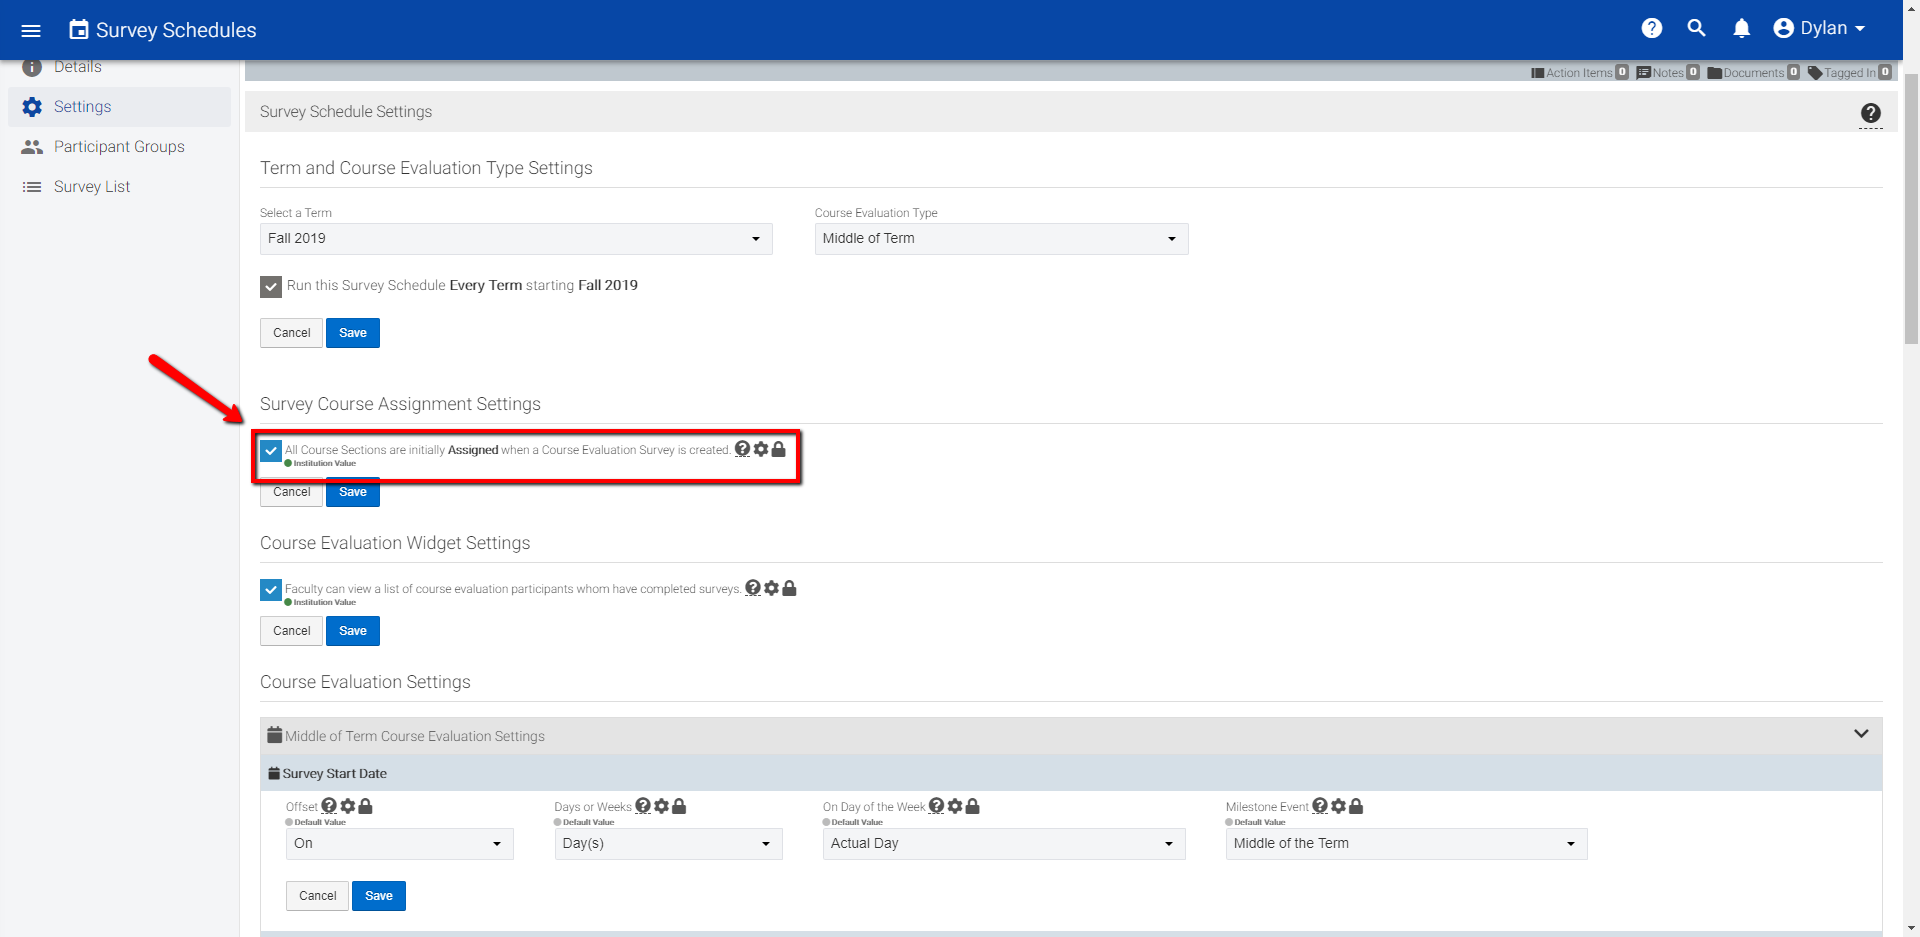
With this option selected, all courses linked to the Survey Schedule under the Participants panel are automatically assigned to this particular Survey Schedule. If you wish to individually assign each course to the Survey Schedule, de-select this option.
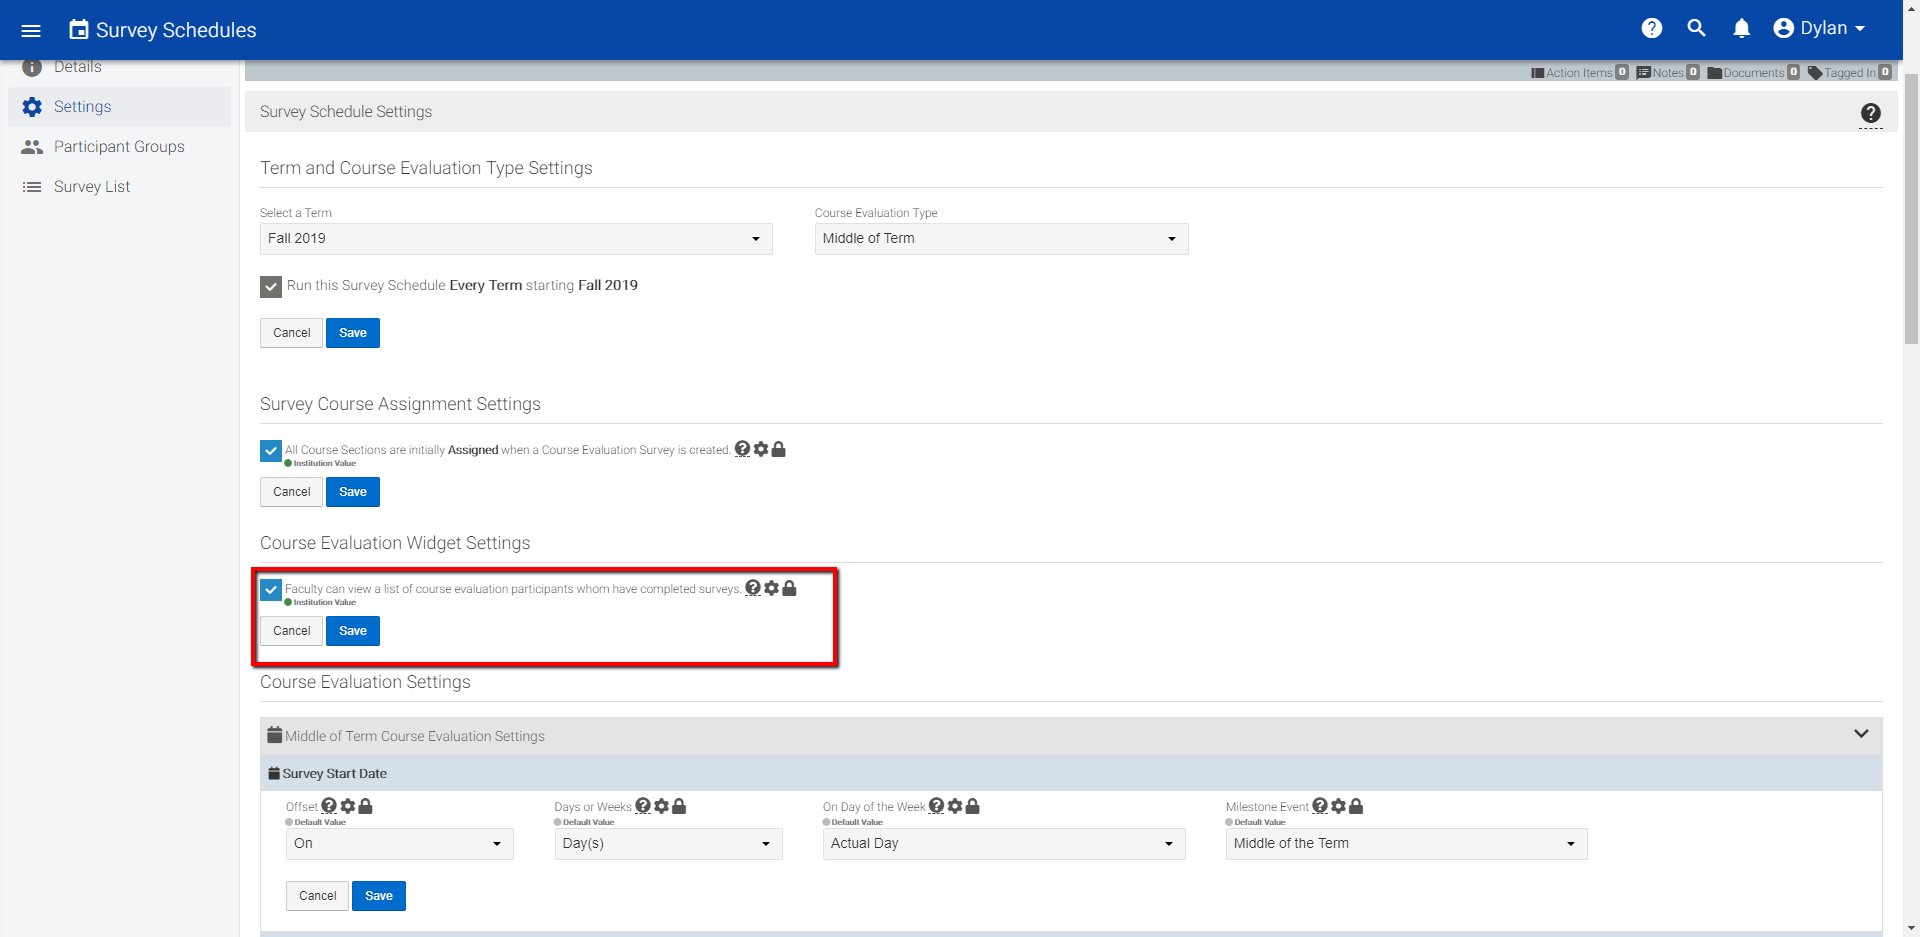
Under Course Evaluation Widget Settings, you have the option to decide whether or not Faculty can view a list of course evaluation participants who have completed the survey. Select the drop-down panel to view options (Do Not Allow, In Progress, or Pending Results)
To edit the start and end times for your Survey schedule, navigate to the Course Evaluation Settings section. From here you will see options for both the Survey Start and End date.
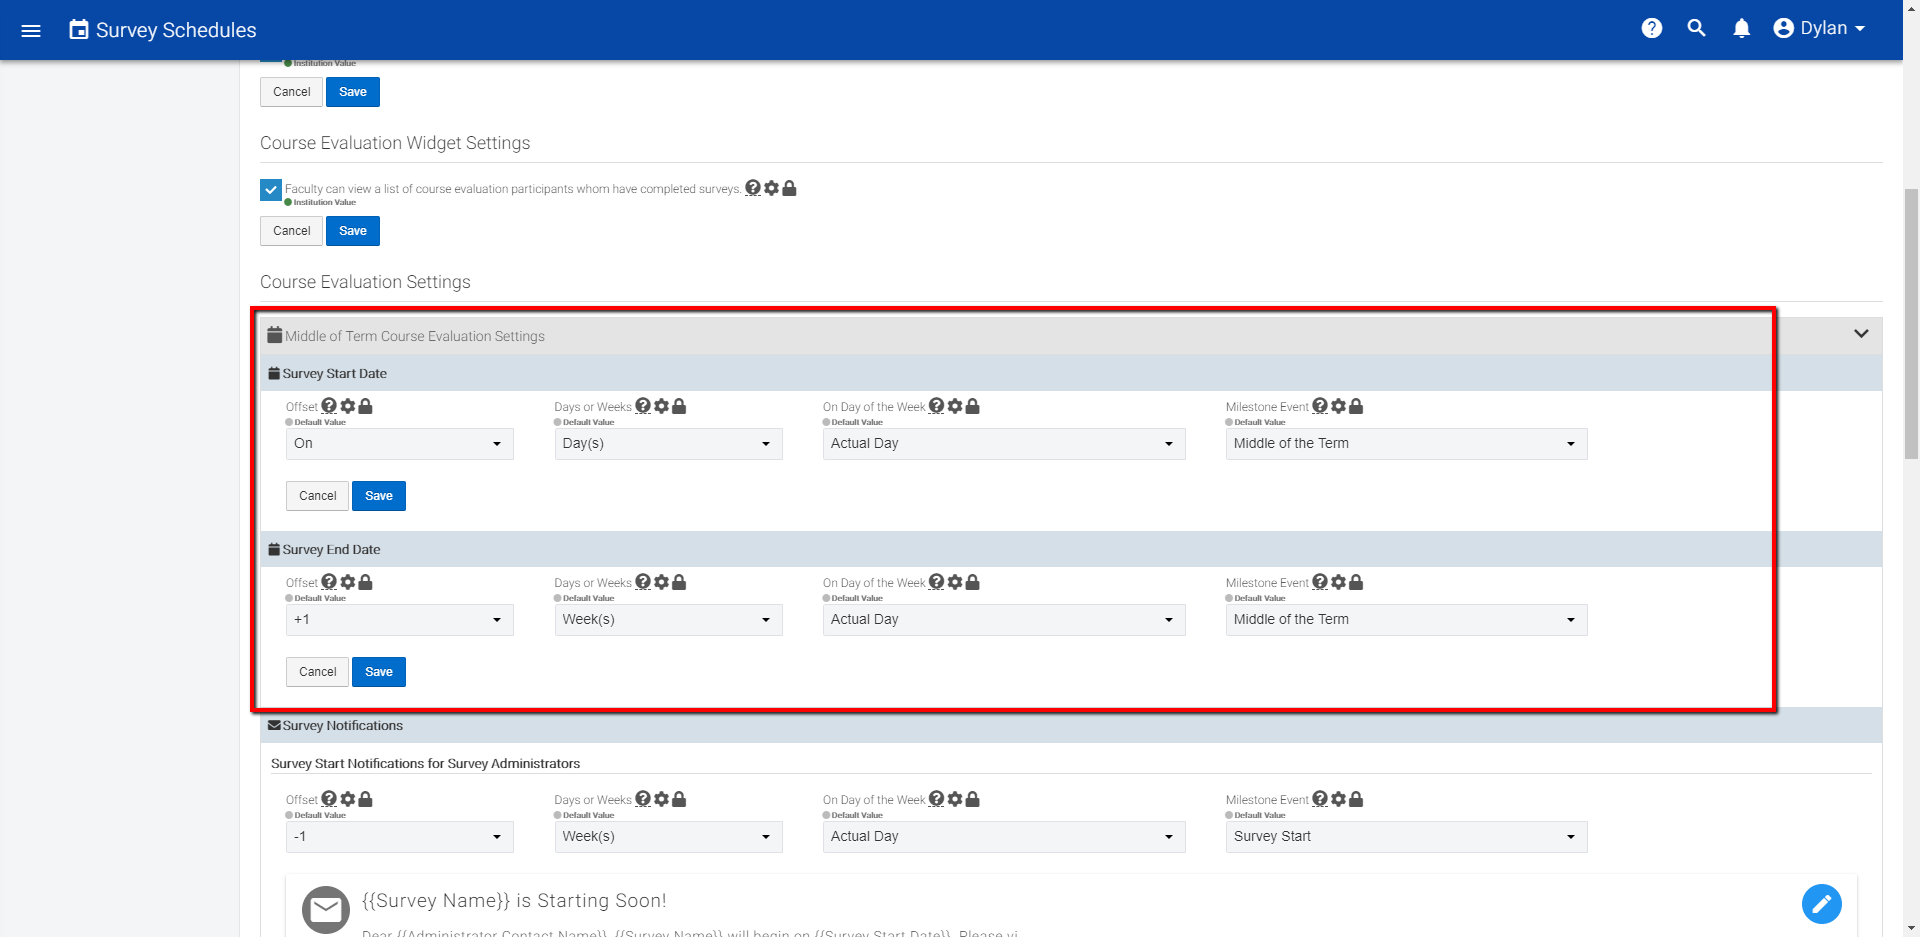
Under these sections, you can edit the following information from the associated drop-down menu:
Offset –
Days or Weeks
On Day of the Week – The day the survey starts or ends.
Milestone Event –
If you would like to edit the information associated with the Notifications that are sent out with your Survey Schedule, navigate to the Survey Notifications option. You will see two options here, an option to edit the Survey Notification for Administrators and Faculty, respectively.
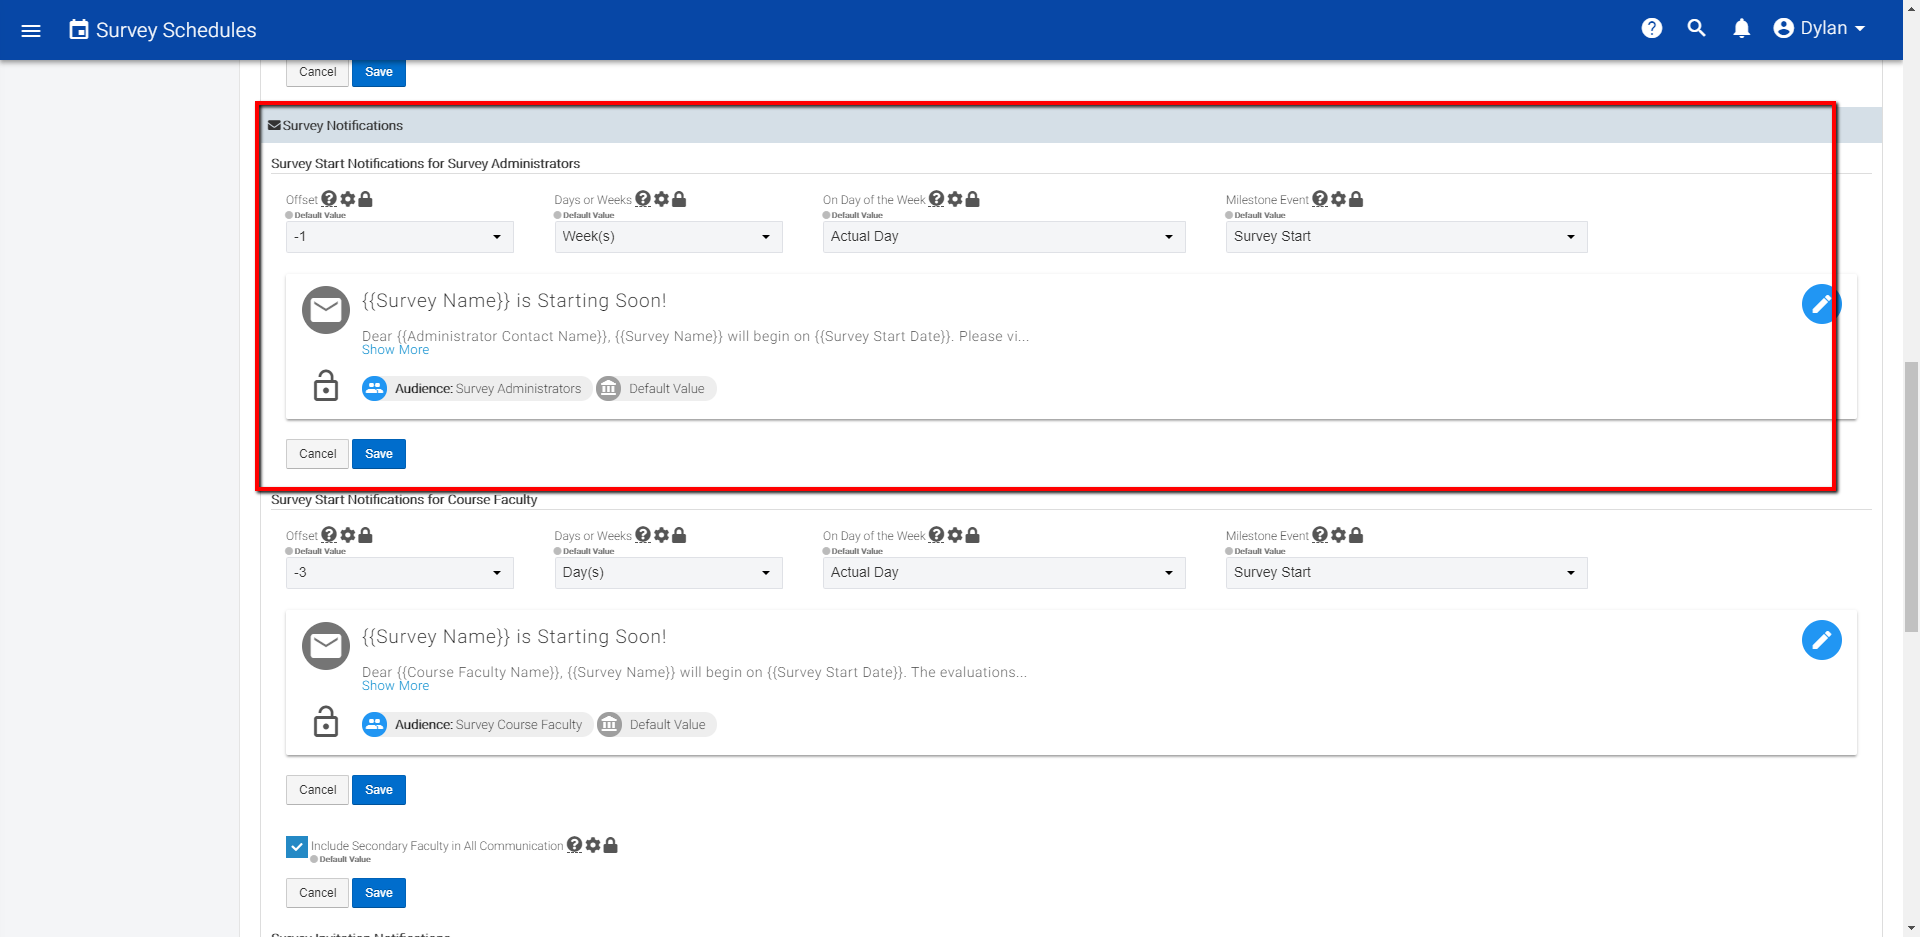
To edit the message associated with your notification, click on the blue pencil icon that appears to the right of the Notification section:
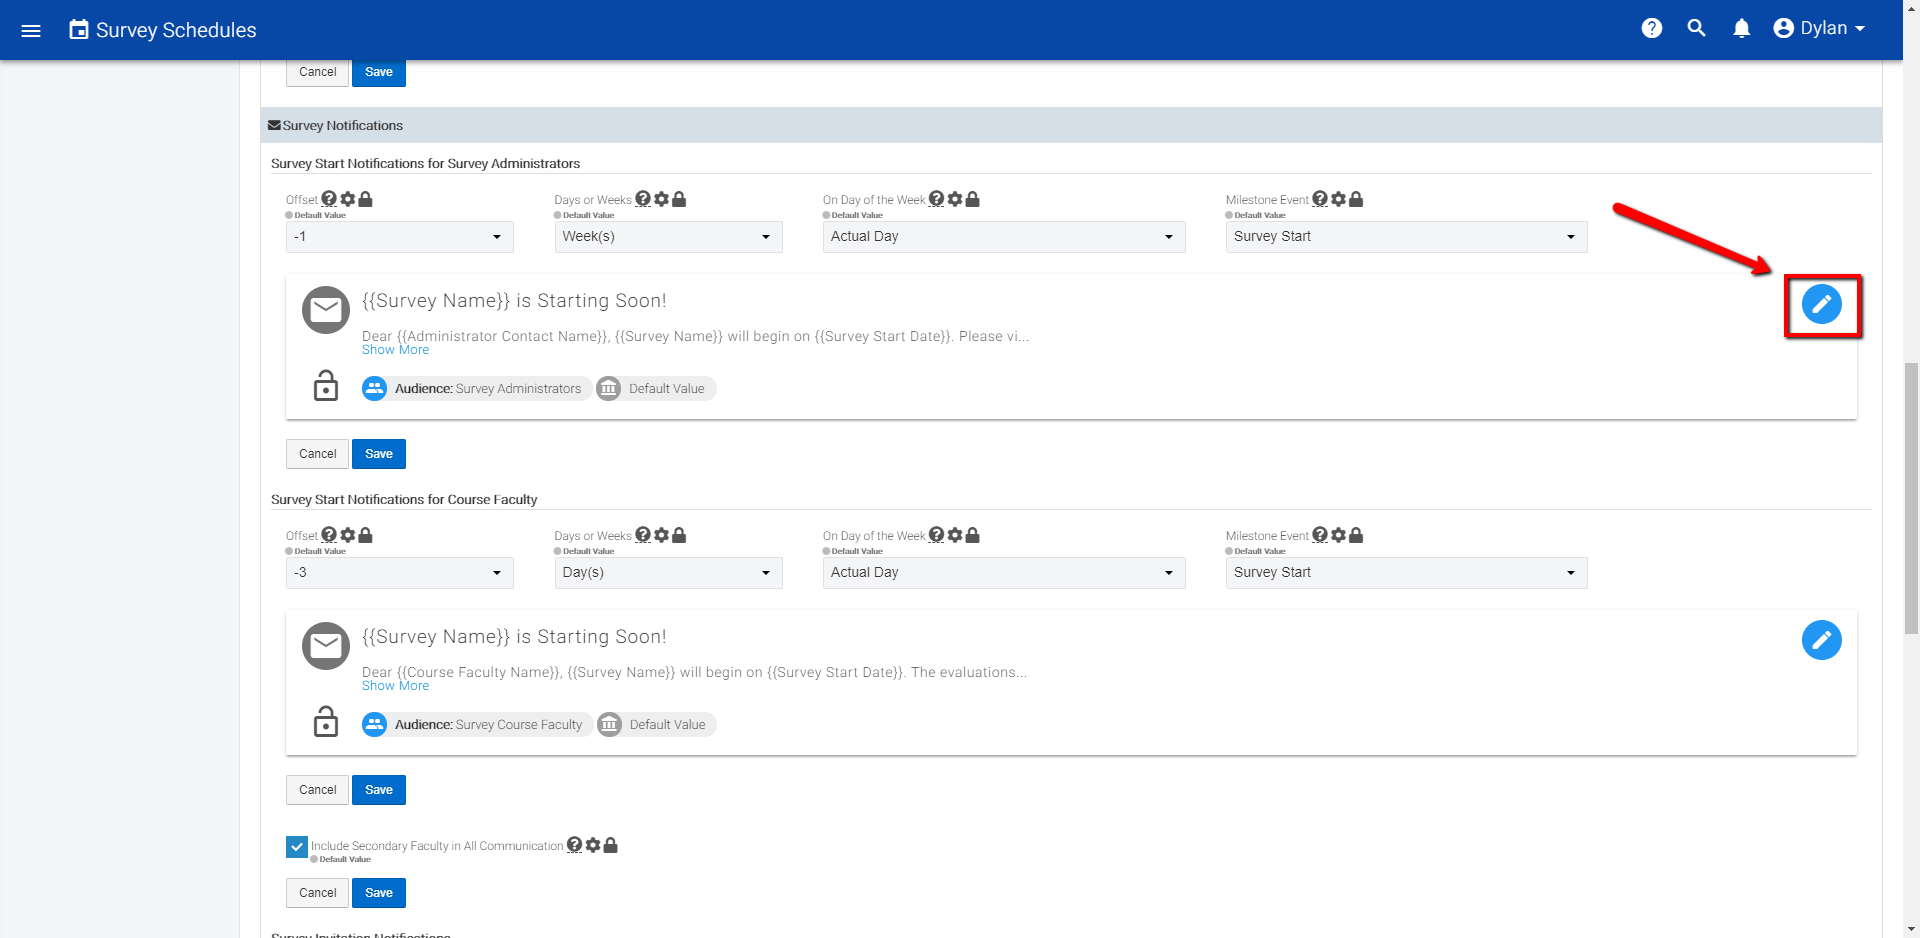
Once you have made this selection, a new pop-up window should appear.
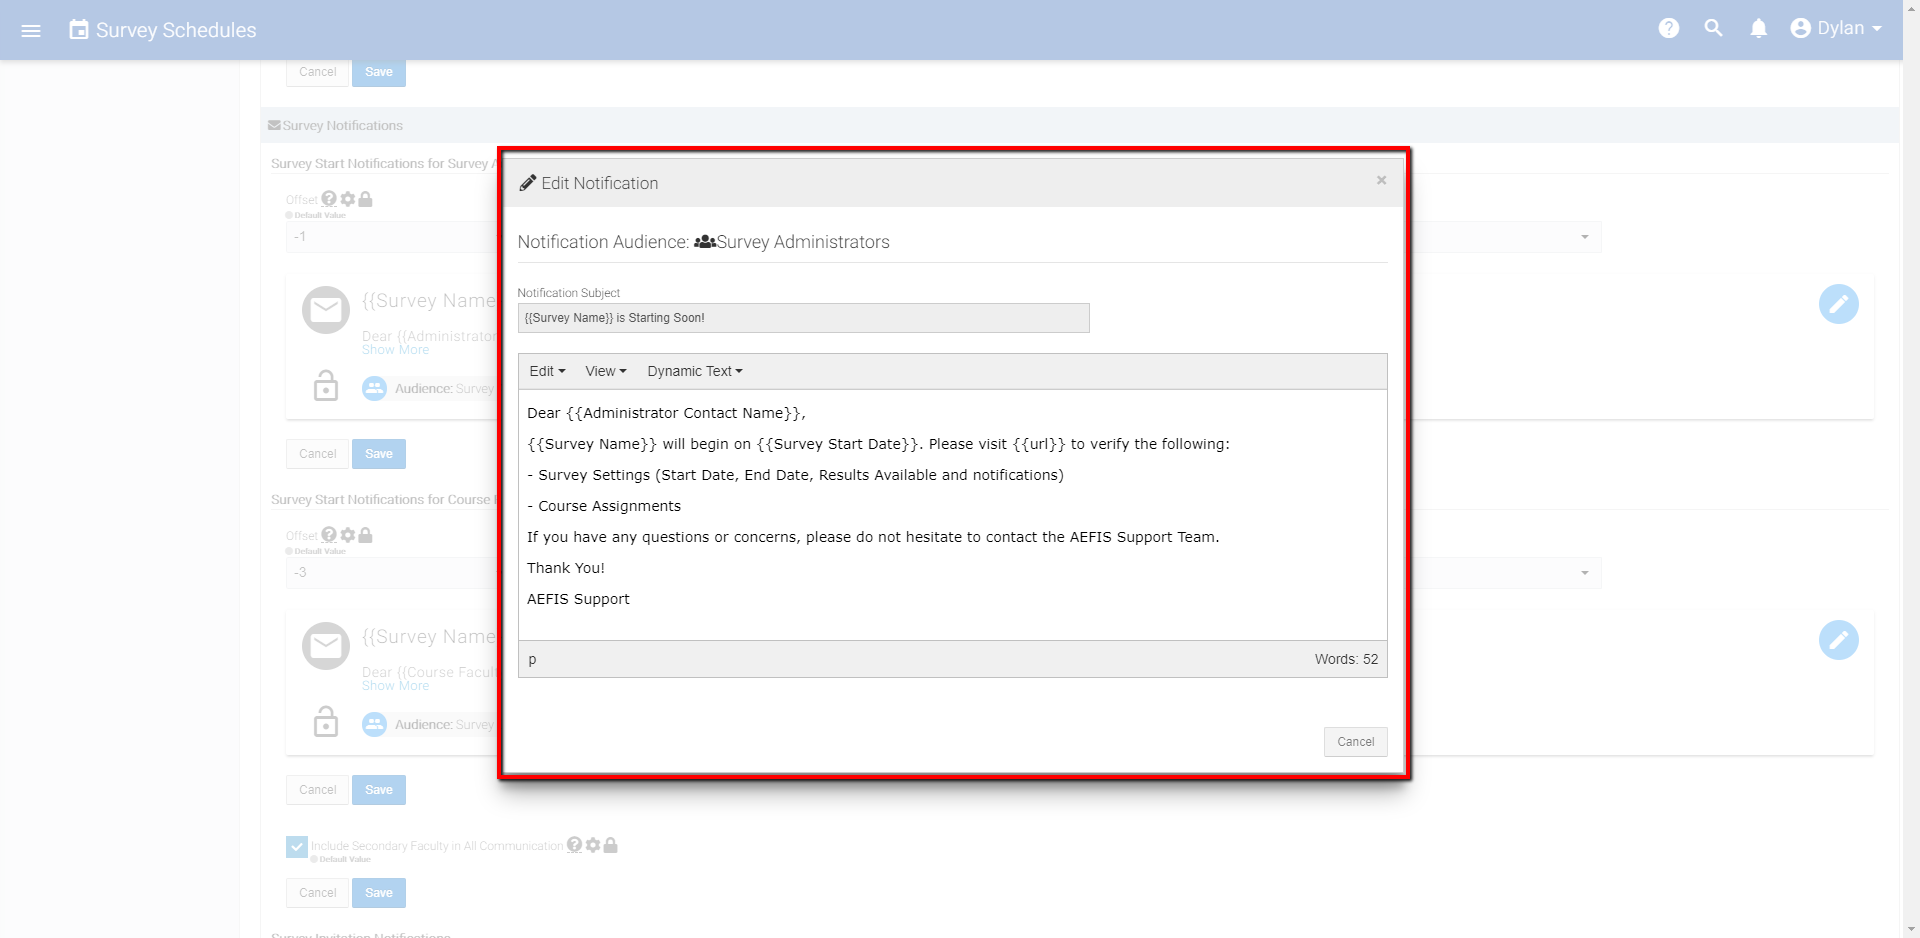
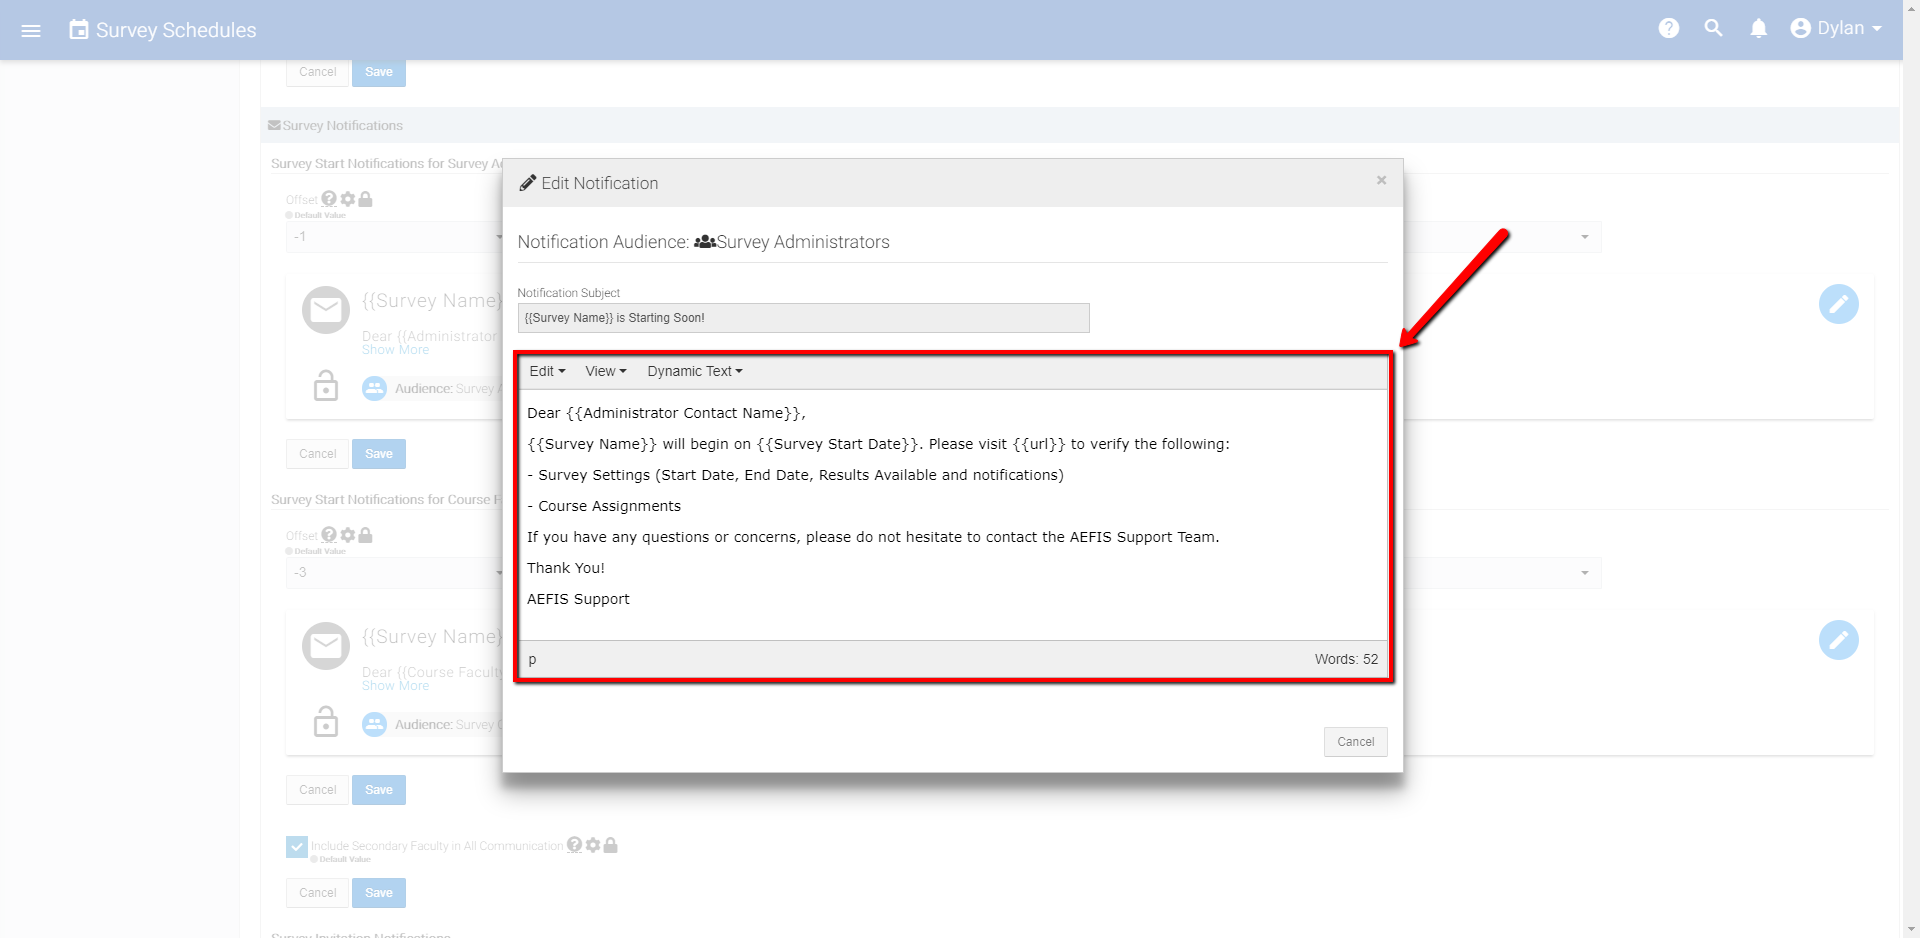
To edit the body message of the Notification, edit the text directly in the Edit window
To save these changes, select the Save button at the bottom of this section
Next, you will see a checkbox option to include Secondary Faculty
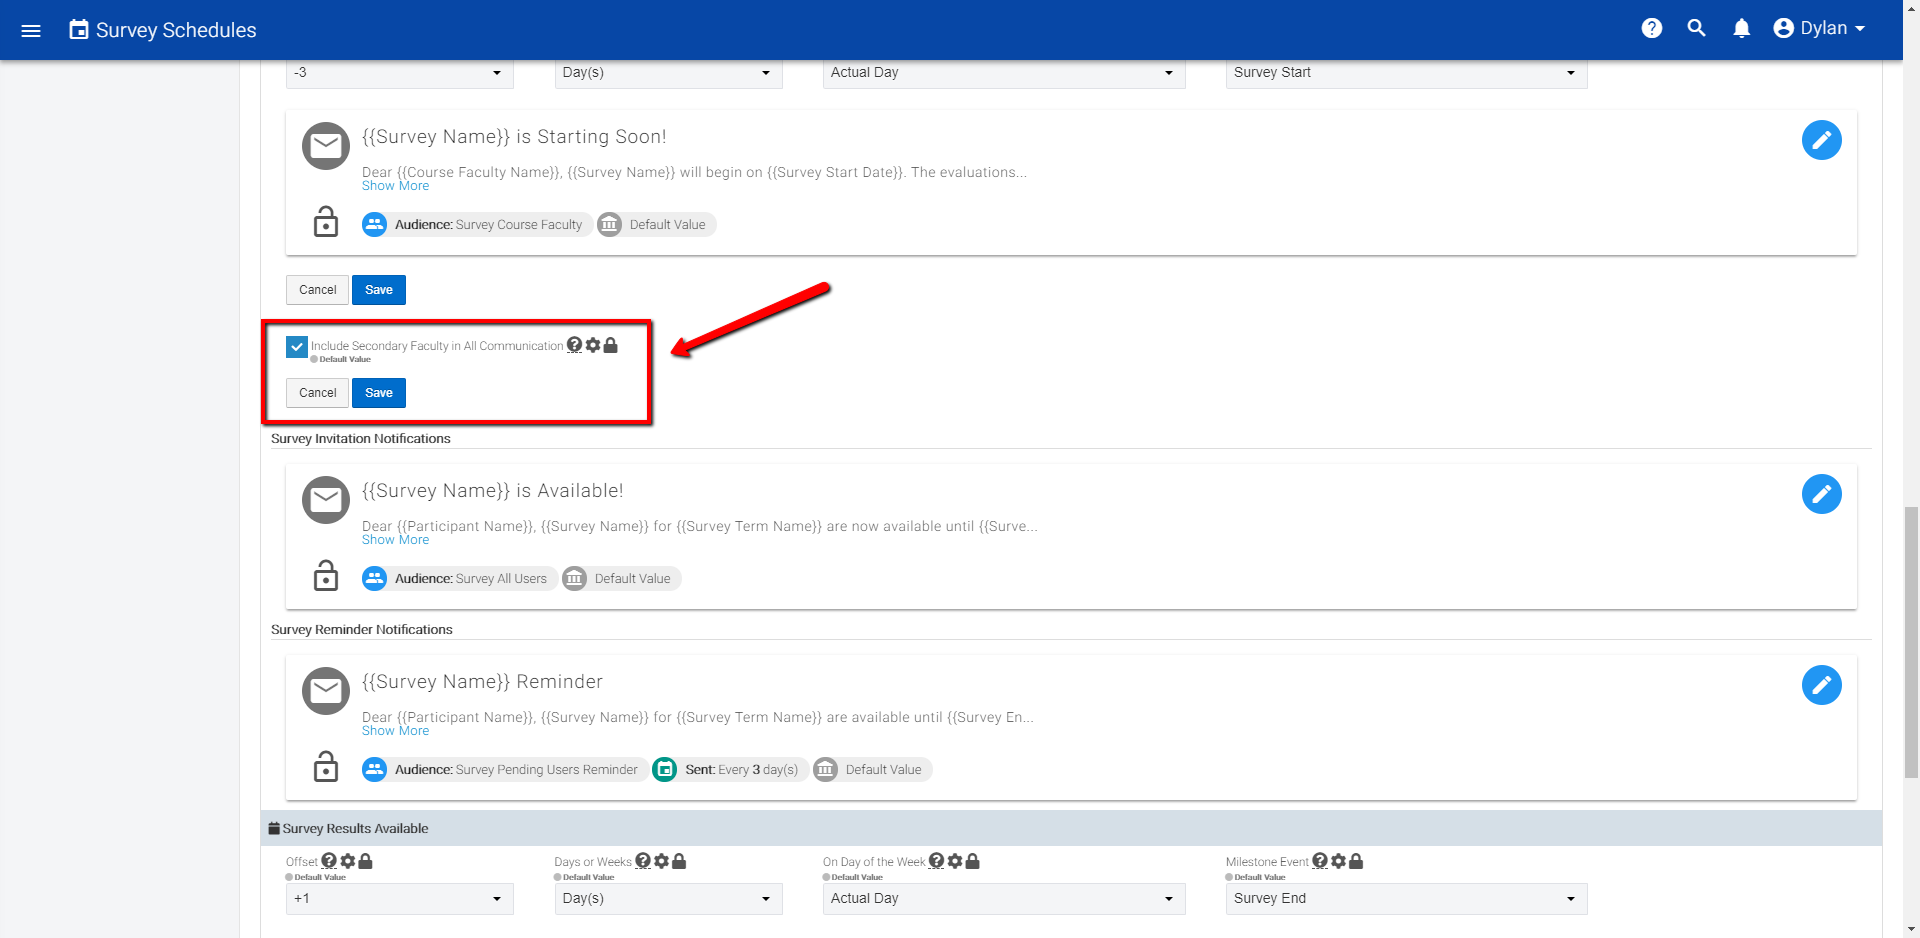
Once you have made a selection, click the save button at the end of this section.
To edit the Survey Invitation Notification email, which is sent out to all Survey Users, click the blue pencil icon to the right of this section. A pop-up window should appear that allows you to edit the text of the notification

The same content can be edited for the Survey Reminder Notifications in the following section.
10. Participant Groups
Under the Participant Groups panel, you can add or remove participants from your current Survey Schedule. You will see that the panel is split into two sections, Include Groups and Exclude Groups.

To add a new Participant, click on the blue plus icon in either of the respected groups
Once you click the icon, a new Add Group pop-up will appear.
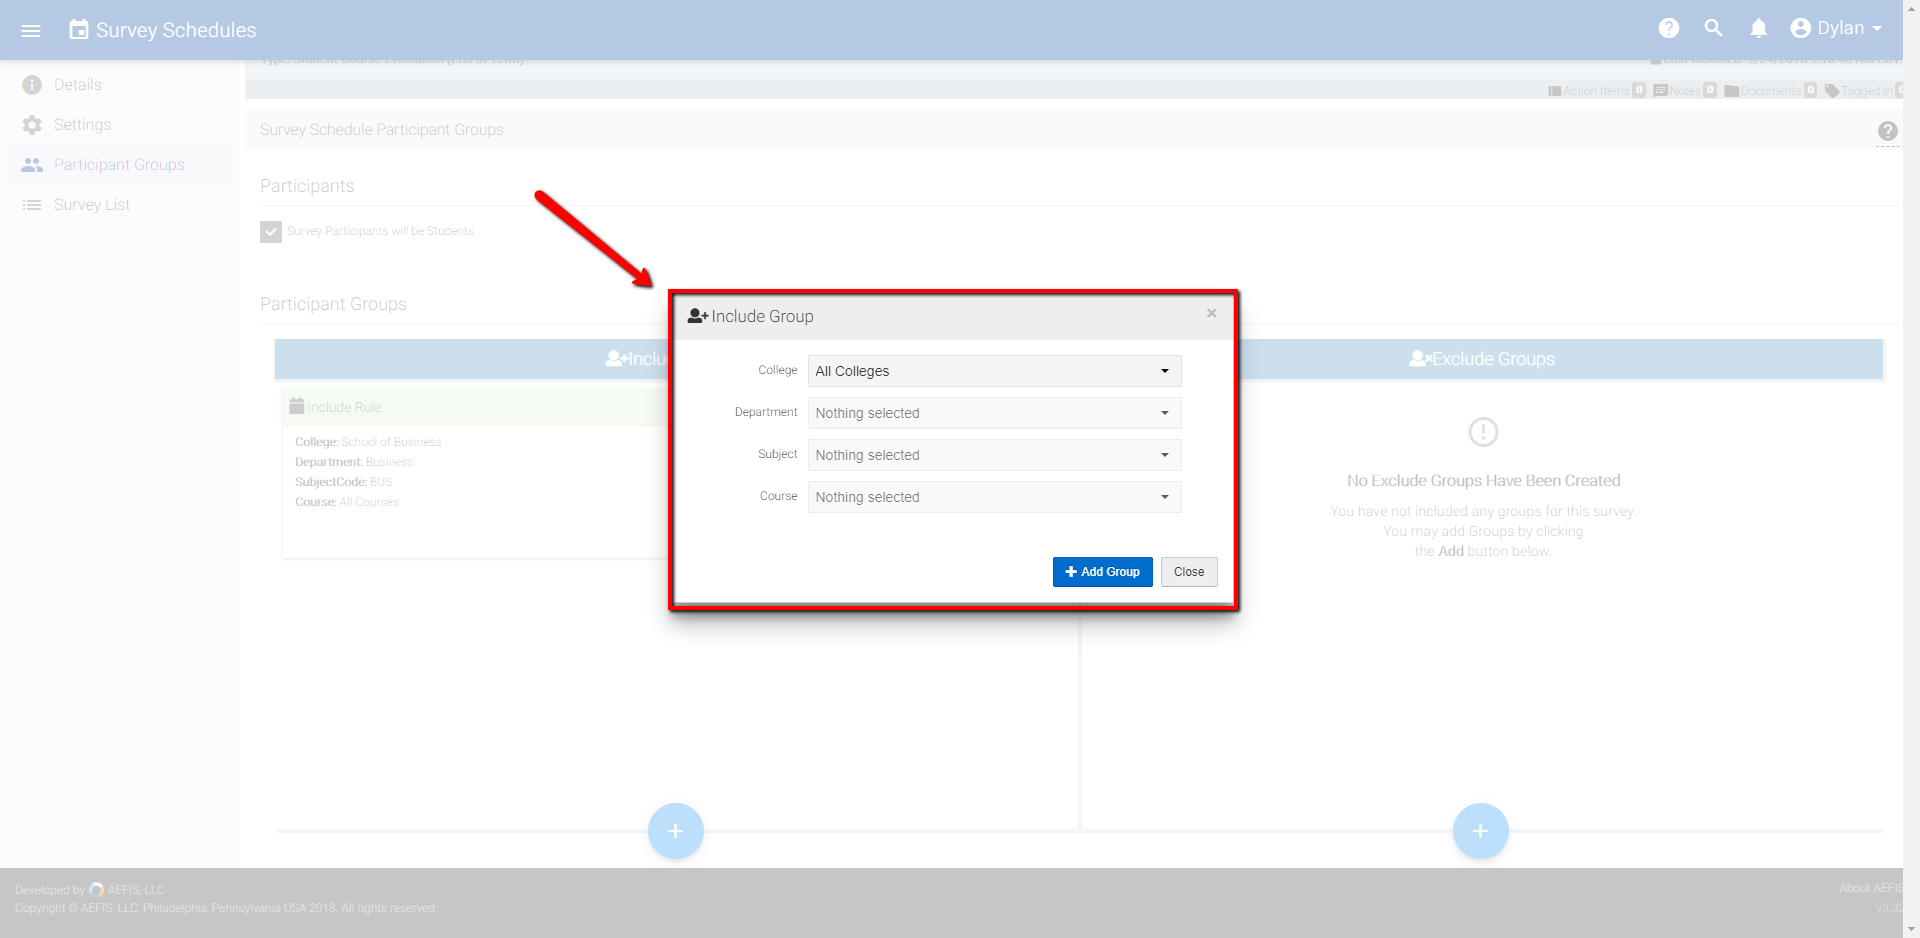
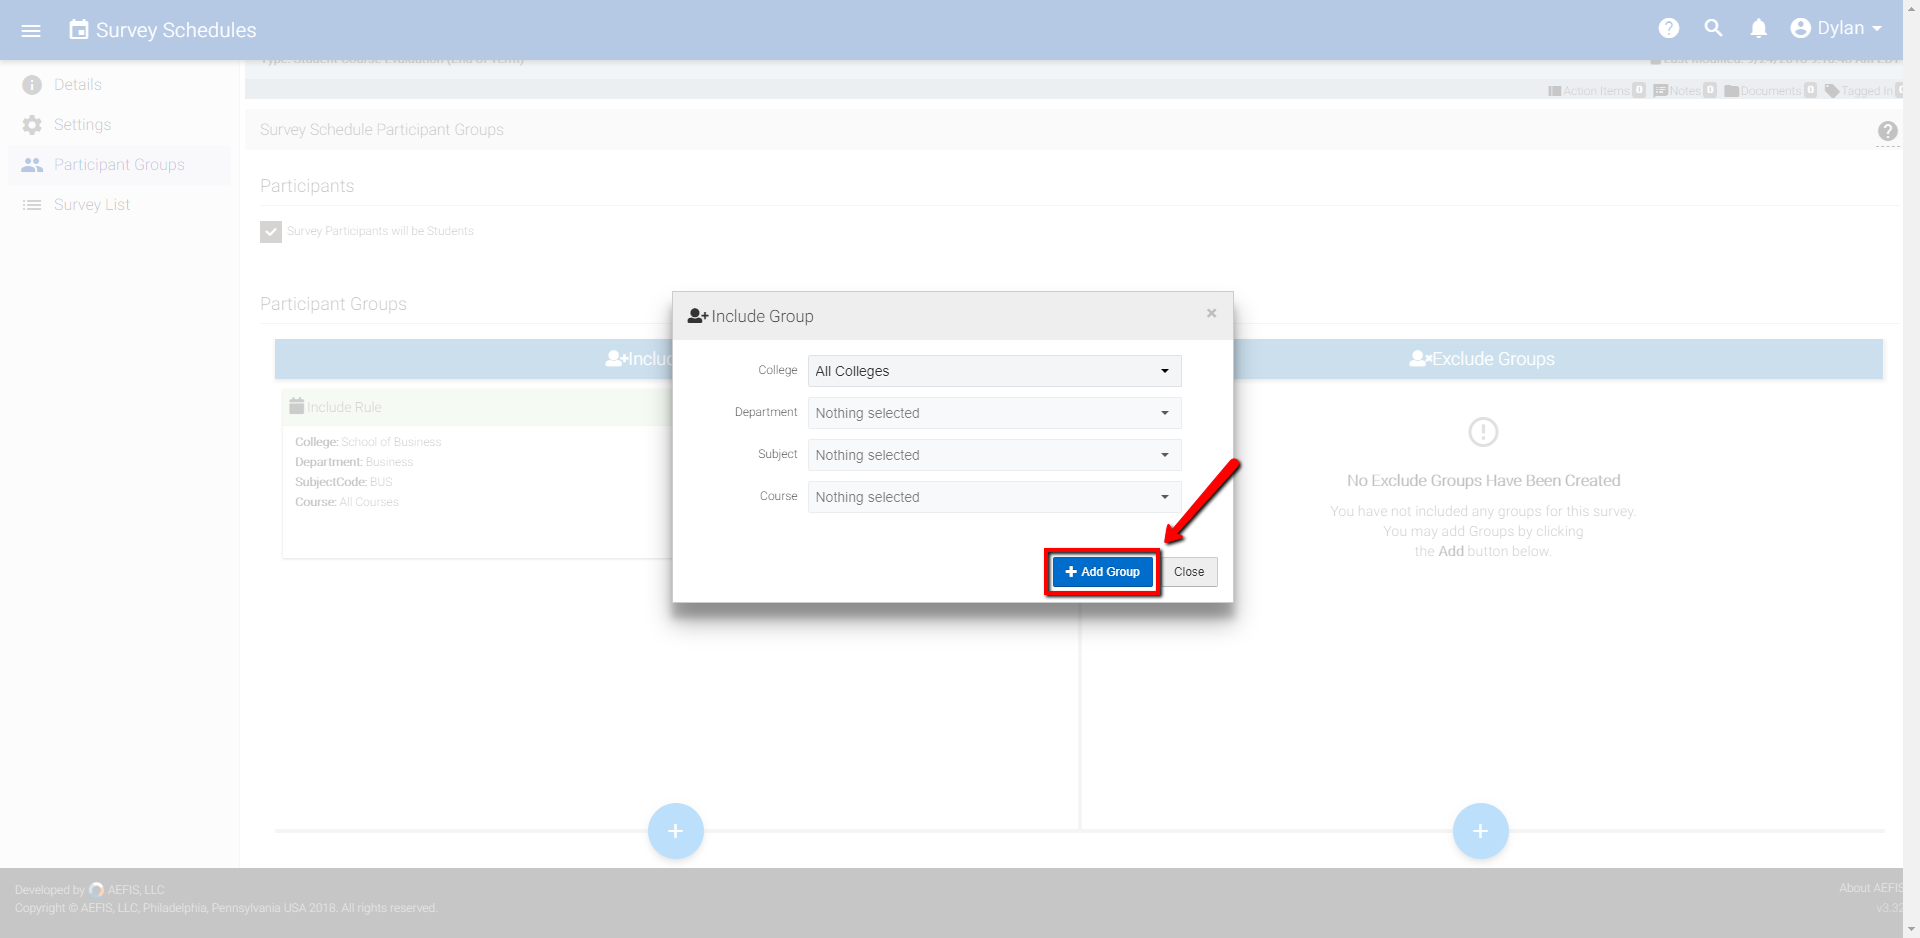
Fill out the required information from the drop-down list options. When you are ready to add the Participant Group, click the Add Group button in the bottom right corner of the pop-up.
11. Survey List
Under the Survey List panel, you can locate surveys that are linked to the Survey Schedule. Use the search bar to find your desired surveys.
12. Final Steps
When you are ready to go live with your Survey Schedule, locate the Publish icon in the top right corner of the screen.
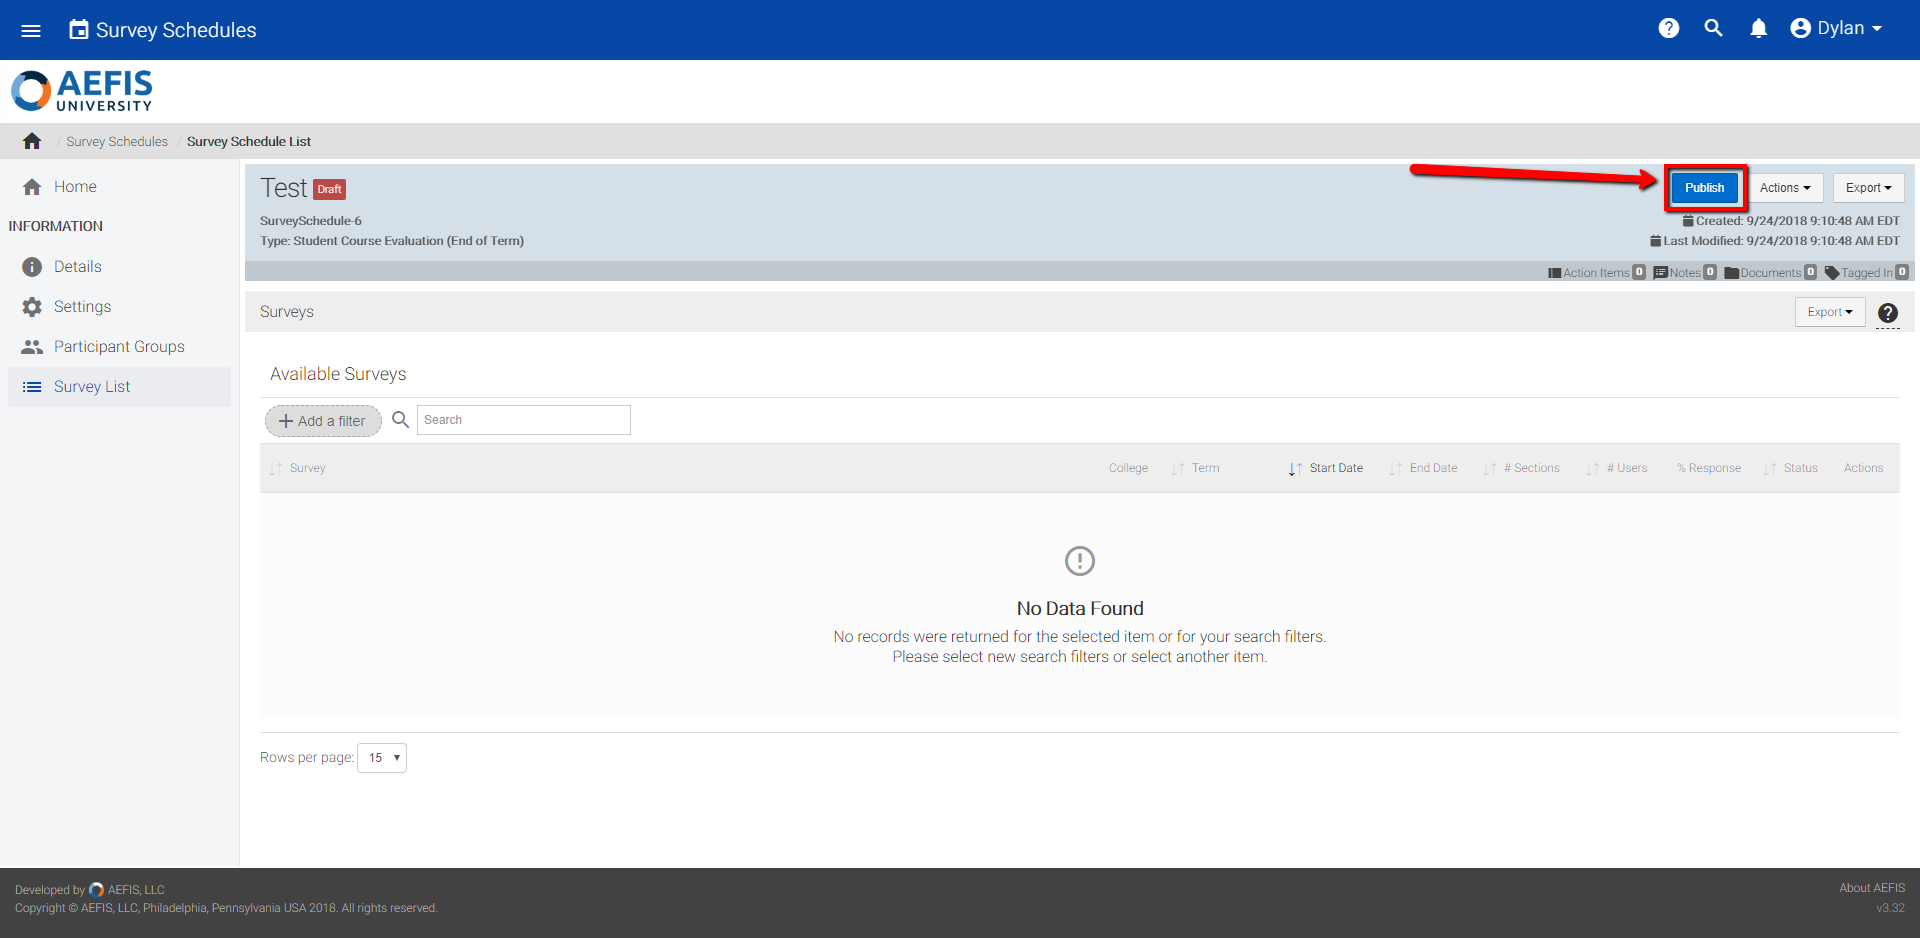
Once this icon is selected, a new pop-up window will appear asking you to confirm your choice to publish.
Recommended Materials/Tools
If you have any specific question about a particular setting, select the corresponding question mark on the AEFIS site.
Helpful Tips
If you have any more questions or concerns, don’t hesitate to contact the AEFIS Client Success Team.
