
How to Edit My Faculty Portfolio
This guide walks instructors through the process of adding their intellectual contributions, service and professional organizations to create their faculty portfolio.
Applicable to: Instructors
Step-by-Step…
Step 1: Log into your AEFIS Account
Step 2: Navigate to the Faculty Activity and CV widget on you dashboard (this might be towards the bottom of the page)

Step 3: Select the blue EDIT YOUR PORTFOLIO button
Step 4: You will automatically be directed to the Portfolio Form
Step 5: If your Portfolio is Published, revise the Portfolio Form by selecting the blue Revise button in the top right-hand corner. If the form is already in Draft, you can proceed.
Step 6: Select the Faculty Background tab in the panel on the left-hand side:
Step 7: Fill out the desired field(s):
- Discipline
- Name of Endowed Position
- Room Code
- Ethnicity
- Citizen
- Gender
- Date of Birth
- Phone 1 and/or Phone 2
- Fax
- Website
- Research Interests
- Notable Courses Taught
- Initial Appointment, Exam, and Obtain Tenure
- Tenure Decision, Attain Asst. Prof. and Attain Assoc. Prof.
- Attain Prof, Attain Professional, and Separation
Step 8: Once you have entered the desired information, select the blue SAVE button at the bottom
Step 9: Select the Intellectual Contributions tab in the panel on the left-hand side
Step 10: Select the blue + sign in the top left corner to Add an Intellectual Contribution
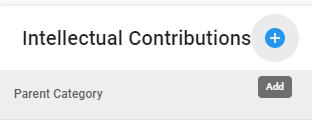
Step 11: A pop-out window will appear to fill out the required and optional fields:
- Please Select a Parent Category*
- Please Select a Category*
- Once you have populated the desired Parent Category and Category, you can then add the following information:
- Start Date, End Date
- Sponsor
- Funding Sector
- Level
- Location
- Number of Participants
- Organization
- Research Type
- Engaged Research
- Yes, No
- Title
- URL
- Abstract
- Amount
- Award Number
- Competitive
- Yes, Noe
- Any following HH Authors, Inventors, and Contributors

- Select the blue + ADD button to add HH Authors, Investors and Contributors
- If the person in question already has an account in AEFIS, simply type in their name
- A list of the first 10 related accounts will populate in a drop-down list
- If the person does not already have an account in AEFIS, select the + Add icon
- From there, you will enter the First Name and Last Name of the person in question
- If the person in question already has an account in AEFIS, simply type in their name
- Enter the desired Role for the person in question
- If you would like to add any new items or delete any items that you have populated, select the corresponding + ADD or the
 icon
icon
Step 12: Drag & Drop OR Browse for desired files to upload
Step 13: Once you have uploaded the desired documents, select the blue SAVE button in the top right hand corner.
Step 14: Select the Service Activities tab in the panel on the left-hand side
Step 15: Select the blue + sign in the top left corner

Step 16: A pop-out window will appear and fill out the necessary fields:
- Please Select a Parent Category*
- Description
- Organization
- Engaged Service
- URL (if applicable)
Step 17: Drag & Drop OR Browse for desired files to upload
Step 18: Once you have uploaded the desired documents, select the blue SAVE button in the top right-hand corner.
Step 19: Select the Professional Associations tab in the panel on the left-hand side
Step 20: Select the gray + sign in the top right corner
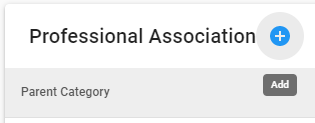
Step 21: A pop-out window will appear and fill out the necessary fields:
- Please Select a Parent Category
- Start Date
- End Date
- Description
- Location
Step 22: Drag & Drop OR Browse for desired files to upload
Step 23: Once you have uploaded the desired documents, select the blue Save button in the top right-hand corner.
Step 24: Select the Professional Credentials and Development tab in the panel on the left-hand side
Step 25: Select the blue + sign in the top left corner

Step 26: A pop-out window will appear and fill out the necessary fields:
- Please Select a Parent Category*
- Start Date
- End Date
- Description
- Organization
- Name
- Level
- Type
- Competitive
- URL
Step 27: Drag & Drop OR Browse for desired files to upload
Step 28: Once you have uploaded the desired documents, select the blue SAVE button in the top right-hand corner.
Step 29: Select the Teaching and Advising tab in the panel on the left-hand side
Step 30: Select the blue + sign in the top left corner
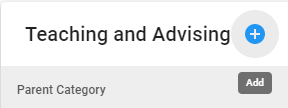
Step 31: A pop-out window will appear and fill out the necessary fields:
- Please Select a Parent Category*
- Engaged Teaching
- Yes, No
Step 32: Drag & Drop OR Browse for desired files to upload
Step 33: Once you have uploaded the desired documents, select the blue SAVE button in the top right-hand corner.
Step 34 (Optional): If you would like to view previous versions of your faculty portfolio, select the Previous Versions tab in the panel on the left-hand side
Step 35: Once you have made the necessary changes and edits, select the blue Publish button in the top right-hand corner

Step 36 (Optional): If you would like to Revise your Faculty Portfolio, return back to the Home Page and select the blue Revise button in the top right-hand corner

Helpful Tips
If you have any questions or concerns, please do not hesitate to contact the AEFIS Client Success Team.
