
How to Create Internal and External User Groups
User Groups are a collective group of people – who work internally and externally with your university. As an admin, you are able to assess different groups of users by creating user groups within in AEFIS. This guide explores the steps that one will take to create these types of groups for the purpose of conducting:
- Senior Exit Surveys
- General Course Evaluation(s)
Created with v3.53
Applicable to: Institutional Admin, College Admin, Department Admin
Quick Video…
Step-by-Step…
Step 1: Log into your AEFIS account
Step 2: Select the three white horizontal lines in the top left hand corner to open the AEFIS Main Menu
Step 3: Navigate to Tools > User Groups
Step 4: Select the blue + ADD USER GROUP button on the top right
Step 5: Populate New User Group name and description

Step 6: Select the blue SAVE button once completed
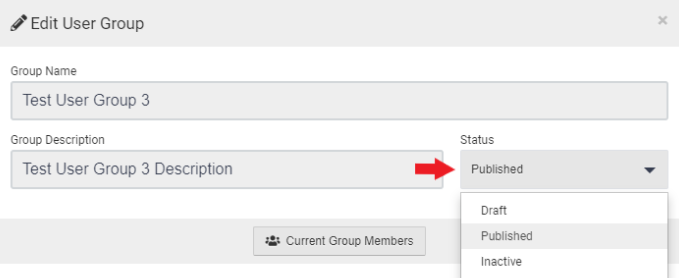
Step 7: Edit User Group box will display, populate the desired information

Step 8: Select the blue SAVE button
Step 9: Select the Edit button to the right of the desired User Group
Step 10: Select a method of adding user groups. There are two methods to populate a user group with either internal or external users.
If the + Add Group Members tab is selected (internal users):
a) Use either the +Add a Filter or the search bar to find applicable group members that already have an existing account in AEFIS.
b) Once desired members are located, click on the check box as seen below
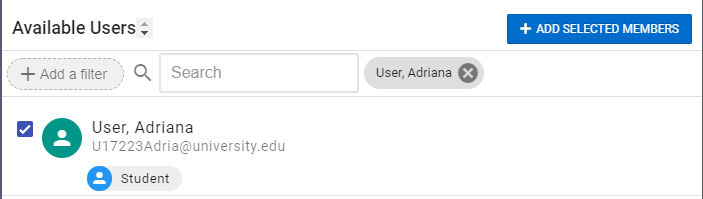
c) Select the blue + ADD SELECTED MEMBERS button
d) Select the blue ADD button to add selected users
e) Select the blue SAVE button
- Important Note: if you do not plan to add any further user group members, change the status of the user group to Published before selecting the SAVE button. However, if you would like to add more user group members at a later time, leave the status as Draft.
If the Upload Group Members tab is selected (external users):
a) Instructions will display, including the AEFIS Group Import Excel template to download
b) Download the provided template and populate the required information as stated in the instructions
- Email address
- Last Name
c) Upload the template and select the blue SAVE button on the bottom right
- Important Note: if you do not plan to add any further user group members, change the status of the user group to Published before selecting the SAVE button. However, if you would like to add more user group members at a later time, leave the status as Draft.

Helpful Tips
To delete a user group, you have to first change the status of the user group to Draft, then the trash icon will populate under the Edit button to the right of the user group.
If you have any more questions or concerns, please do not hesitate to contact the AEFIS Client Success Team
