
How To Create an Administrative Unit
User Roles: Institutional Admin
Outcome: The user creates an Administrative Unit, which is equal to the College level in the AEFIS hierarchy.
Description: Because the data files imported into AEFIS may only represent the Academic hierarchy as they relate to courses, AEFIS offers the option for Admins to create their administrative hierarchy for collection of co-curricular data across Units and Departments such as Career Services, Student Affairs, Student Life or Financial Aid. A structure of Administrative Unit (College)>Administrative Division (Department)>Program or Co-Curricular Activity(Course) can be built. This structure can be utilized in any of the AEFIS solutions, such as Curriculum Mapping + Outcomes Alignment or Course Evaluation + Feedback. This is also commonly used for the Strategic Planning + Data Collection solutions
Step-by-Step…
1: Log into your AEFIS account
2: Open the AEFIS Main Menu by selecting the three white horizontal lines in the top left-hand corner
3: Navigate to Organizational Hierarchy>Administrative Units
4: At the top right of the screen click the

5: Enter a Code (any code you would like – alphanumeric)**Note this can be edited after the creation of the Administrative Unit
6: Enter a Name (any name you would like – alphanumeric)**Note this can be edited after the creation of the Administrative Unit
7: Enter a Description
8: Select your Institution as the owner – there should only be one Institution
9. Click Save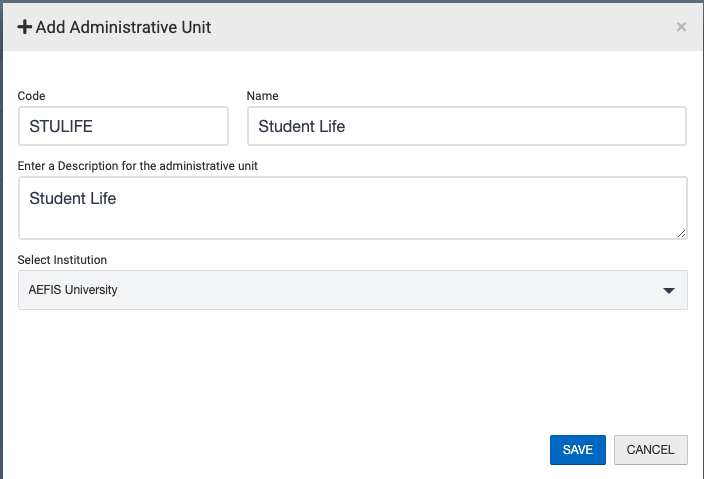
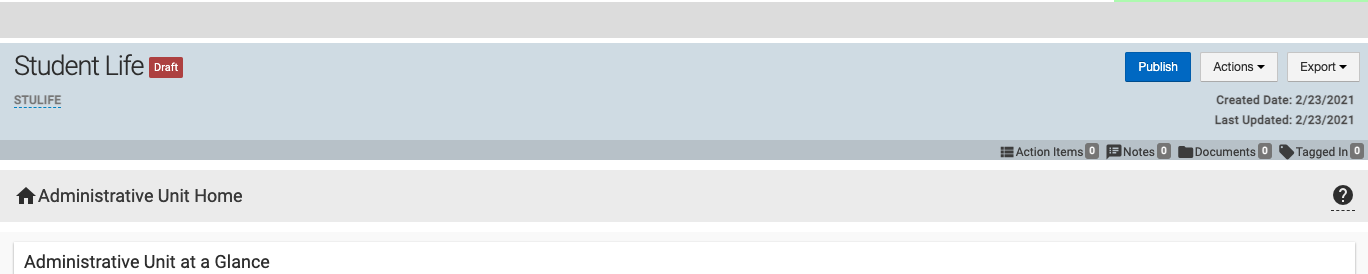
10: Your new Administrative Unit will then appear on the screen in DRAFT status. While in DRAFT status you may change any of the details entered when following the creation wizard in the details screen. You will note that the Administrative Unit has the same settings as the Institution and College. These settings can be changed after Publishing.
11: If you are happy with the name and code selected, you may click the blue Publish button at the top right of the screen
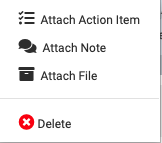
If you created this Administrative Unit in error or would like to delete it before publishing, you may select the Actions button to the right of the blue Publish and click the red Delete option:
What’s next?
Let’s create an Administrative Division (Department)!
