
How to Add User Accounts and Edit User Roles in AEFIS
Applicable to: Institutional Admin
Step-by-Step… How to Add User Accounts in AEFIS
Step 1: Log into your AEFIS account
Step 2: Select the three white horizontal lines in the top left corner to open the AEFIS Main Menu
Step 3: Navigate to Admin Tools>User Accounts
Step 4: Select the blue +ADD USER tab in top right corner
Step 5: A new pop-up window will appear, and fill out the following tabs and corresponding fields
- User Type
- First, choose a user type
- Local User
- University User
- New User by Email
- First, choose a user type
- User Information
- Local User – fill out the following information
- User Email Address
- First Name
- Last Name
- University ID
- User Name
- Password (Re-enter Password)
- University User – fill out the following information
- User Email Address
- First Name
- Last Name
- University ID
- User Name
- New User by Email – fill out the following information
- User Email Address
- Local User – fill out the following information
- User Roles
- Select the Roles drop down and select the desired roles to add to the user account
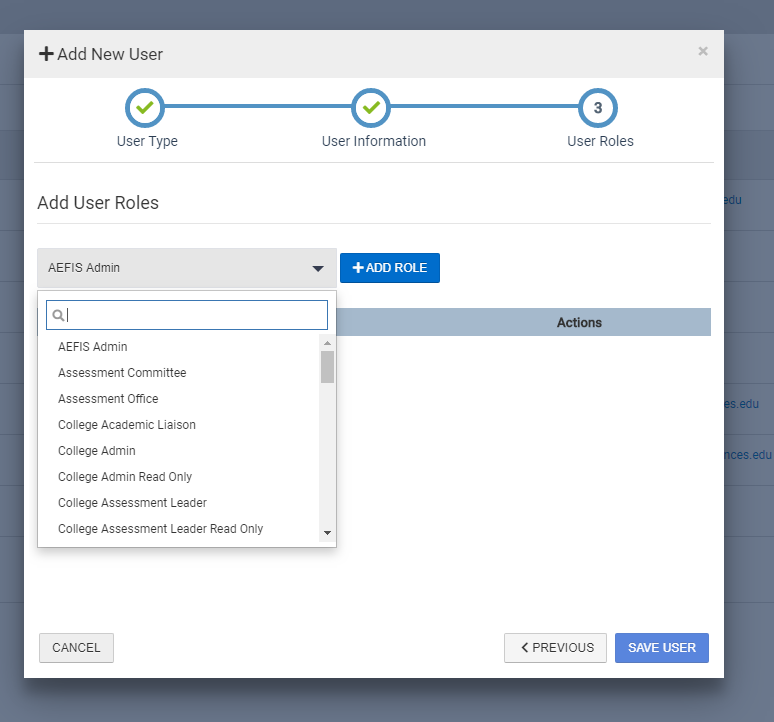
- Select the blue +ADD ROLE button to add the desired roles
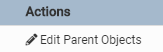
- In the corresponding row of the newly added role, select Edit Parent Objects (pencil icon)
- Select the desired Parent Object(s)
- Select the right-directional arrow to assign the Parent Object

Step 6: Once you’ve made the desired inputs, select the blue OK button
Step 7: Select the blue Save User tab
Step-by-Step… How to Edit Roles for Users in AEFIS
Step 1: From the User Accounts Manager page, use the +Add Filter option or the search bar to locate the desired user

Step 2: Select the Manage button in the corresponding row of the desired user
Step 3: Select the Roles tab in the panel on the left-hand side
Step 4: Select the Roles drop-down

Step 5: Select the desired role
Step 6: Select the blue Add Role button
Step 7: Select the + Edit Parent Objects for the corresponding new role
Step 8: Select the desired Parent Object(s)
Step 9: Select the right-directional arrow to assign the Parent Object
Step 10: Once you’ve made the desired inputs, select the blue OK button
Step 11: Select the blue Save button
How to Use the User Audit Report (Export)
Step 1: From the User Accounts Manager page, use the +Add Filter option (optional) to filter a specific role group – pull user information just for institutional admin, students, college admin, etc
Step 2: Select the Export Options icon in the top right corner

Step 3: Select the desired format, into which you would like export the report
Step 4: Once the report has finished exporting, the file will automatically download to your device
Helpful Tips
If you have any further questions or concerns, do not hesitate to contact the AEFIS Client Success Team.
